Open the Account menu
Click your avatar in the top-right corner to open the menu.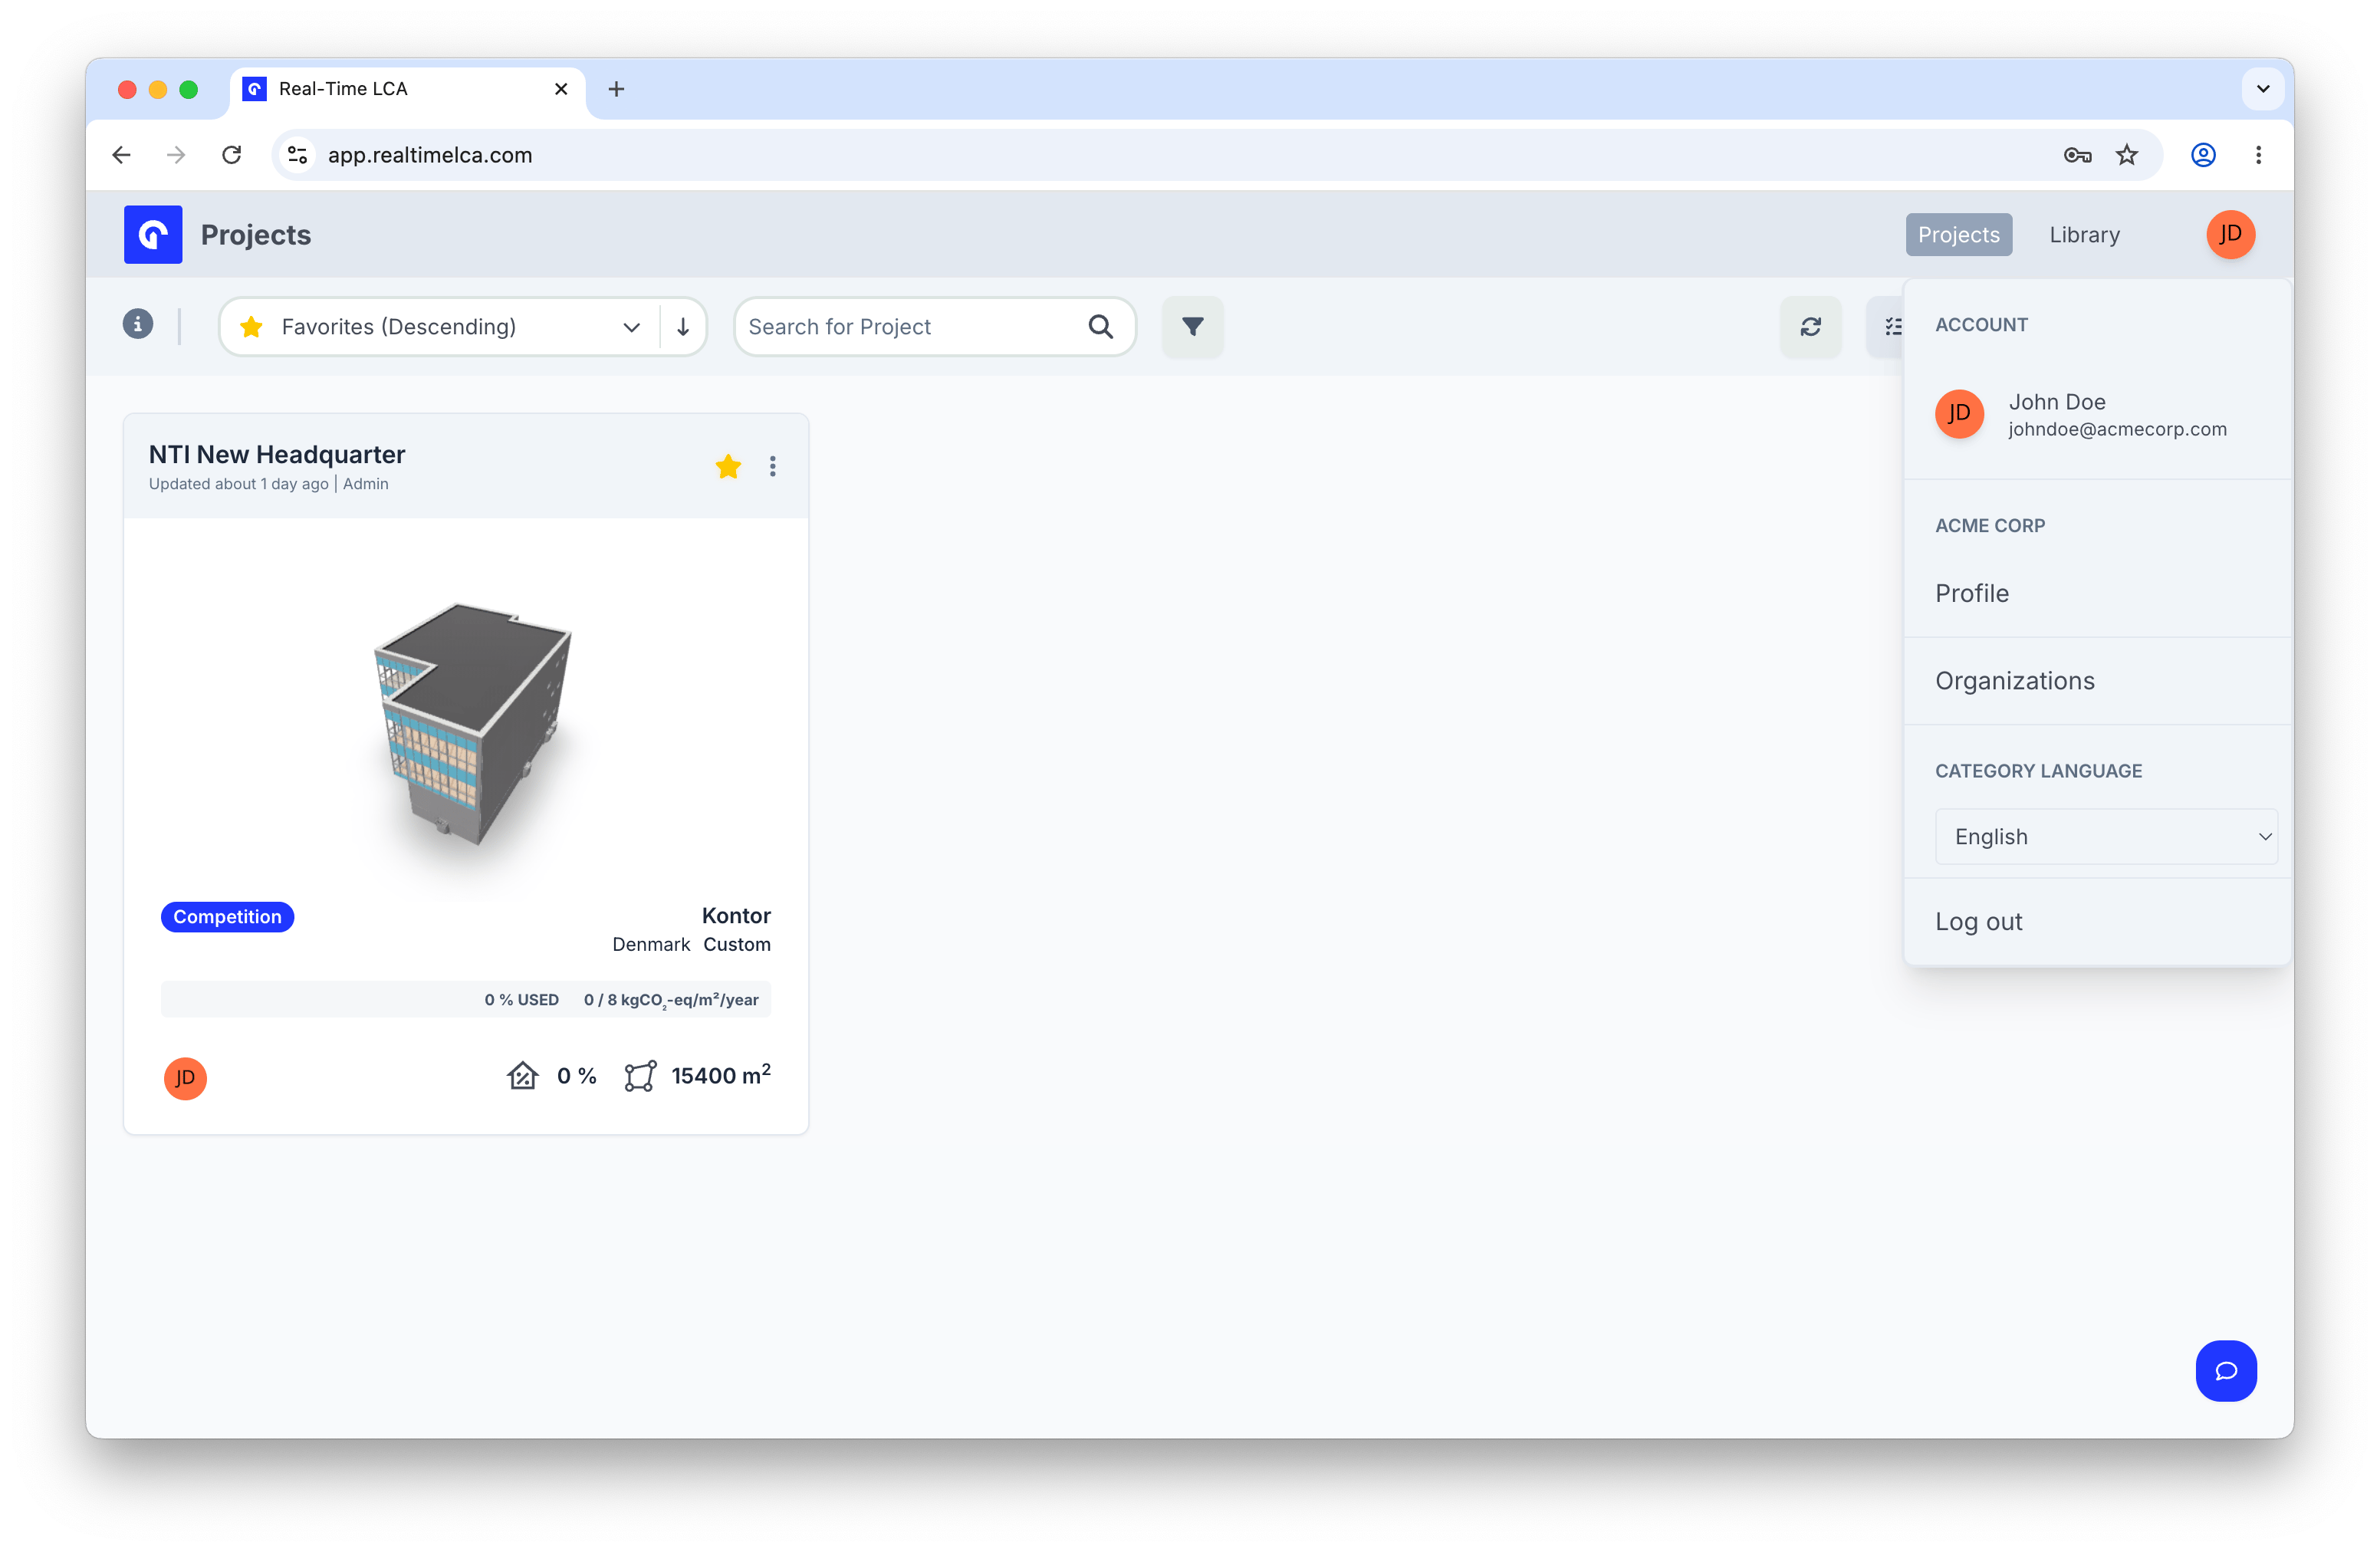
- ACCOUNT — your signed-in user.
- Organization — quick links to Profile and Organizations for the current workspace.
- CATEGORY LANGUAGE — the language used for material categories and other content.
- Log out — end your session.
Profile
Choose Profile to open your personal account settings. The Profile page is split into the My Account and Workspace sections in the left sidebar.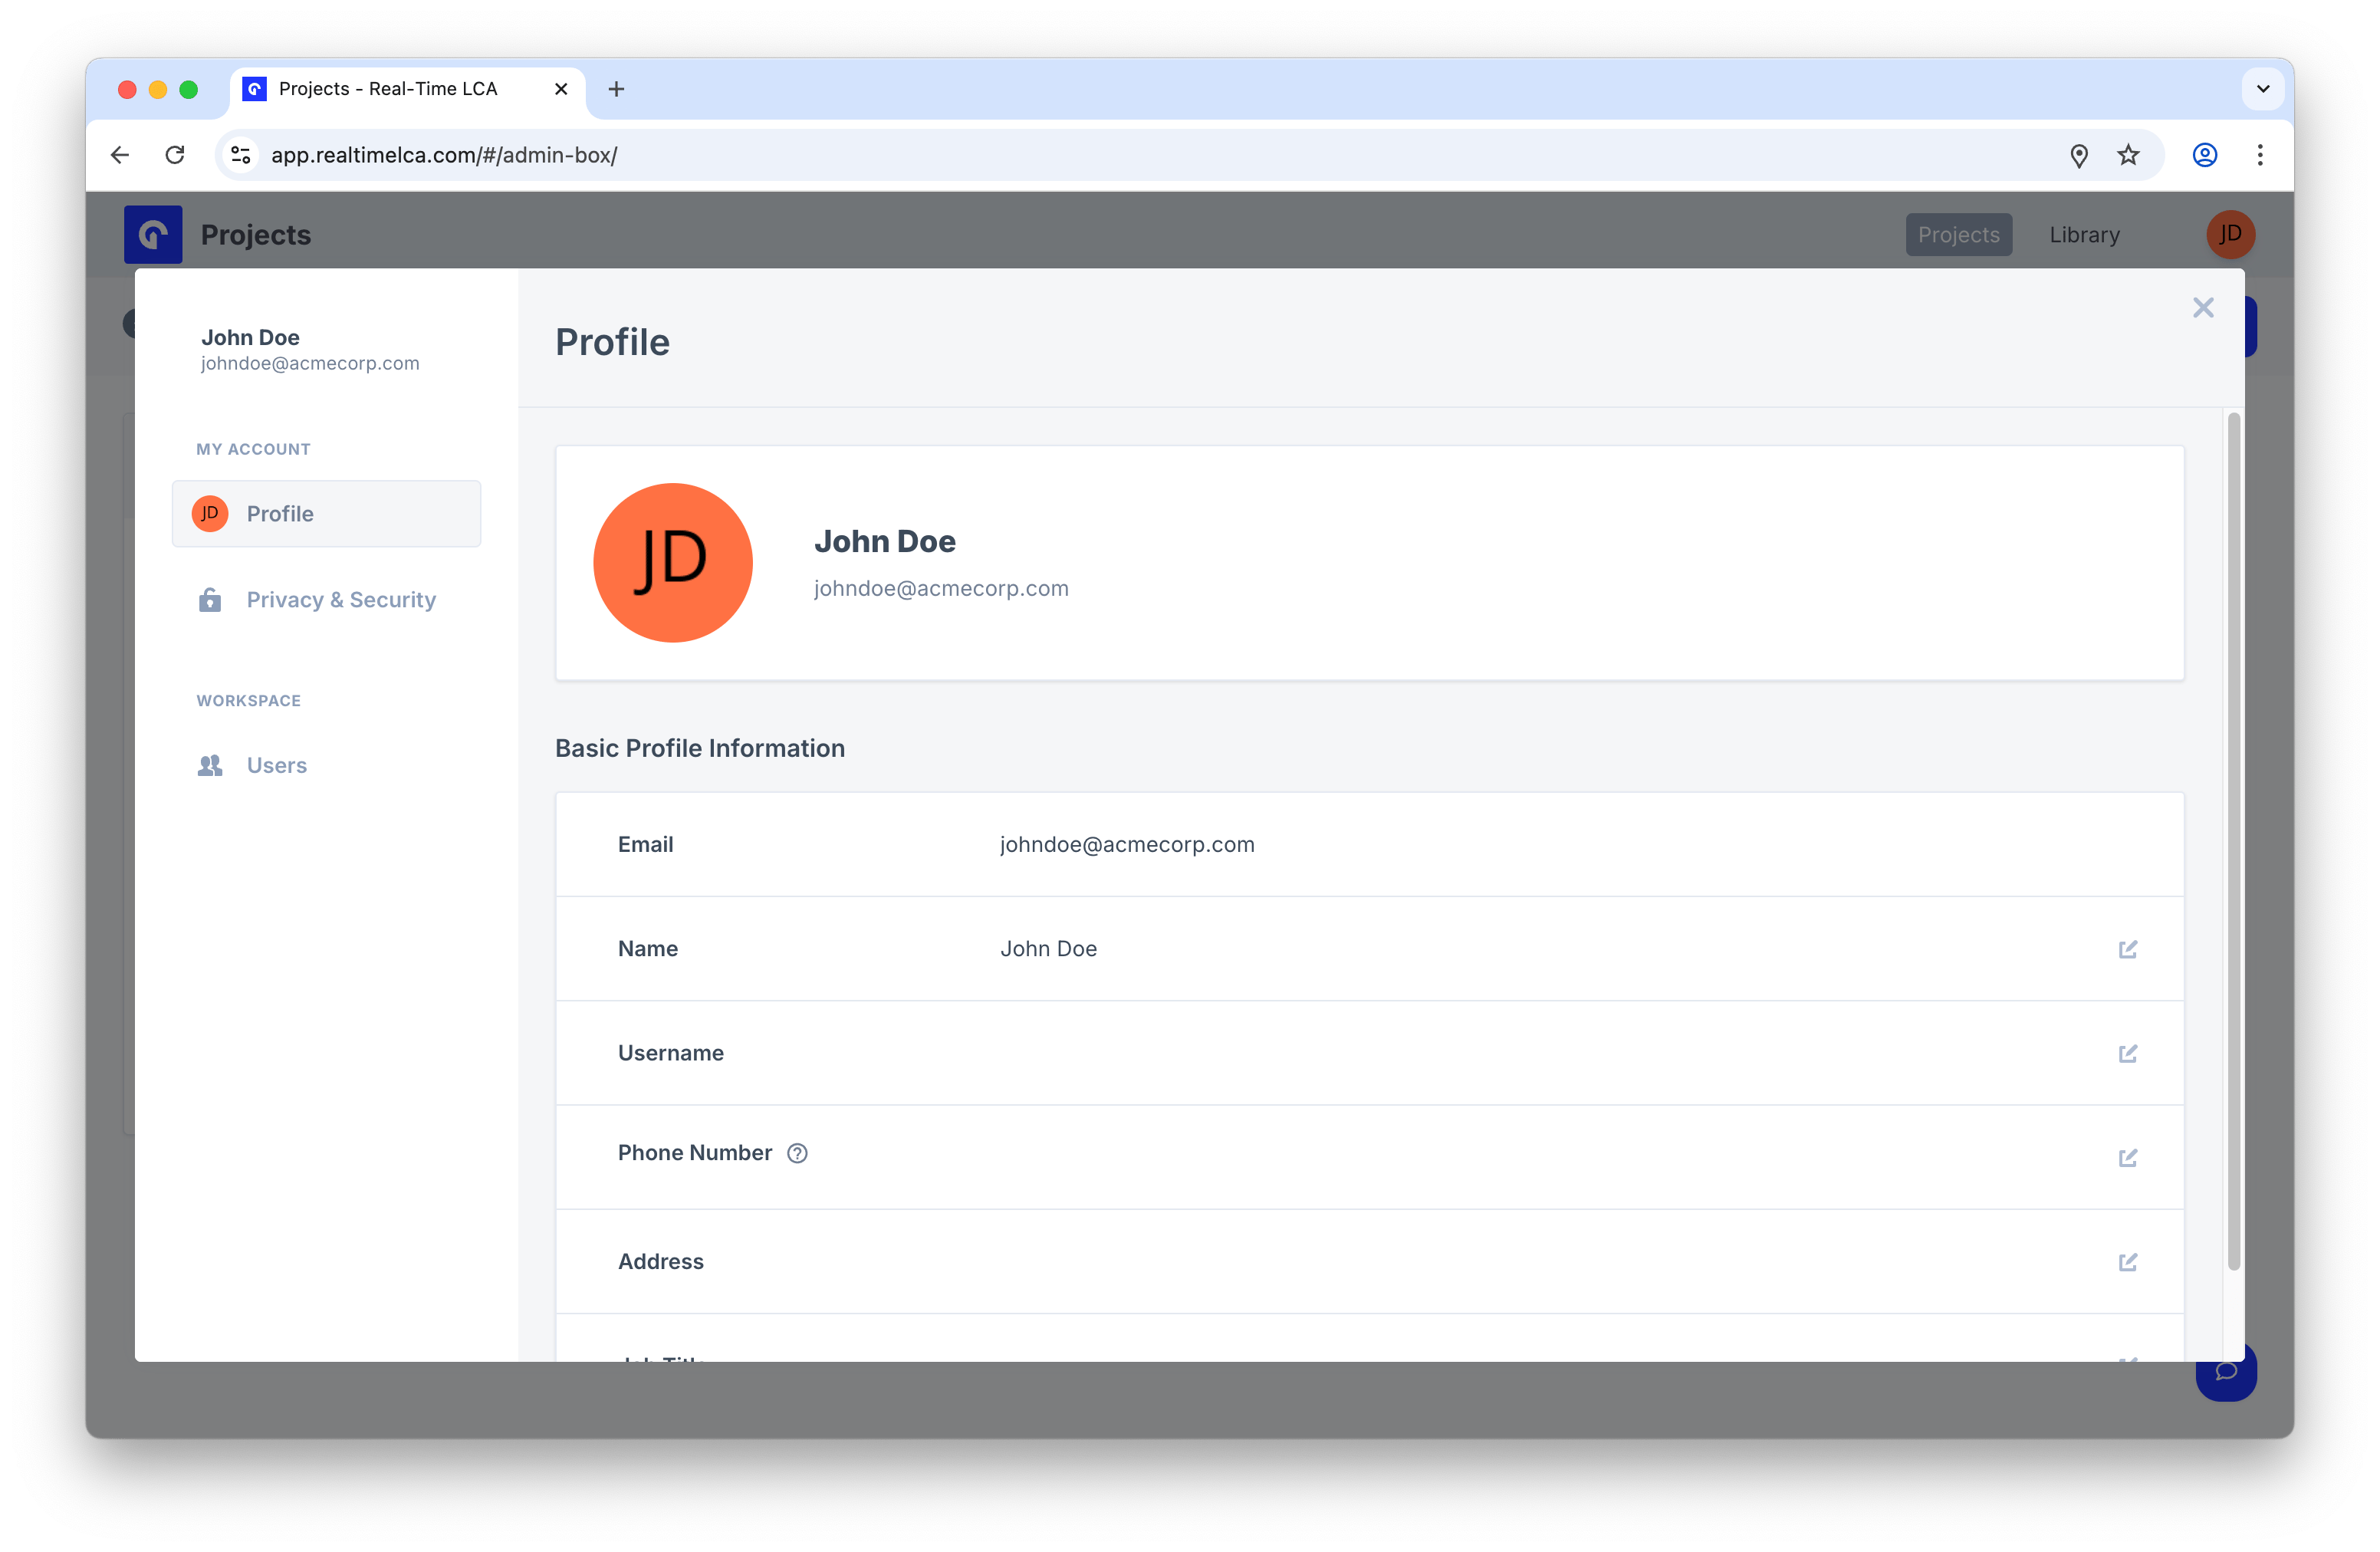
- Email — the email used to sign in.
- Name — your display name.
- Username — optional handle.
- Phone Number — used for account recovery and notifications.
- Address — your work address.
- Job Title — your role at the organization.
Privacy & Security
Open Privacy & Security in the left sidebar to manage how you authenticate.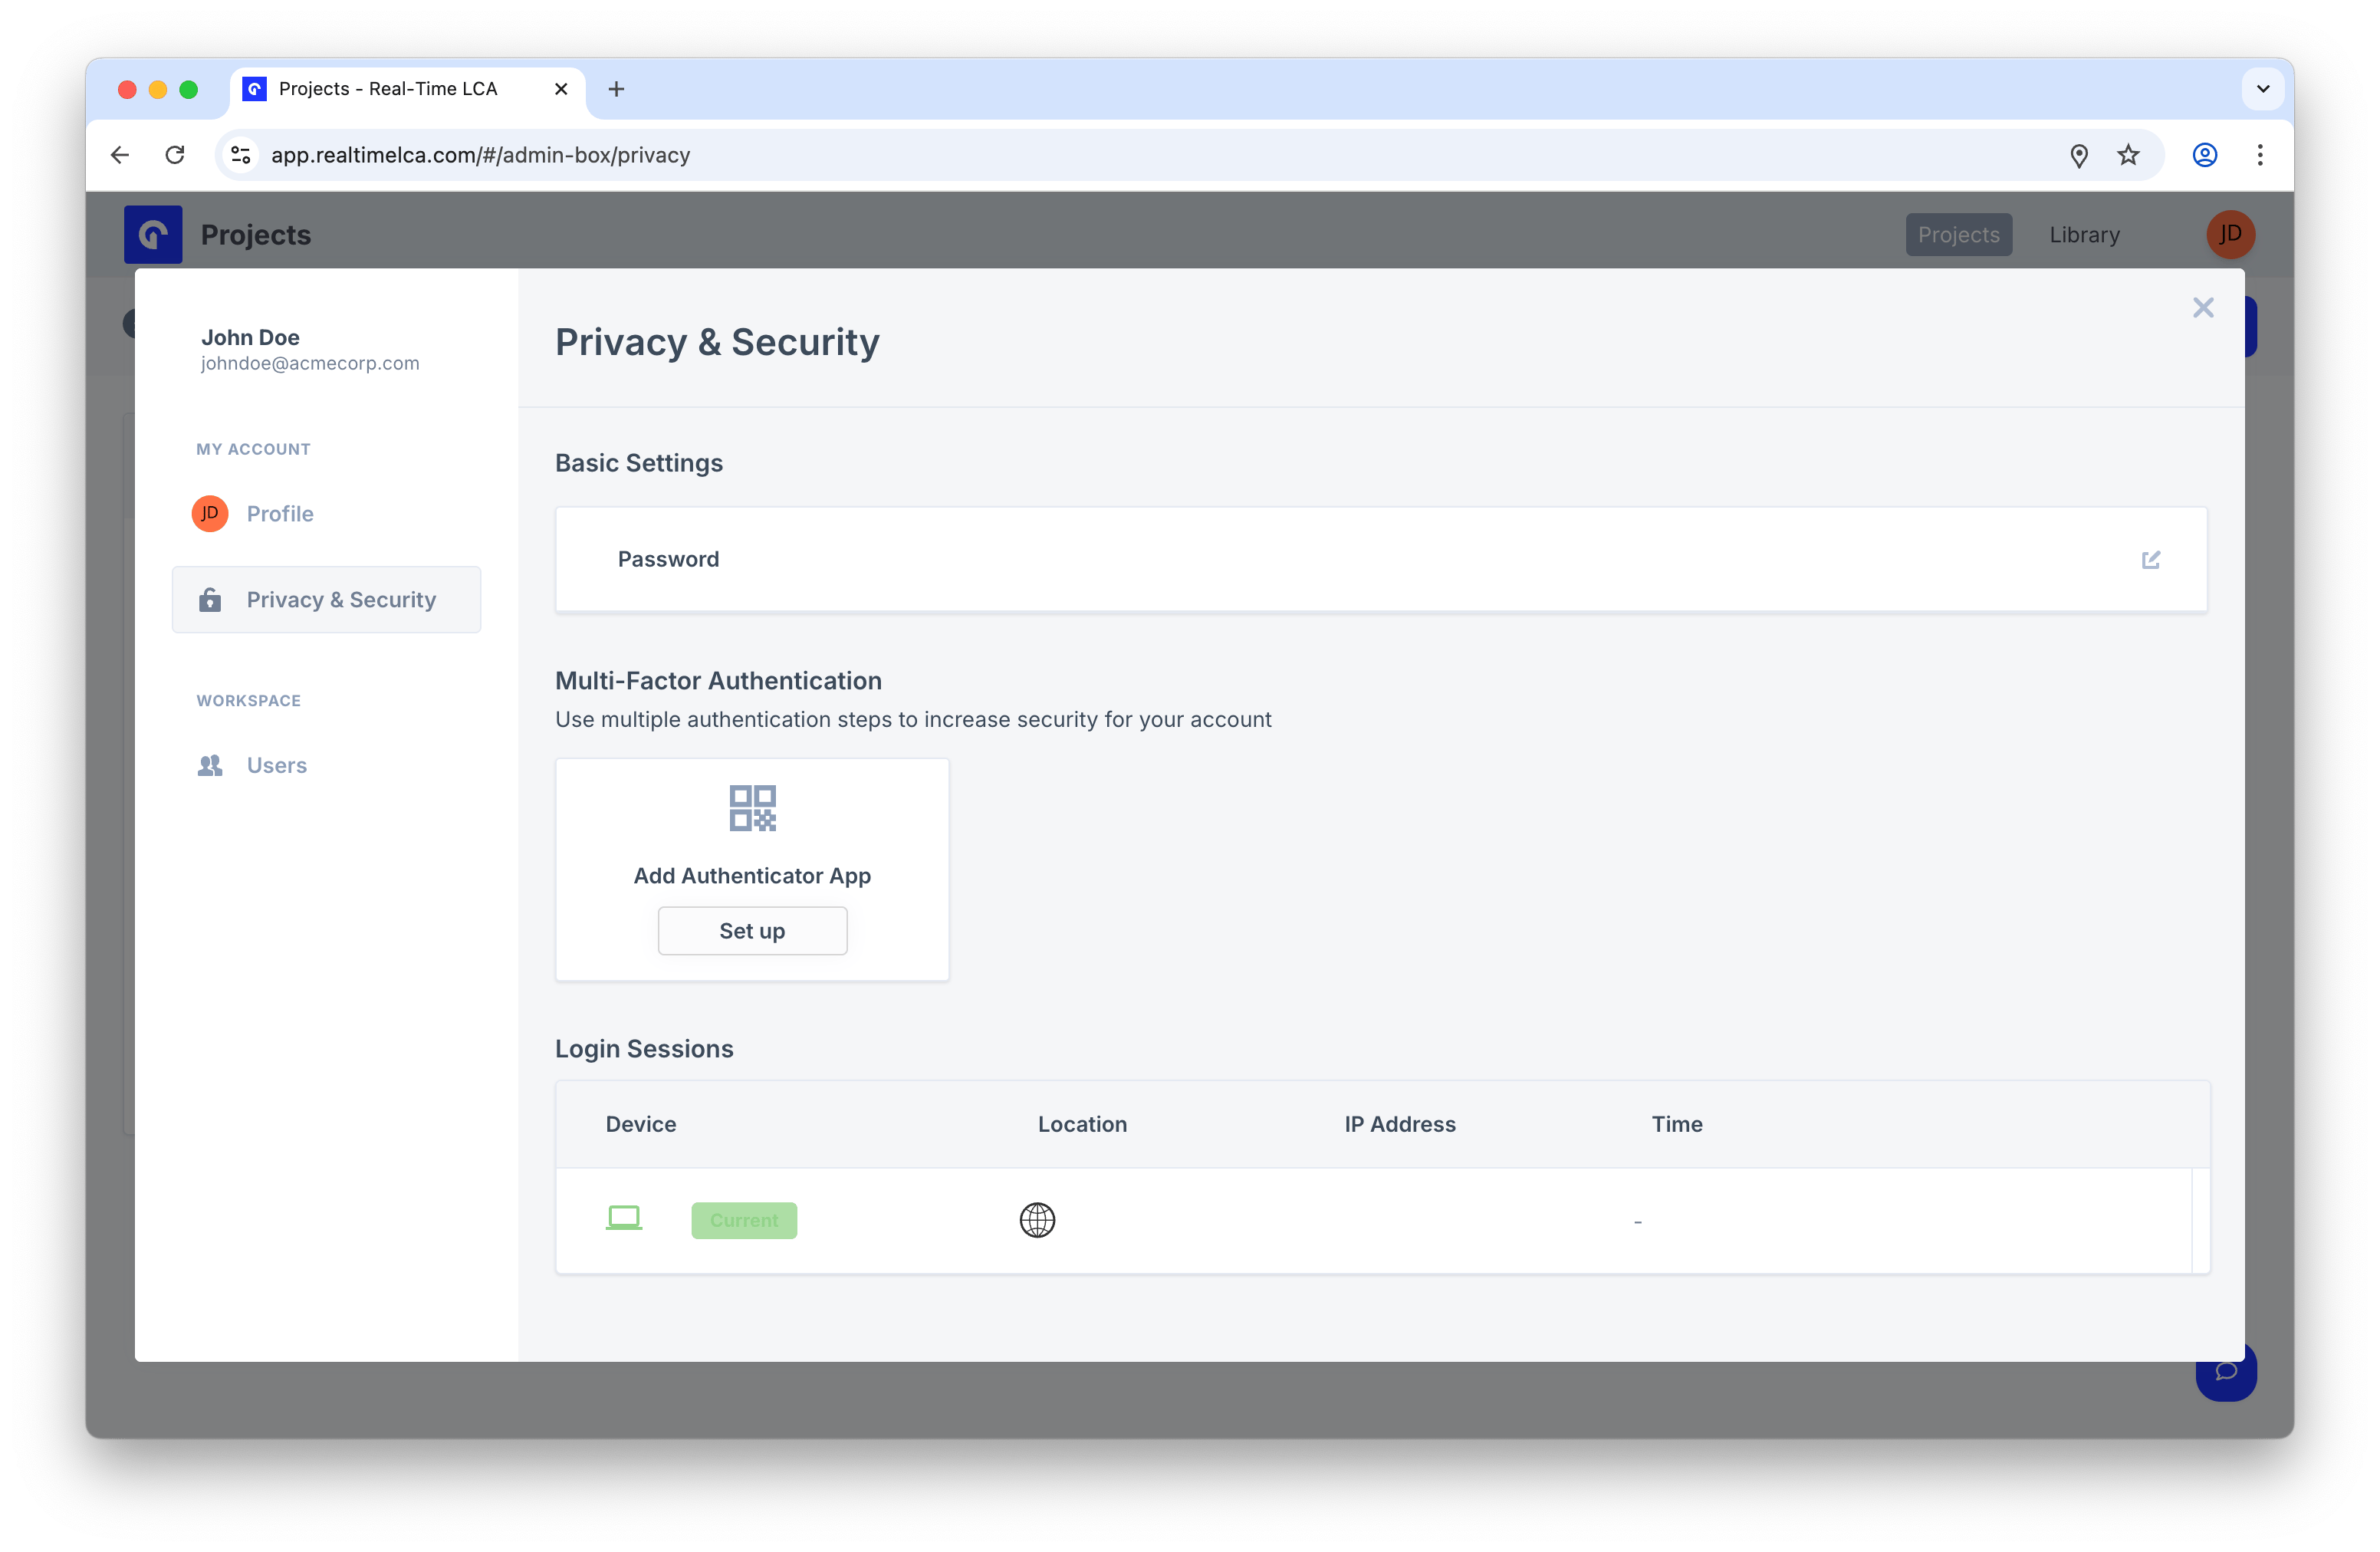
Change your password
Change your password
Under Basic Settings, click Password to set a new password. The same rules as the activation form apply.
Add multi-factor authentication
Add multi-factor authentication
Under Multi-Factor Authentication, click Set up under Add Authenticator App and follow the prompts in your authenticator (for example, 1Password, Authy, Google Authenticator). After MFA is on, you will be asked for a code every time you sign in.
Review active sessions
Review active sessions
The Login Sessions table lists every device that is currently signed in to your account, along with its location, IP address, and last activity time. If you see something you do not recognize, change your password and contact support@realtimelca.com.
Organizations
Click Organizations in the Account menu to see which organizations your user belongs to and to switch between them.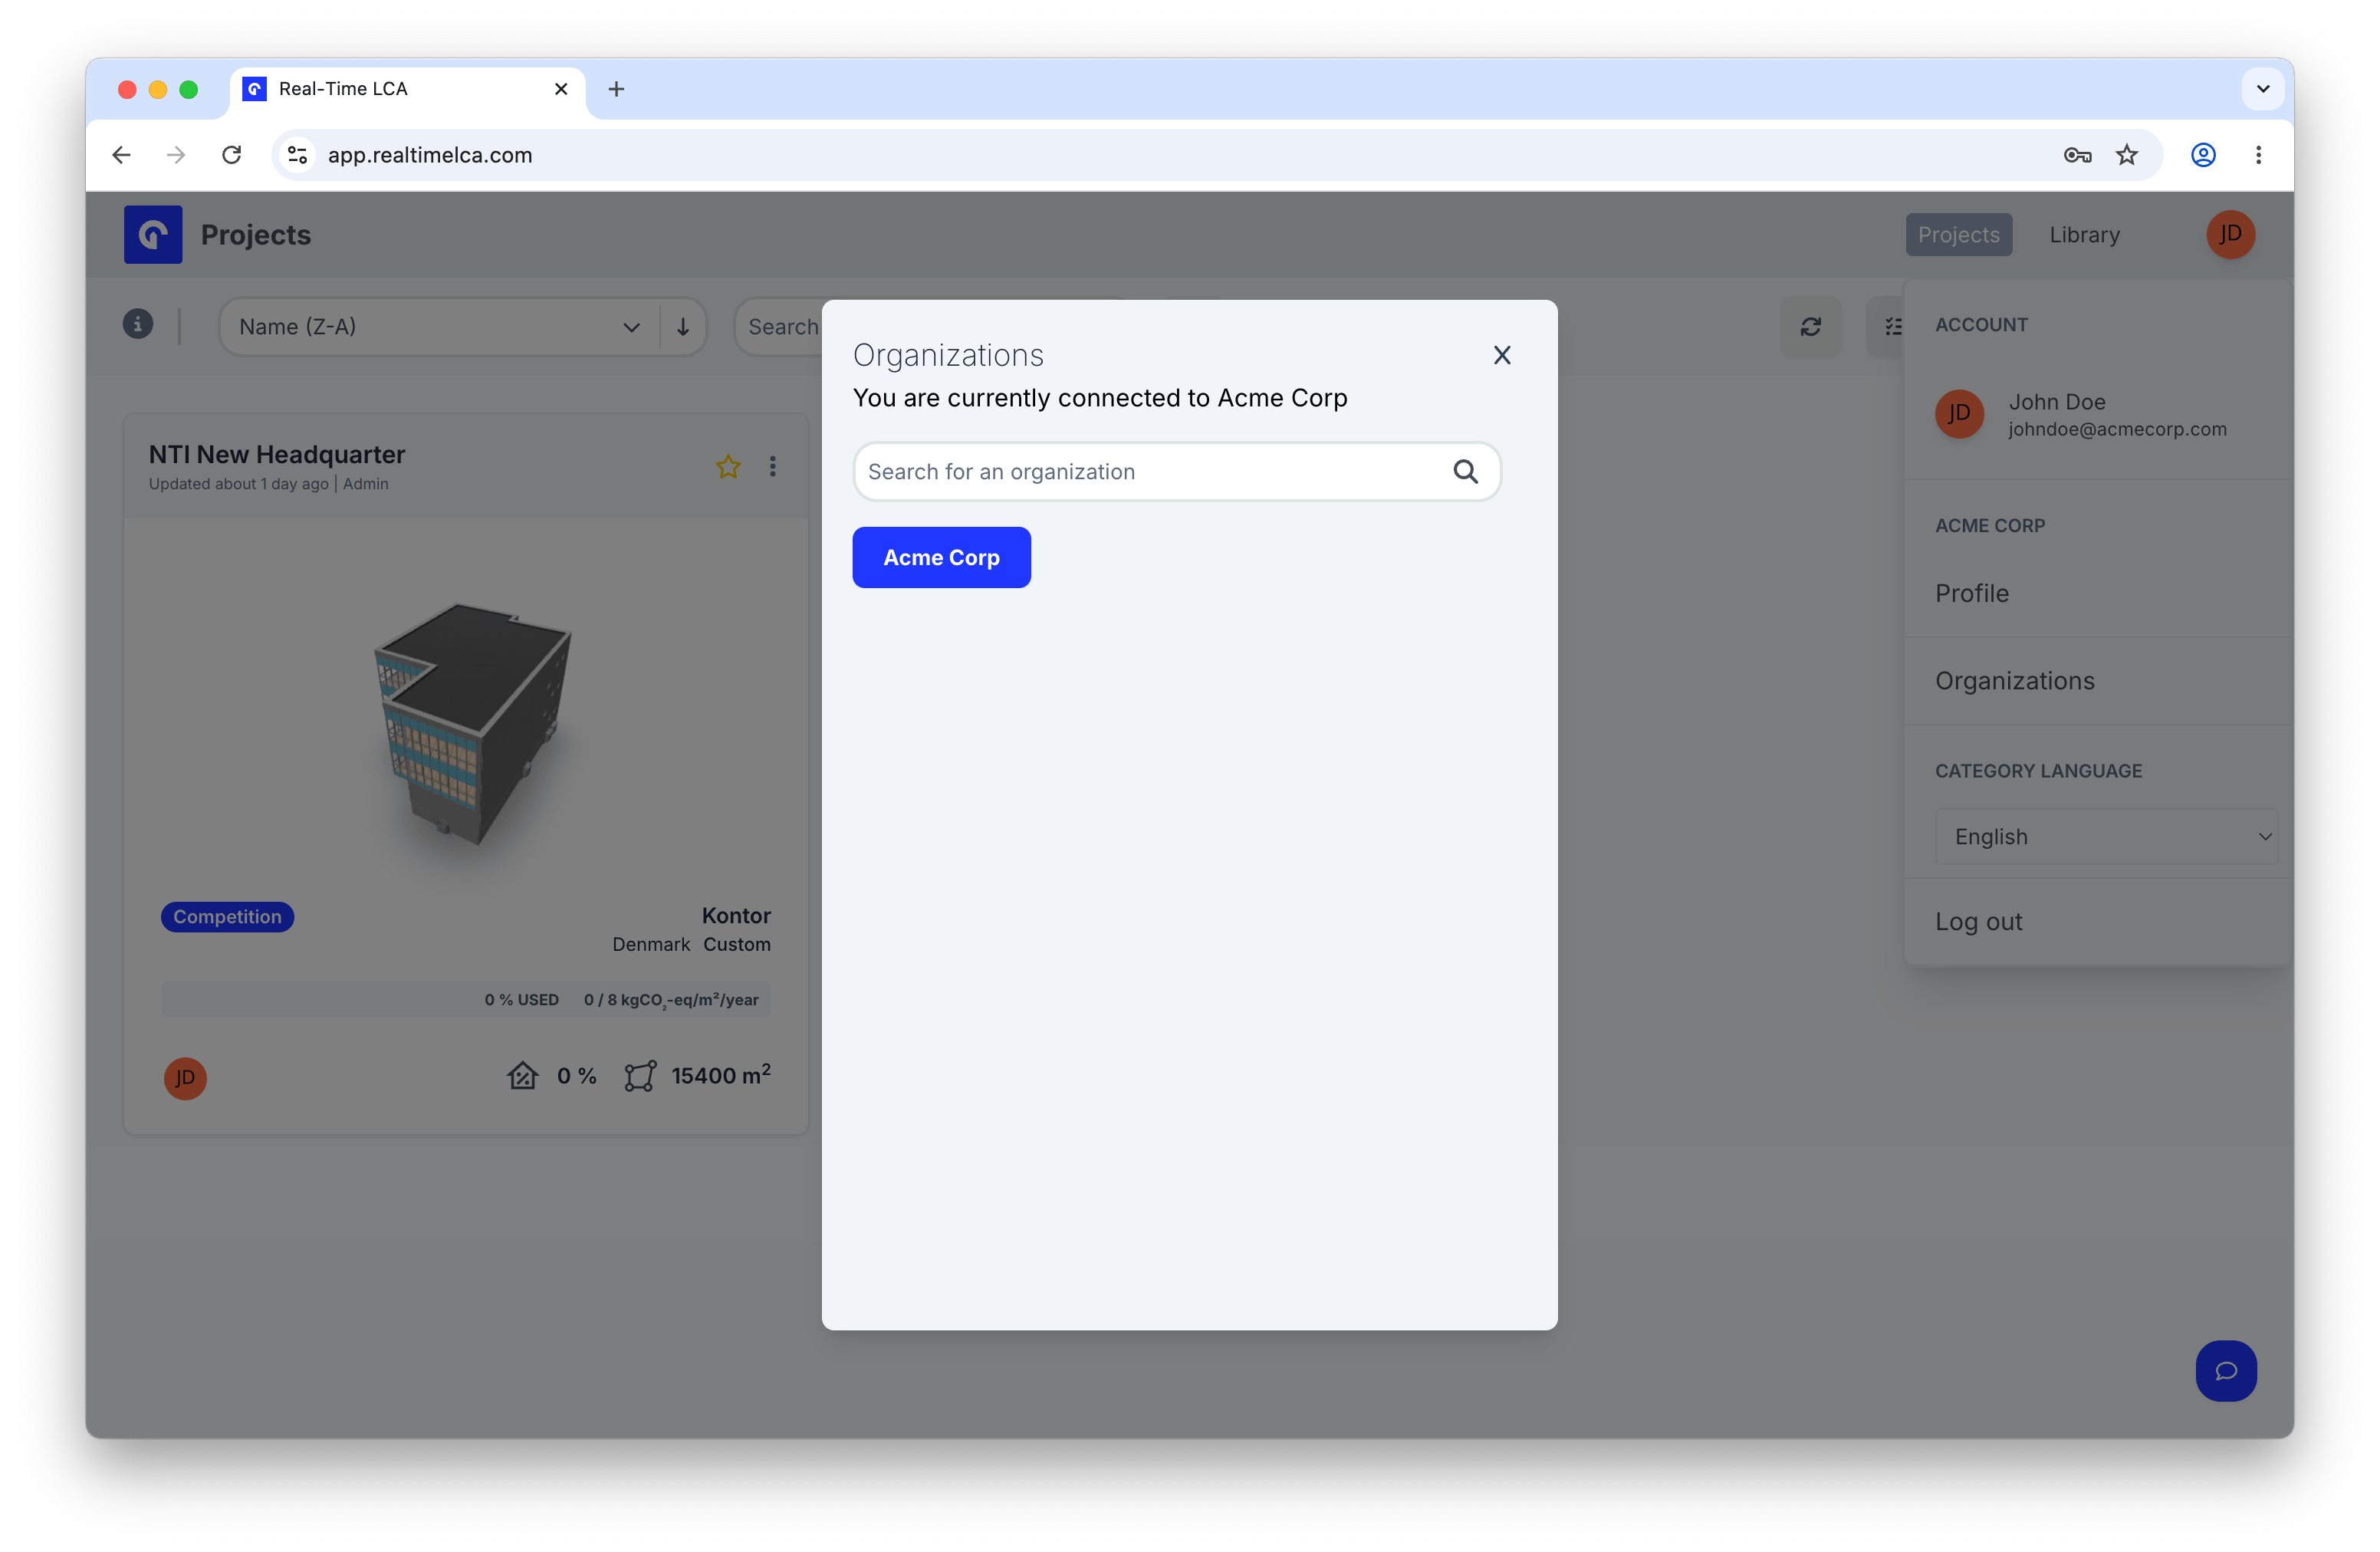
- The text under Organizations tells you which organization you are currently connected to.
- Click an organization’s button to switch into its workspace — projects, users, and library all change to that organization.
- Use Search for an organization if you belong to many.
Category Language
Under CATEGORY LANGUAGE in the Account menu, pick the language used for material categories and other content fields.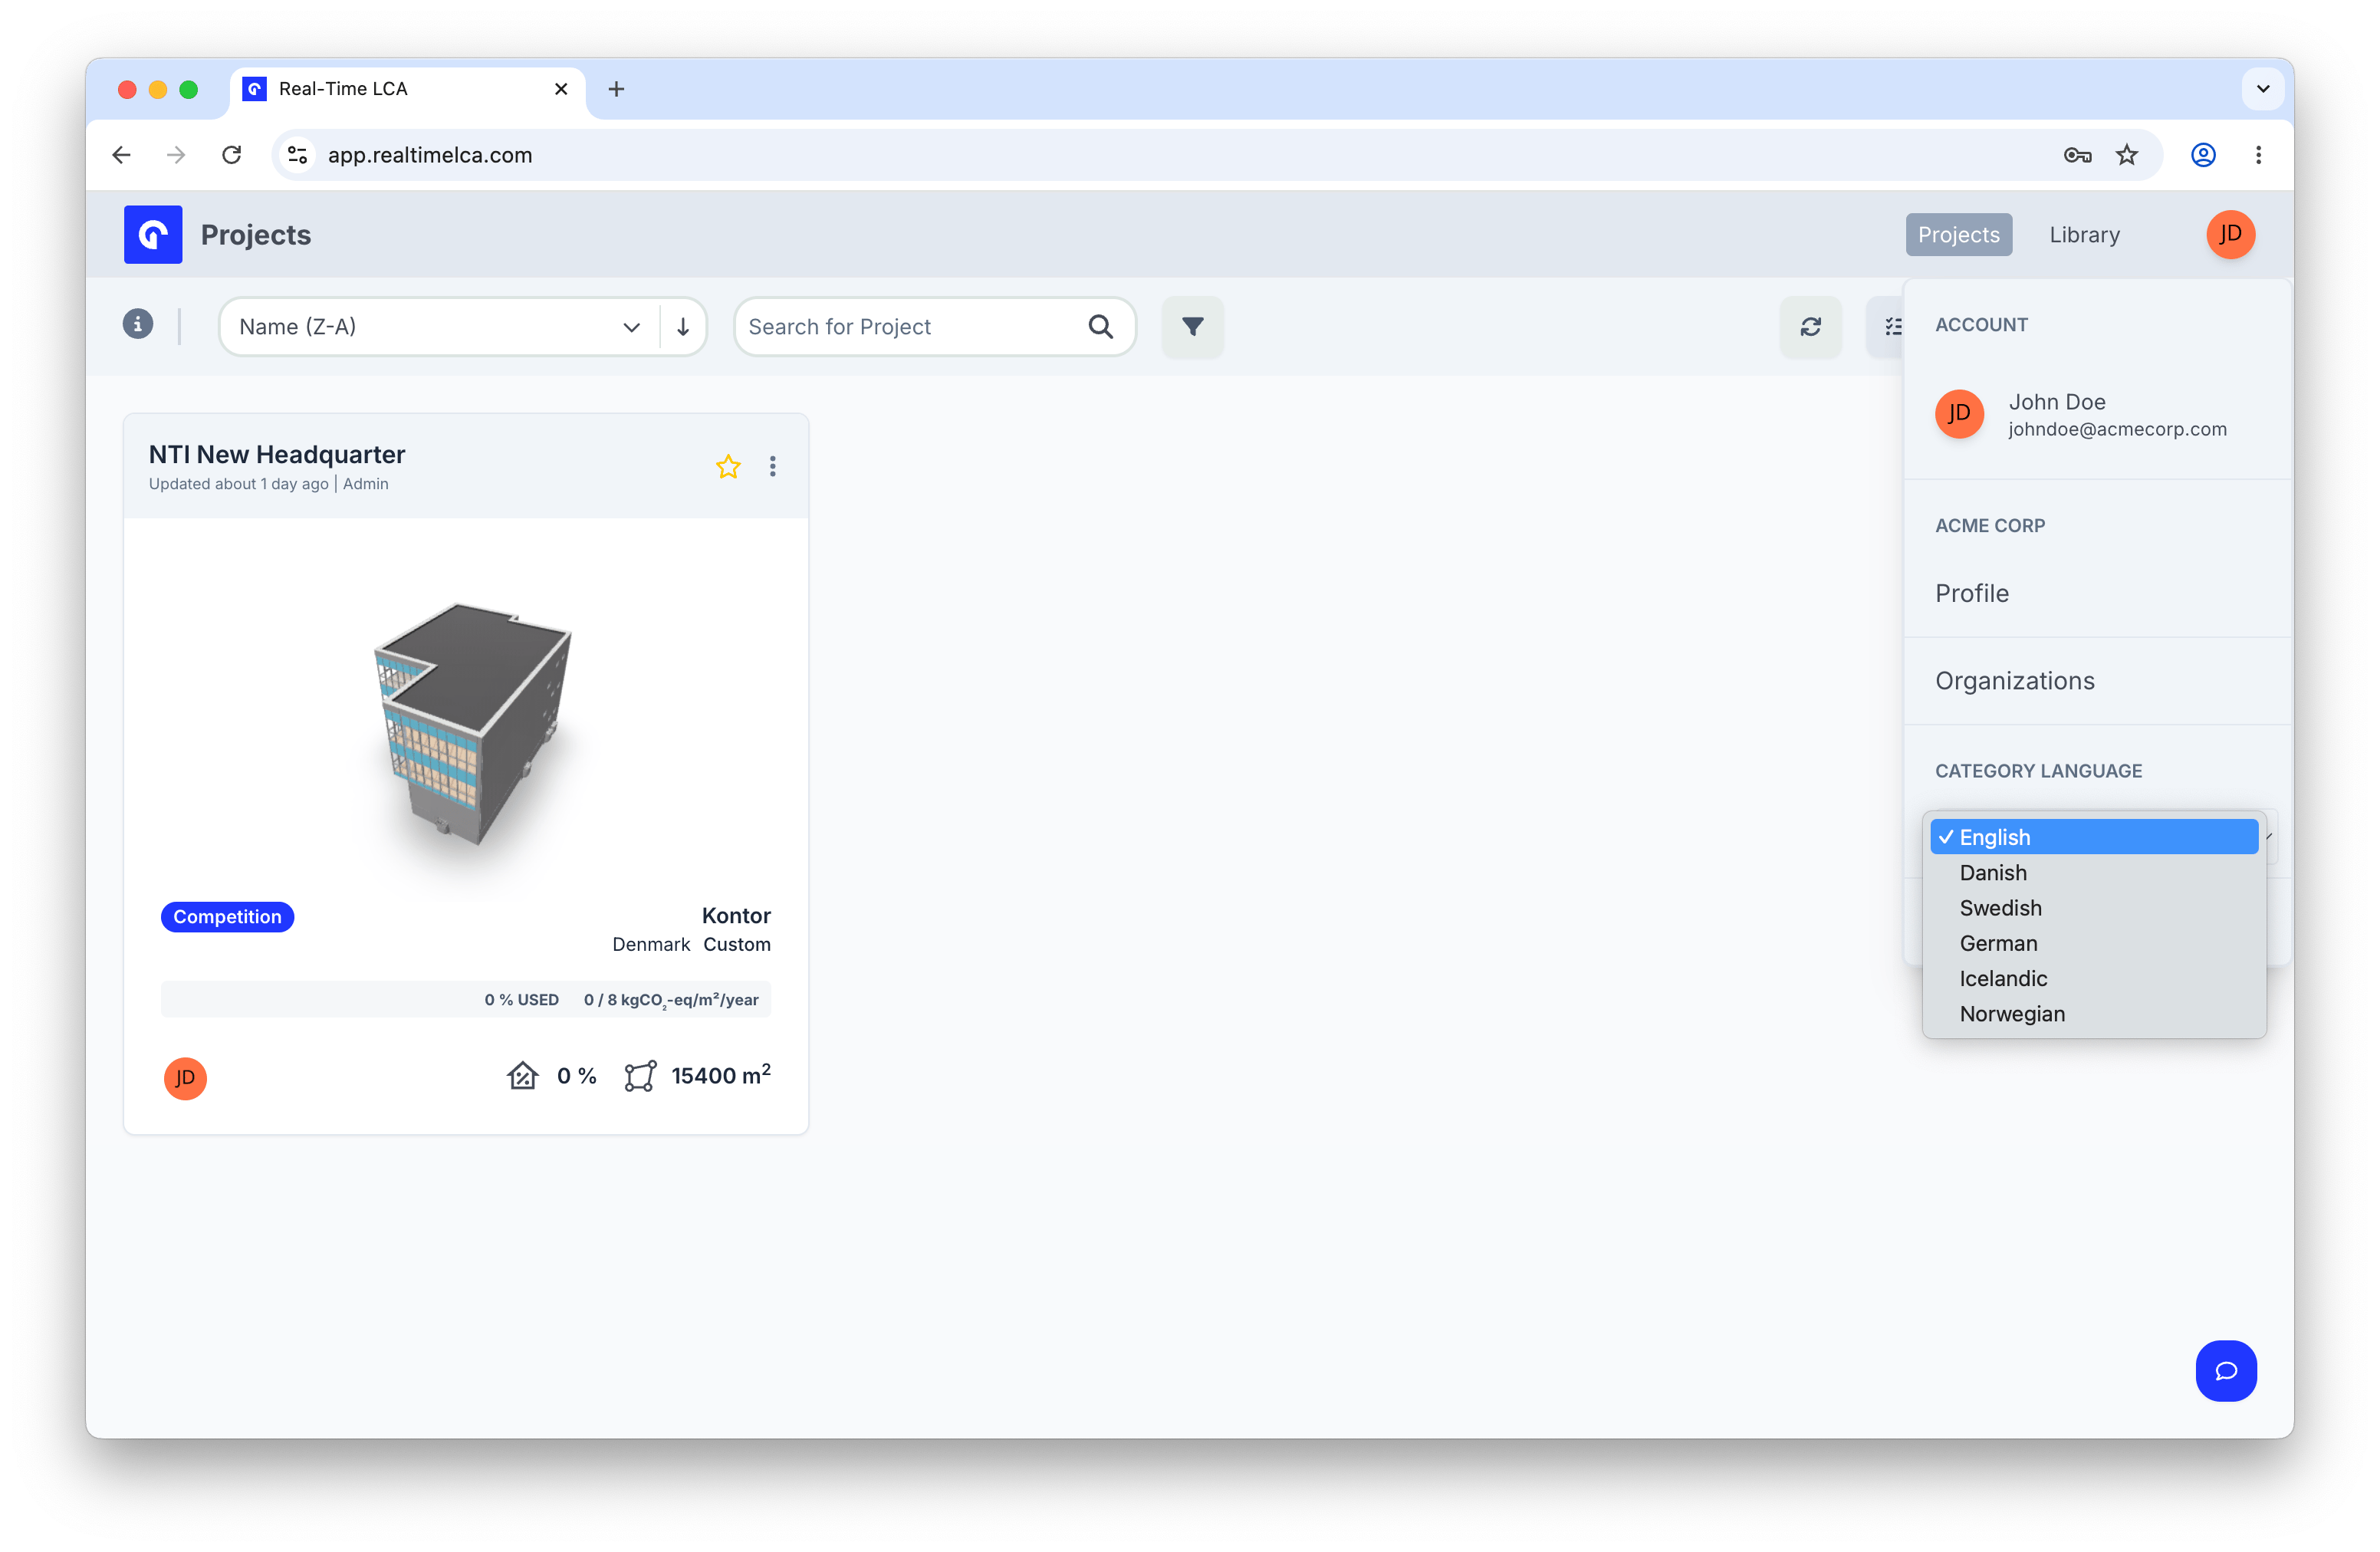
- English
- Danish
- Swedish
- German
- Icelandic
- Norwegian
Workspace users
If you are an administrator in the current organization, open Users in the left sidebar to manage who has access.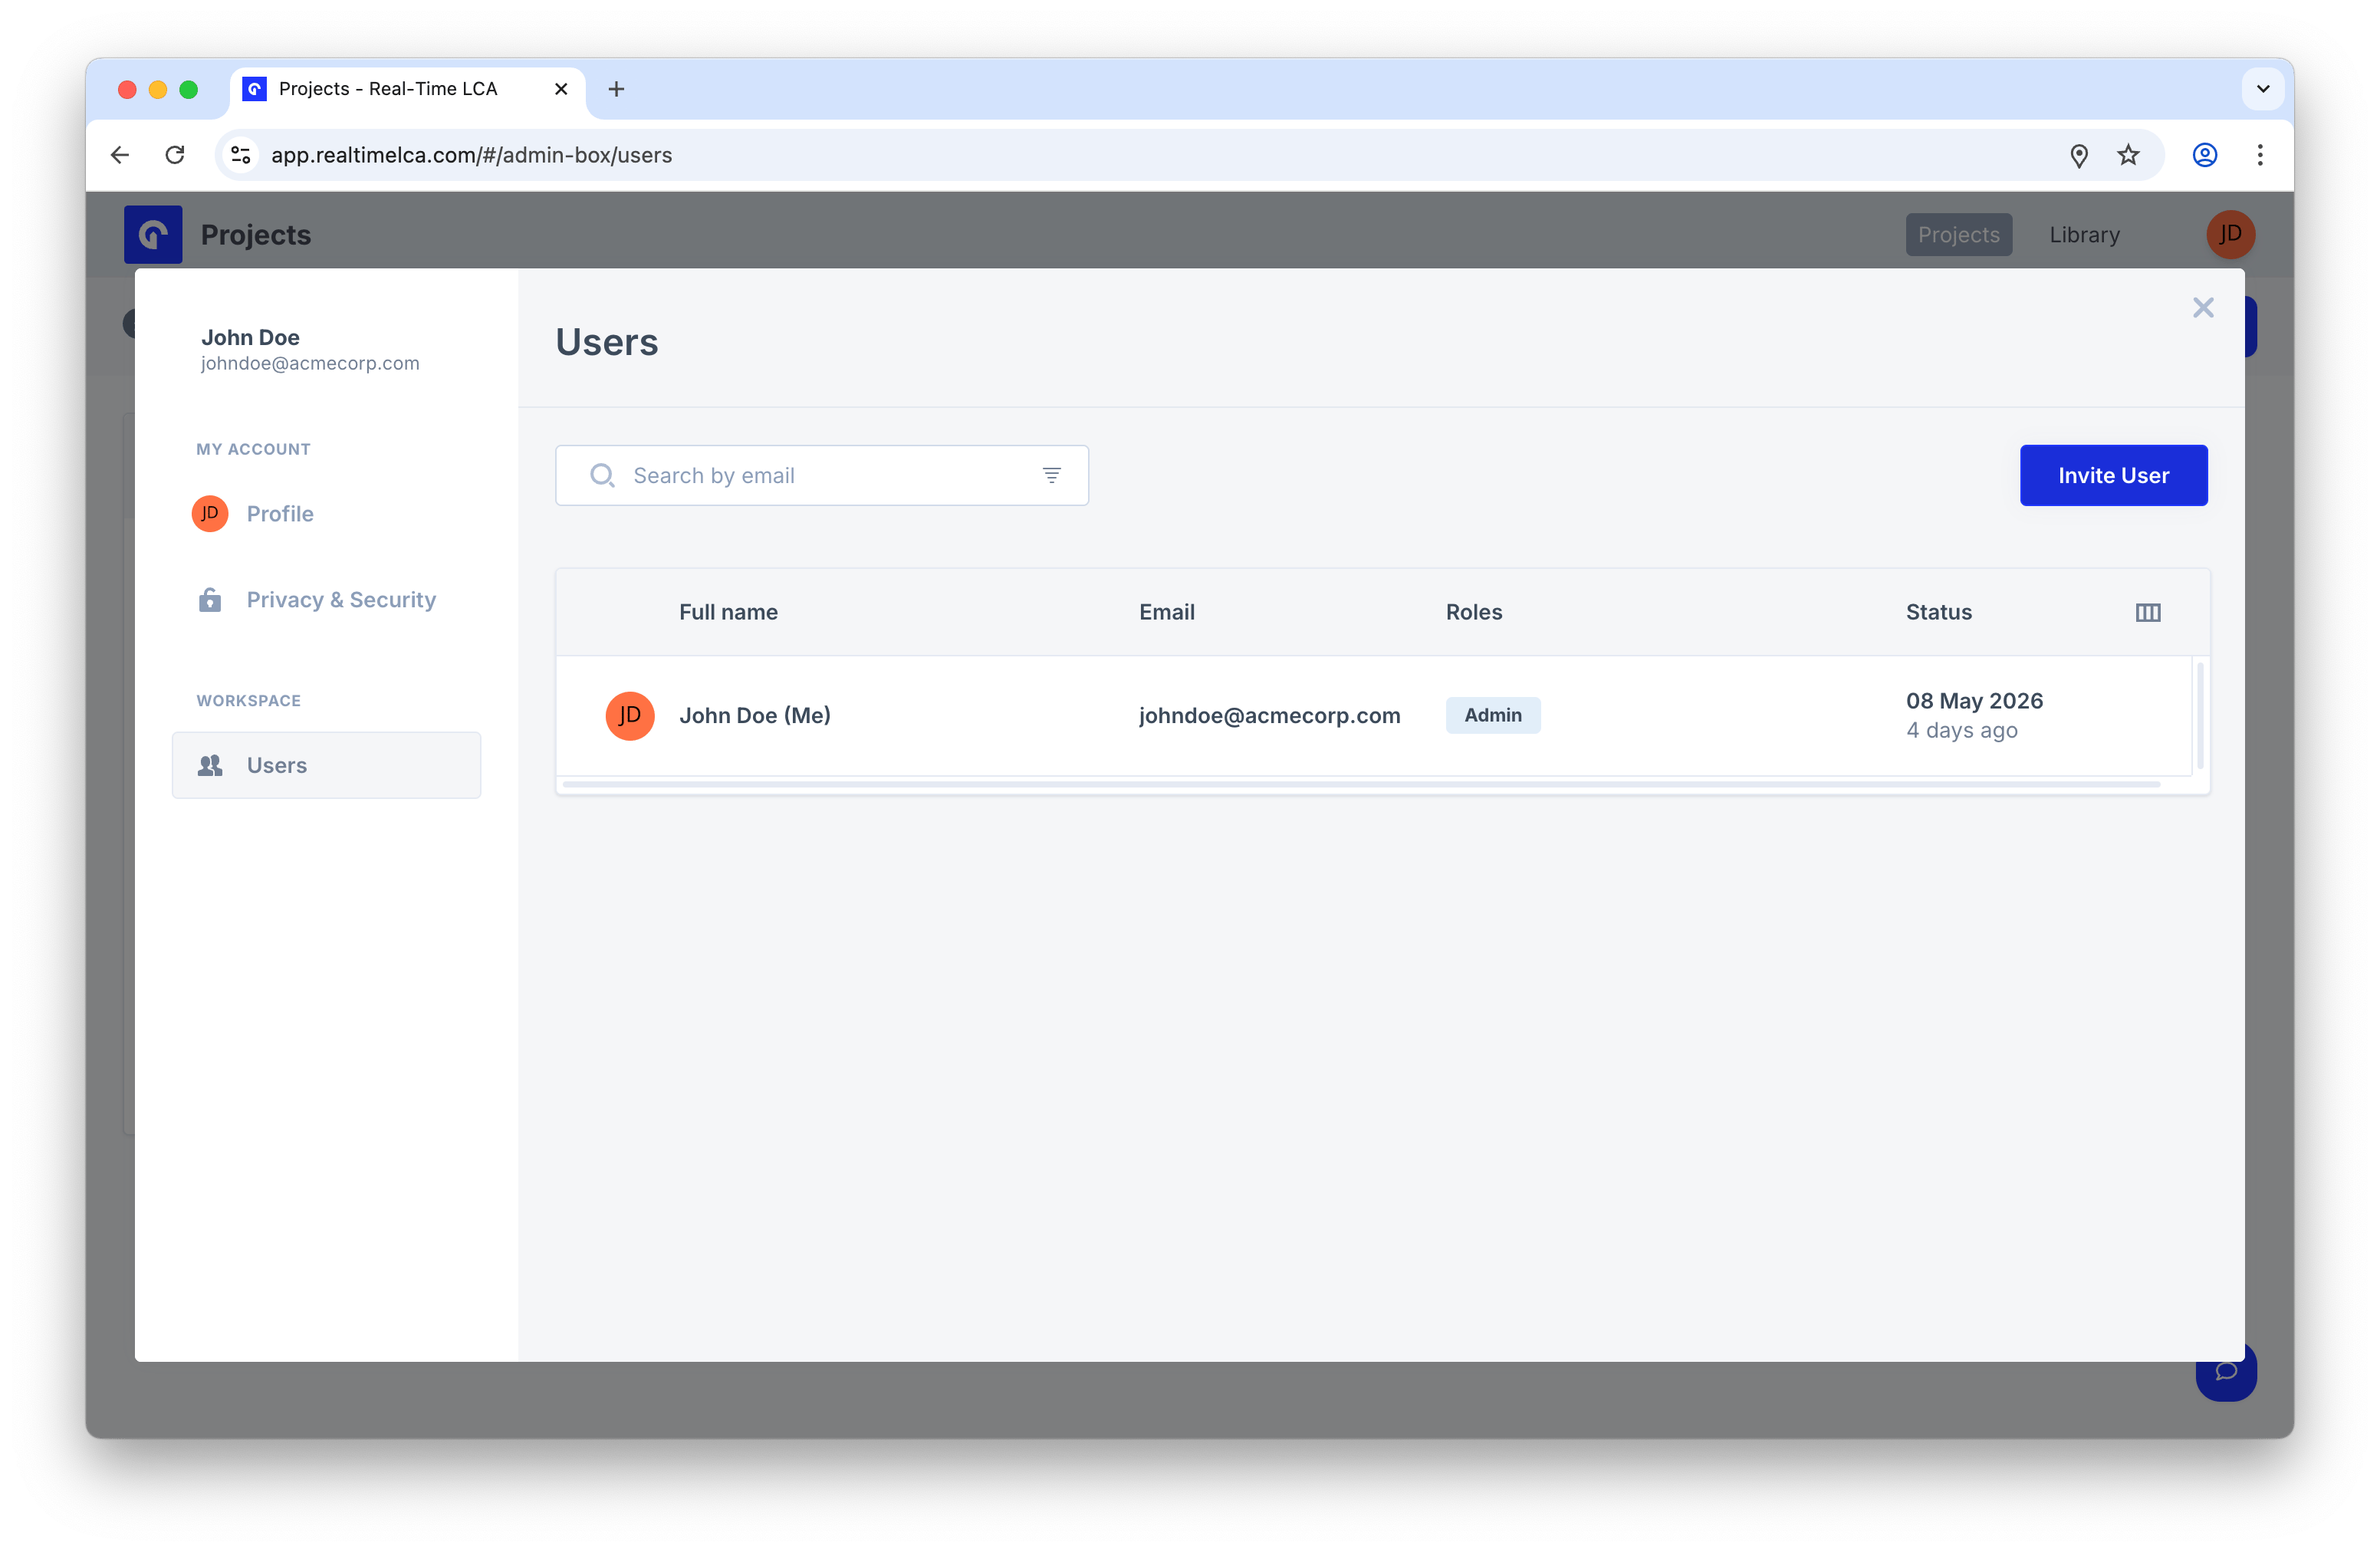
Invite a user
Click Invite User in the top-right of the Users page.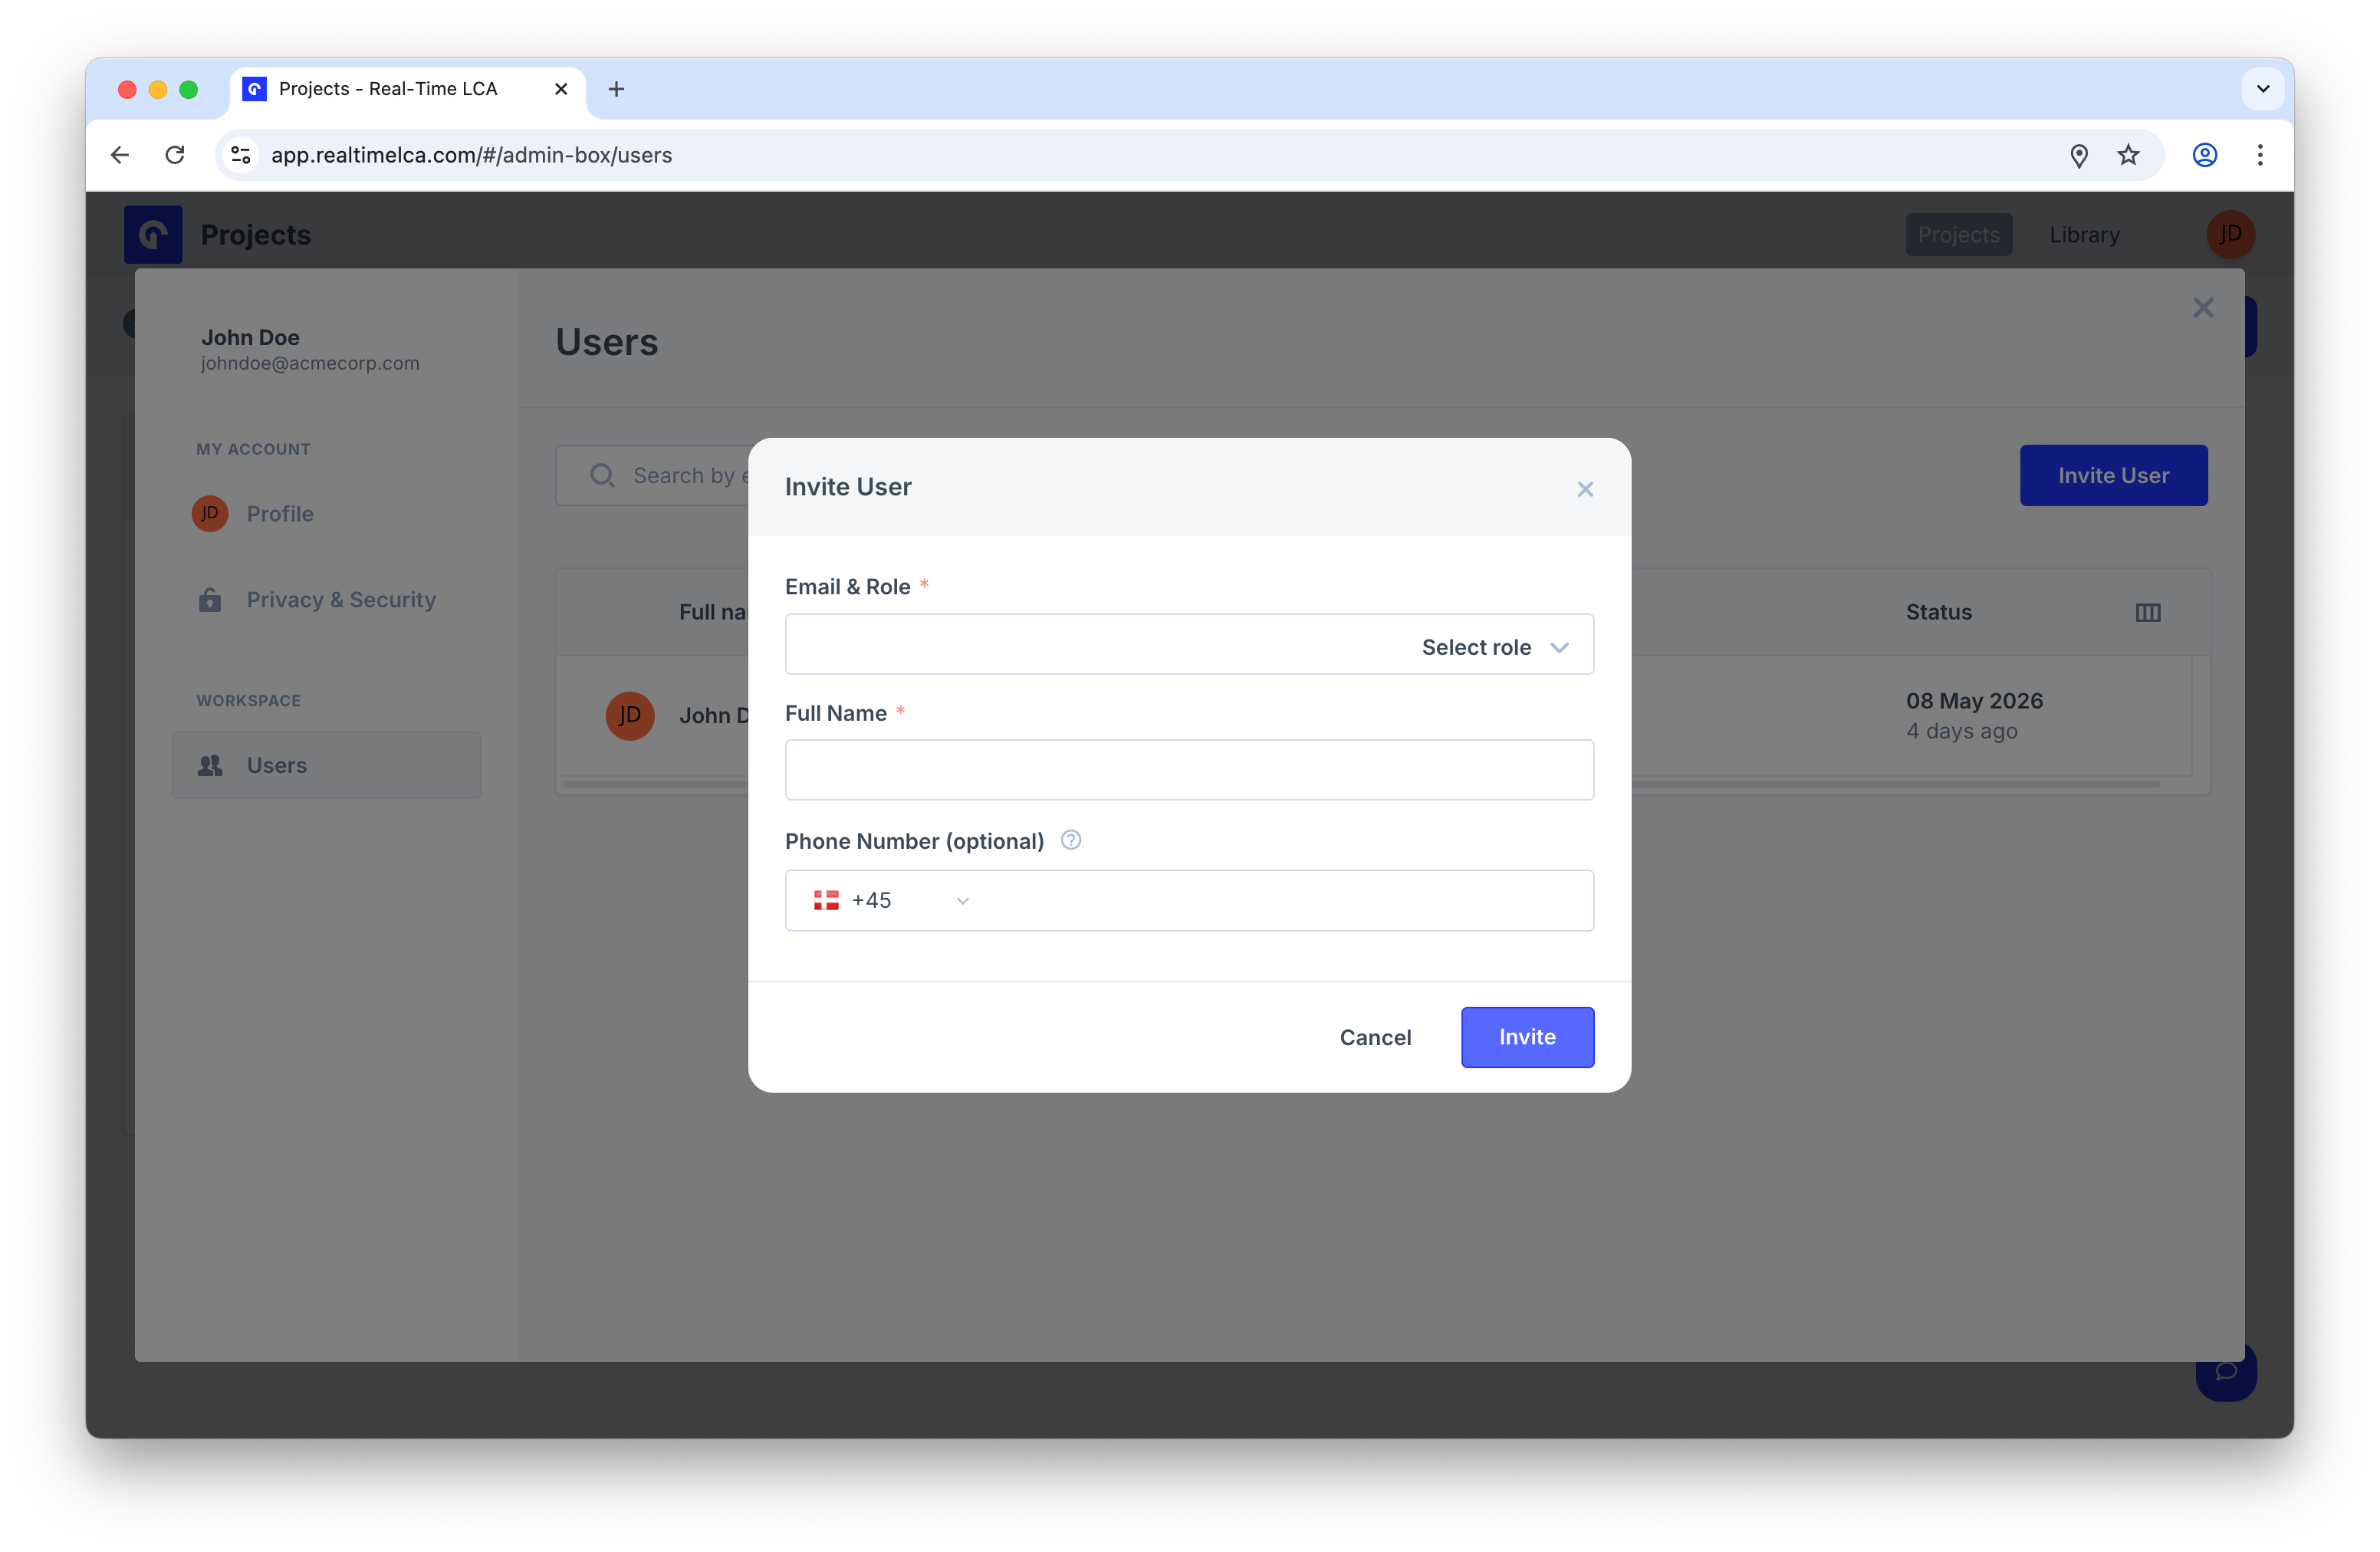
- Enter the new user’s Email and pick a Role from the dropdown.
- Add their Full Name.
- Optionally add a Phone Number (the country code defaults to your organization’s country).
- Click Invite.
Choose a role
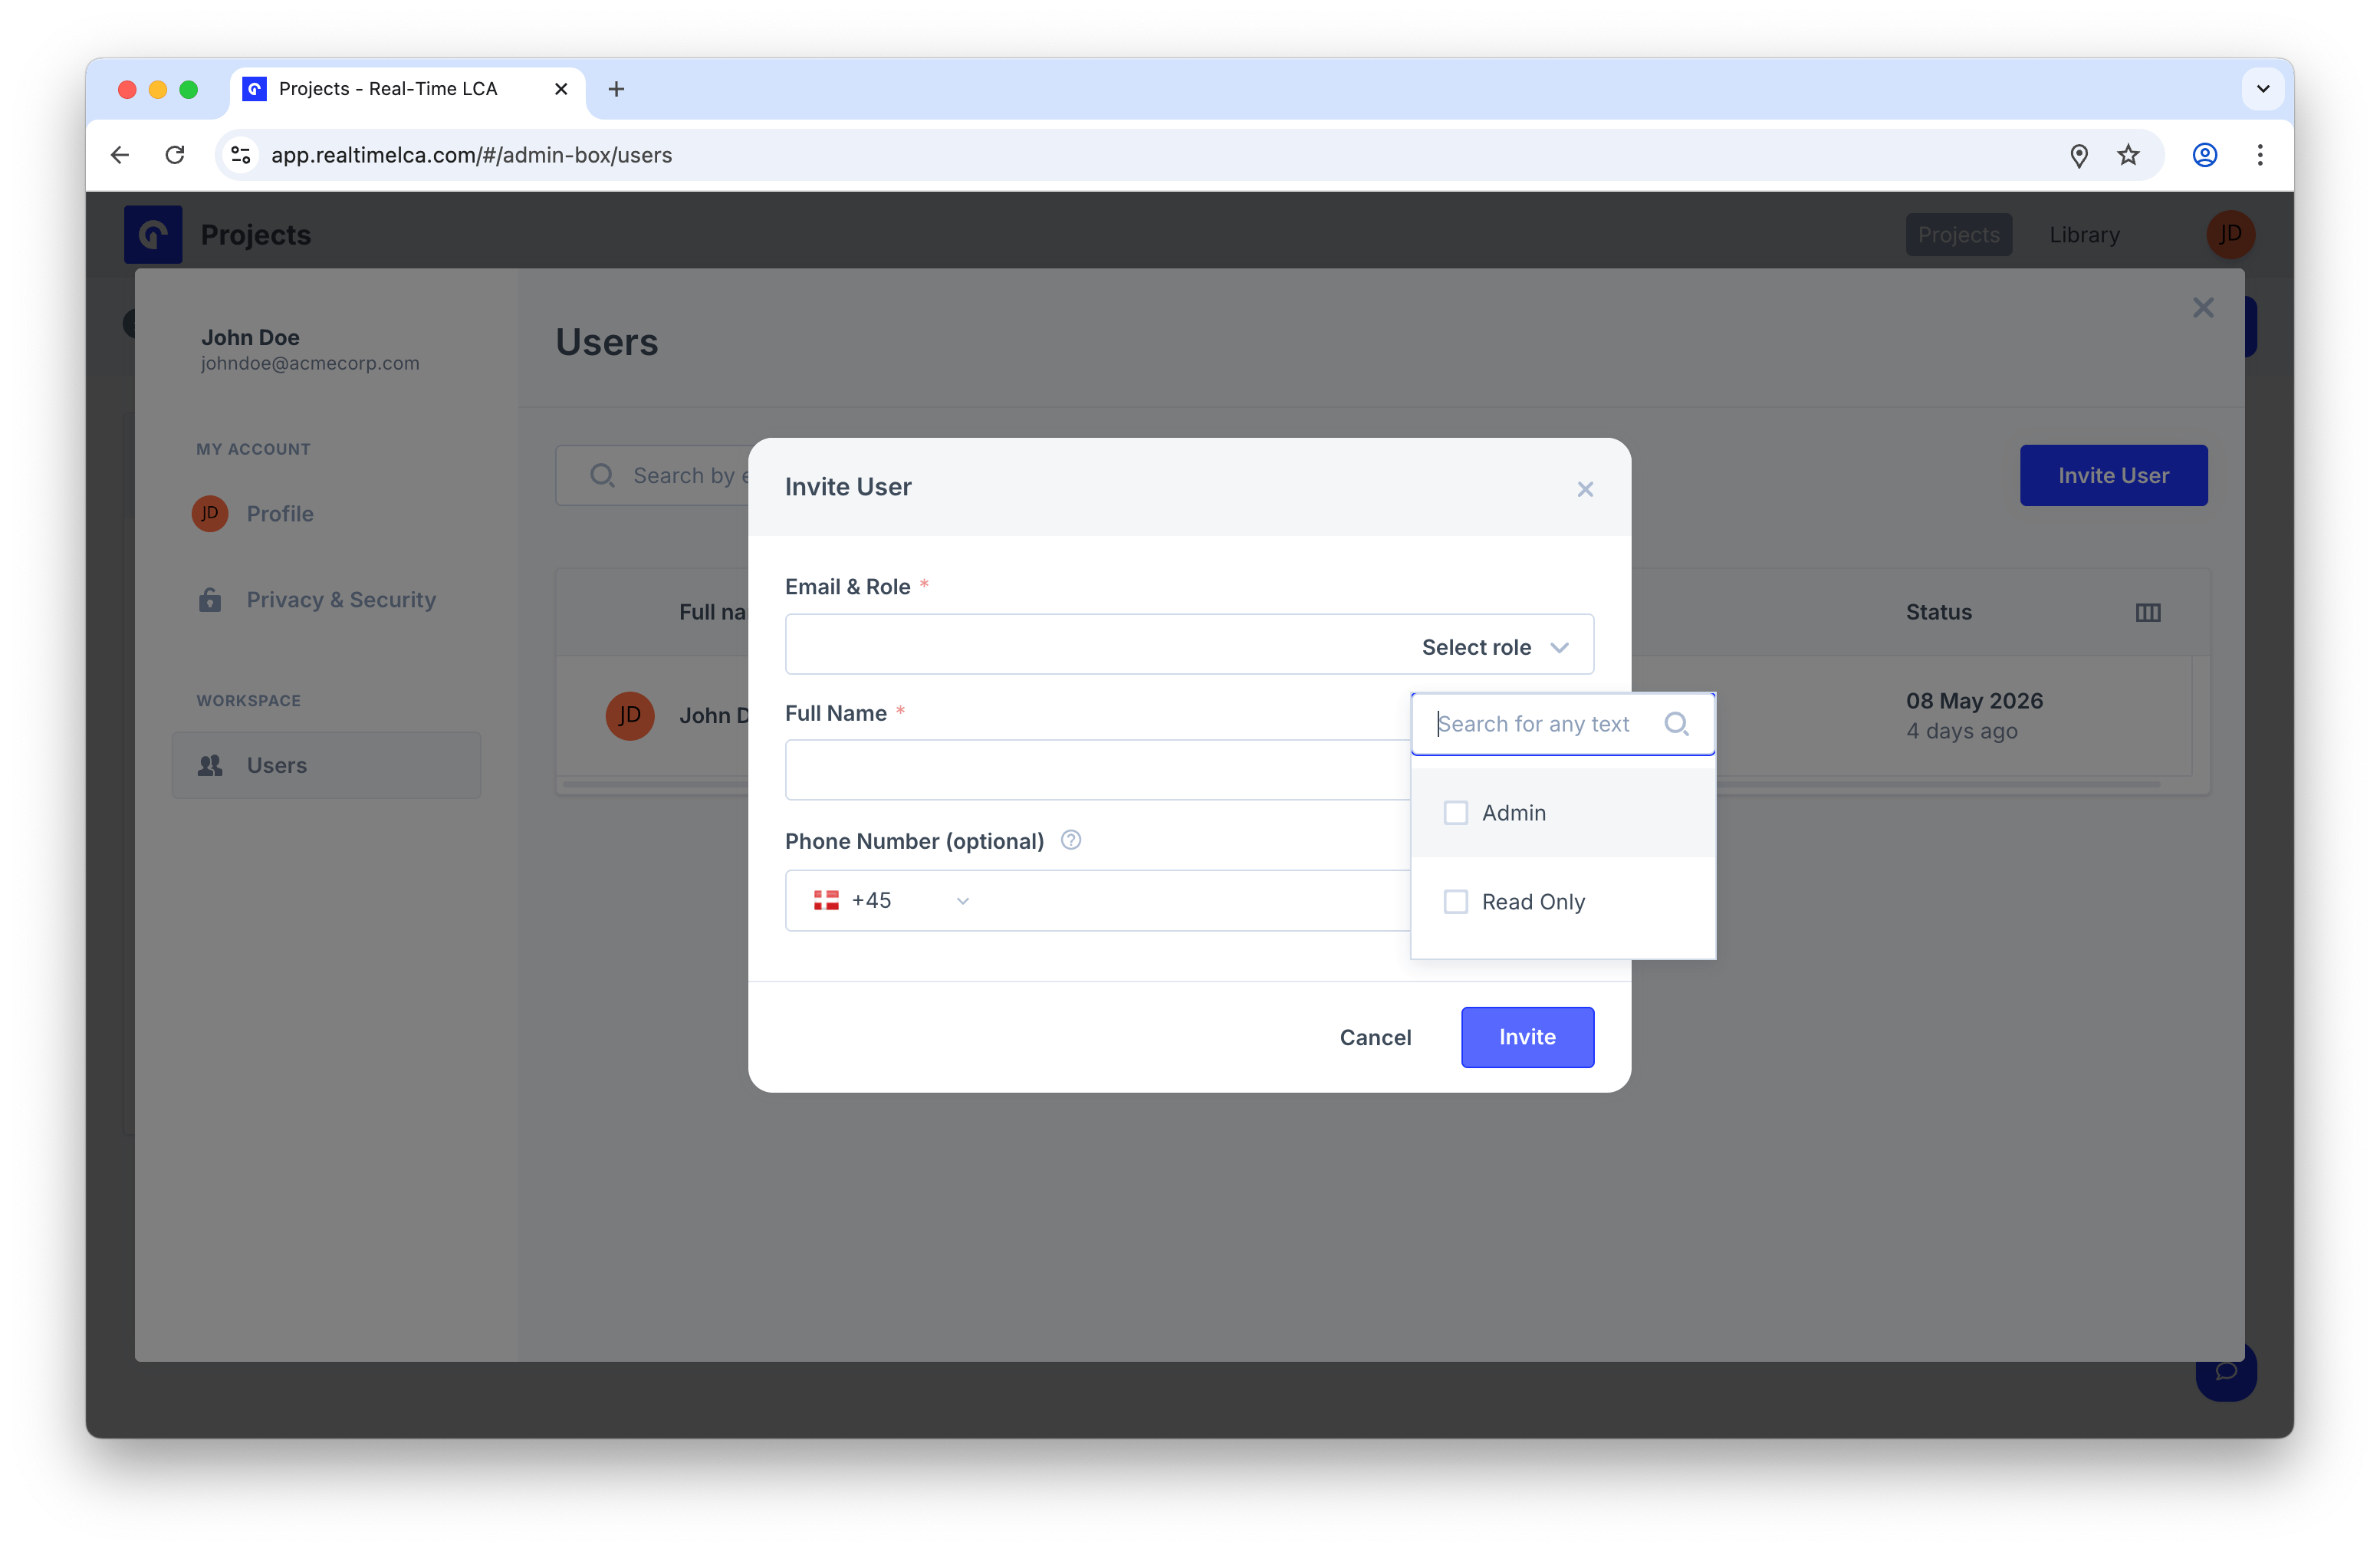
| Role | What they can do |
|---|---|
| Admin | Full access — create and edit projects, manage users, and change organization settings. |
| Read Only | View projects and reports without making changes. |