> ## Documentation Index
> Fetch the complete documentation index at: https://docs.realtimelca.com/llms.txt
> Use this file to discover all available pages before exploring further.
# Create a construction
> Build a reusable, multi-layer construction by naming it, picking a unit, and dragging materials into it.
If you frequently map the same build-up — an external wall, a floor slab, a partition — save it once as a **construction** in your organisation's library and reuse it everywhere. This page walks through the full flow, from opening the form to saving the finished construction.
## Open the Create construction form
Click **+ Construction** in the top-right of the Library. The form is also reachable from **Material Mapping** in any project — both entry points open the same page.
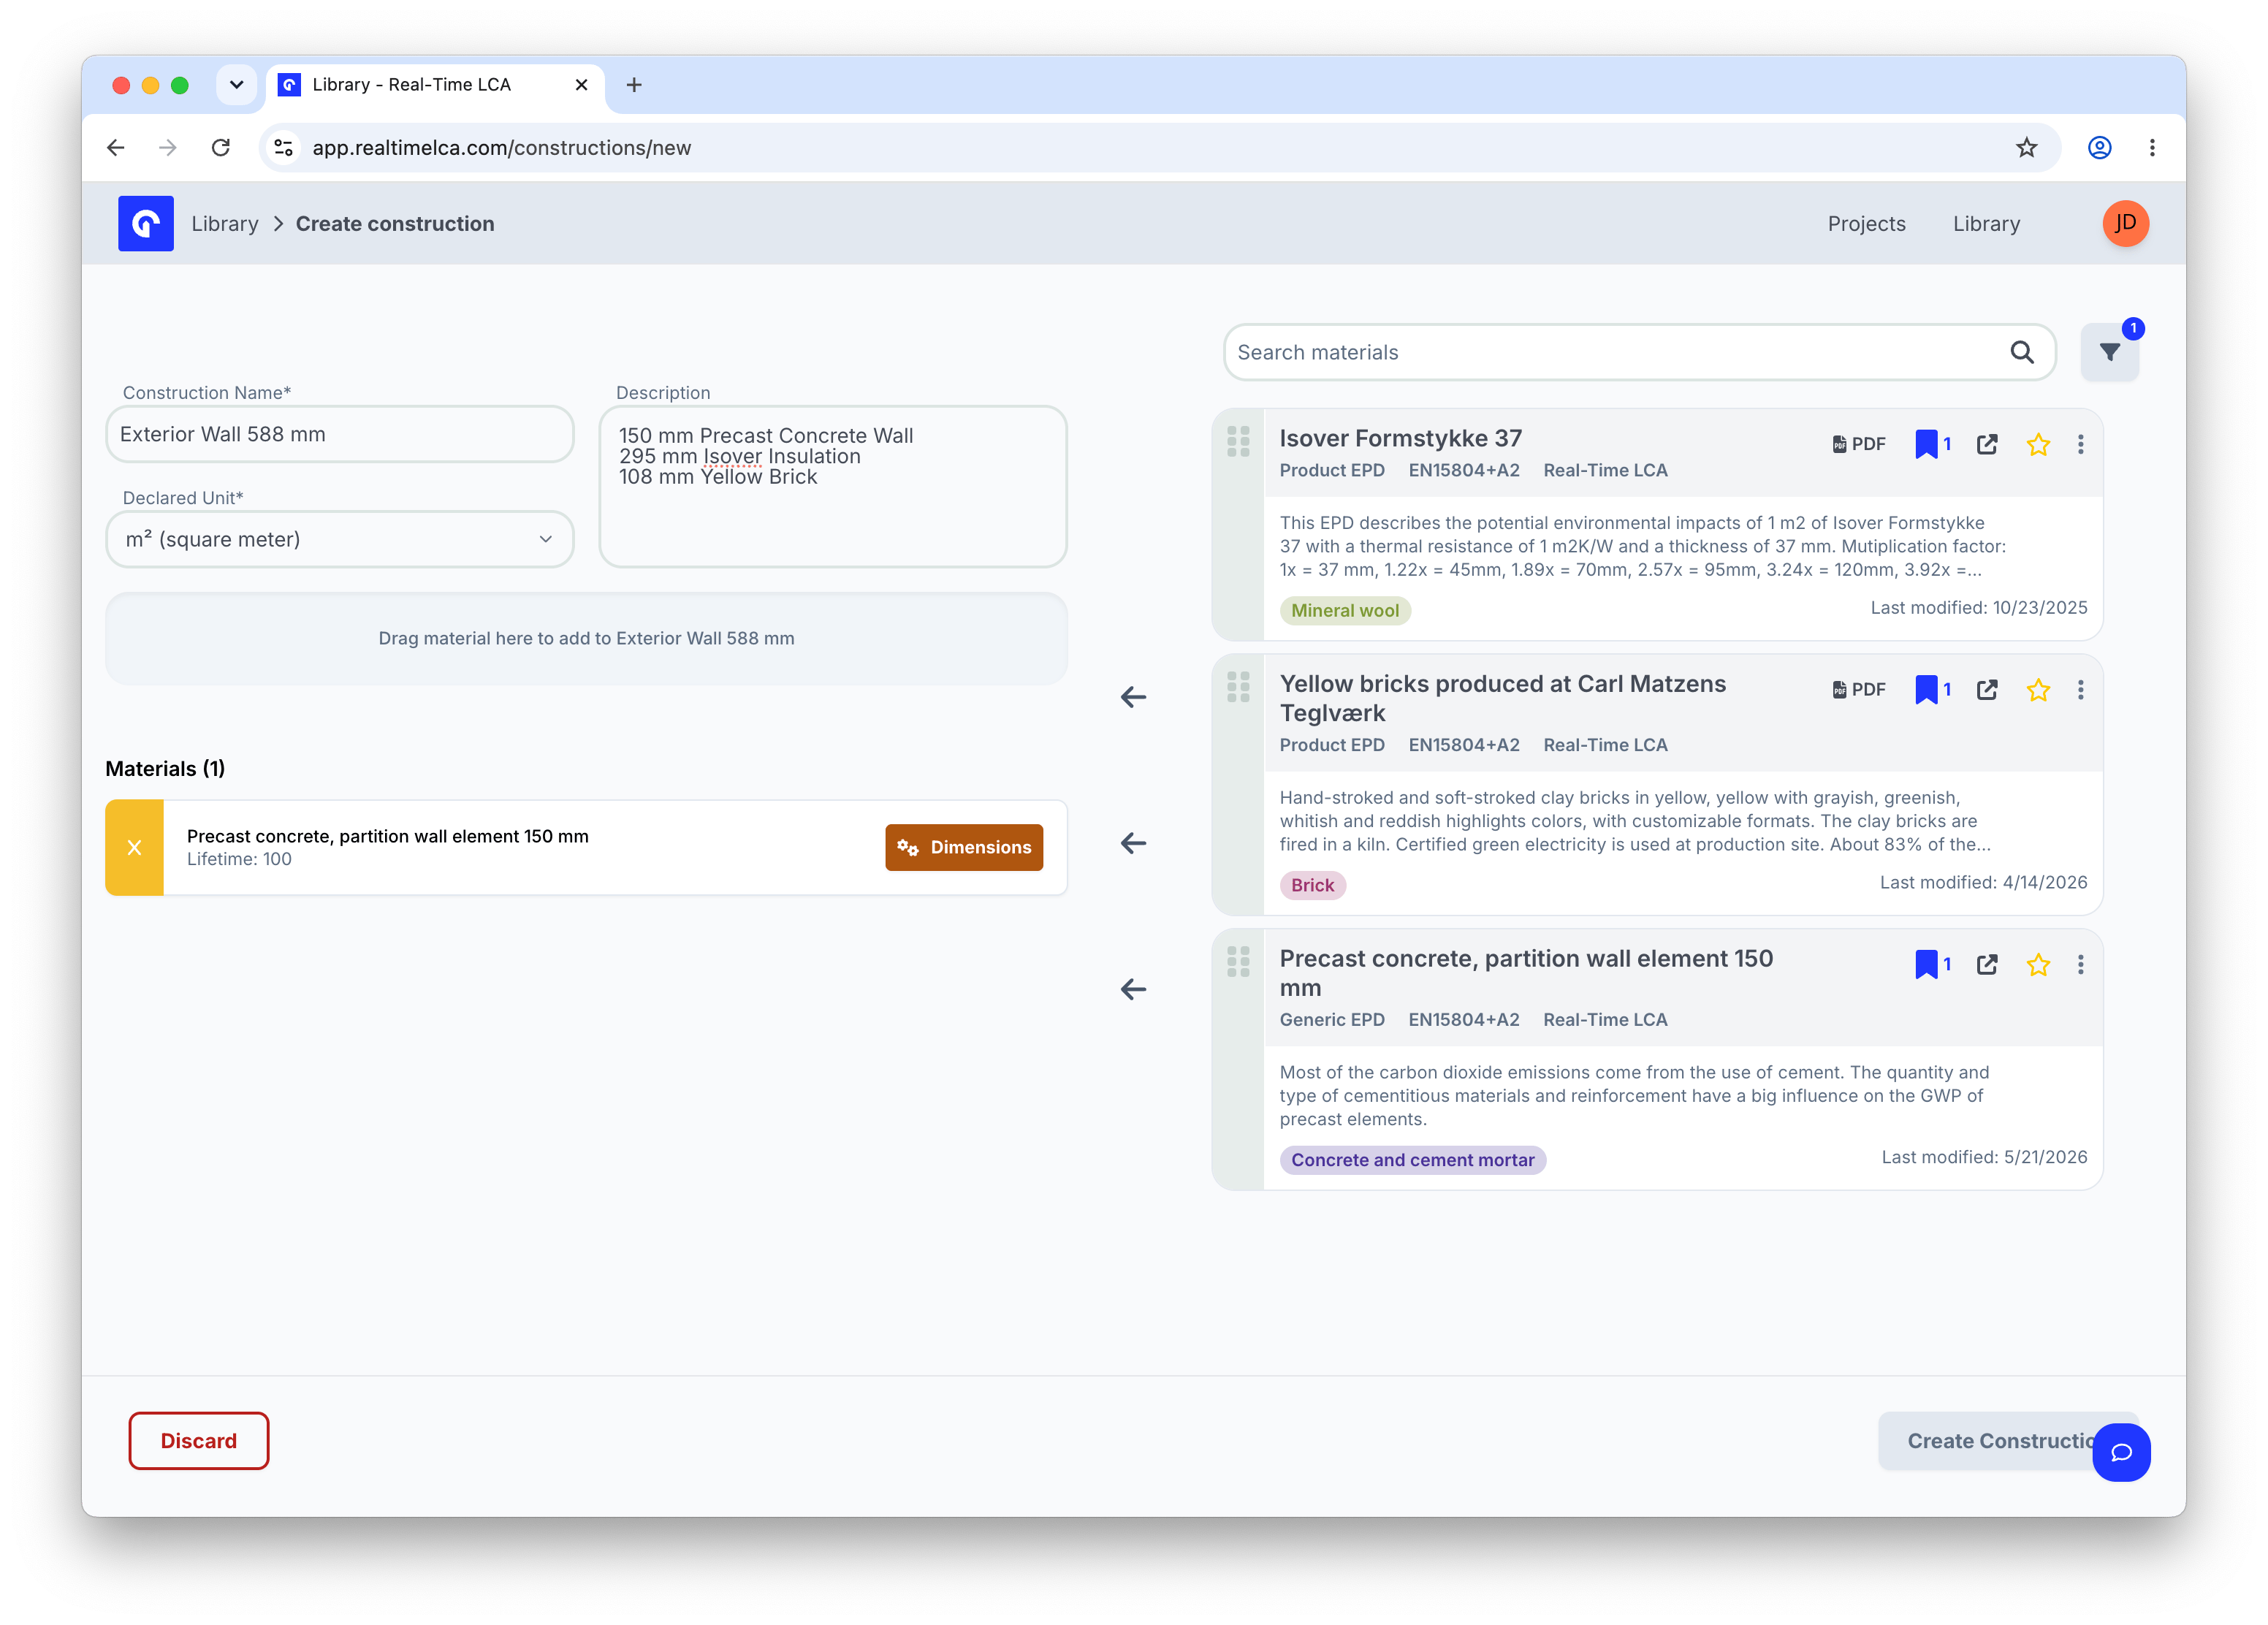
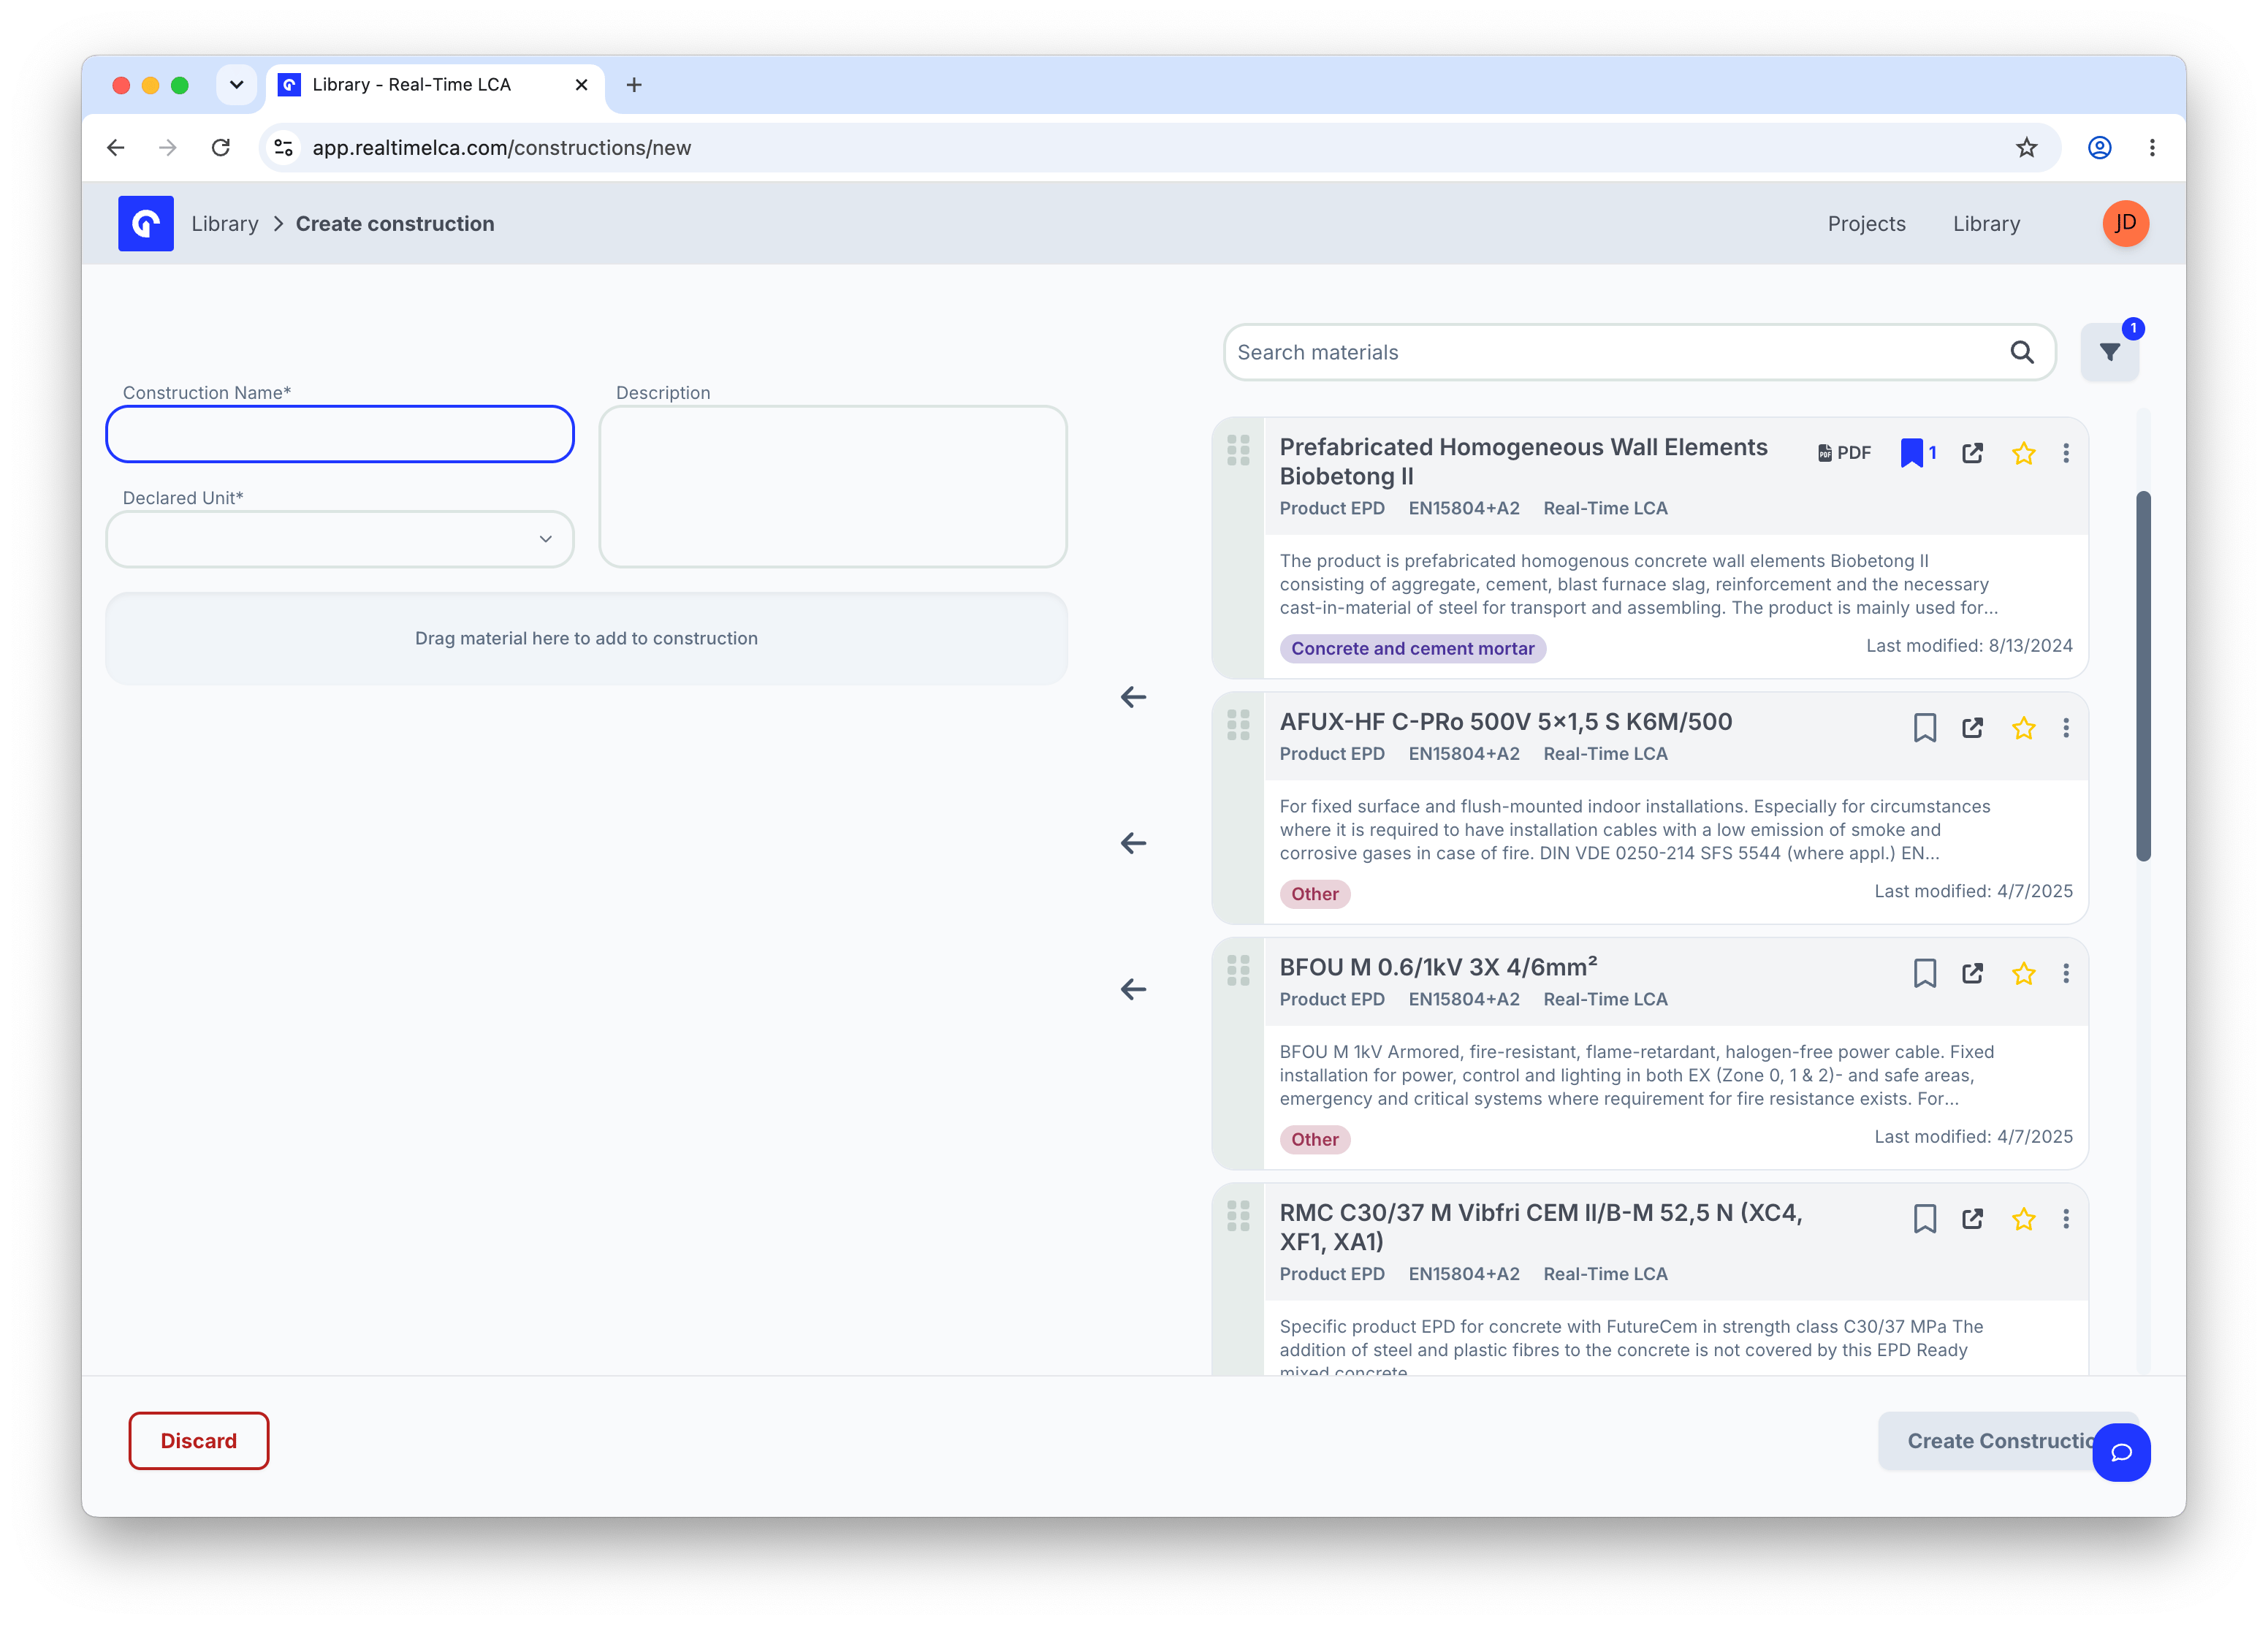 The left side is the **construction you are building**. The right side is a searchable, filterable list of every material in the Library — exactly the same list you see on the Materials tab.
## 1. Name the construction
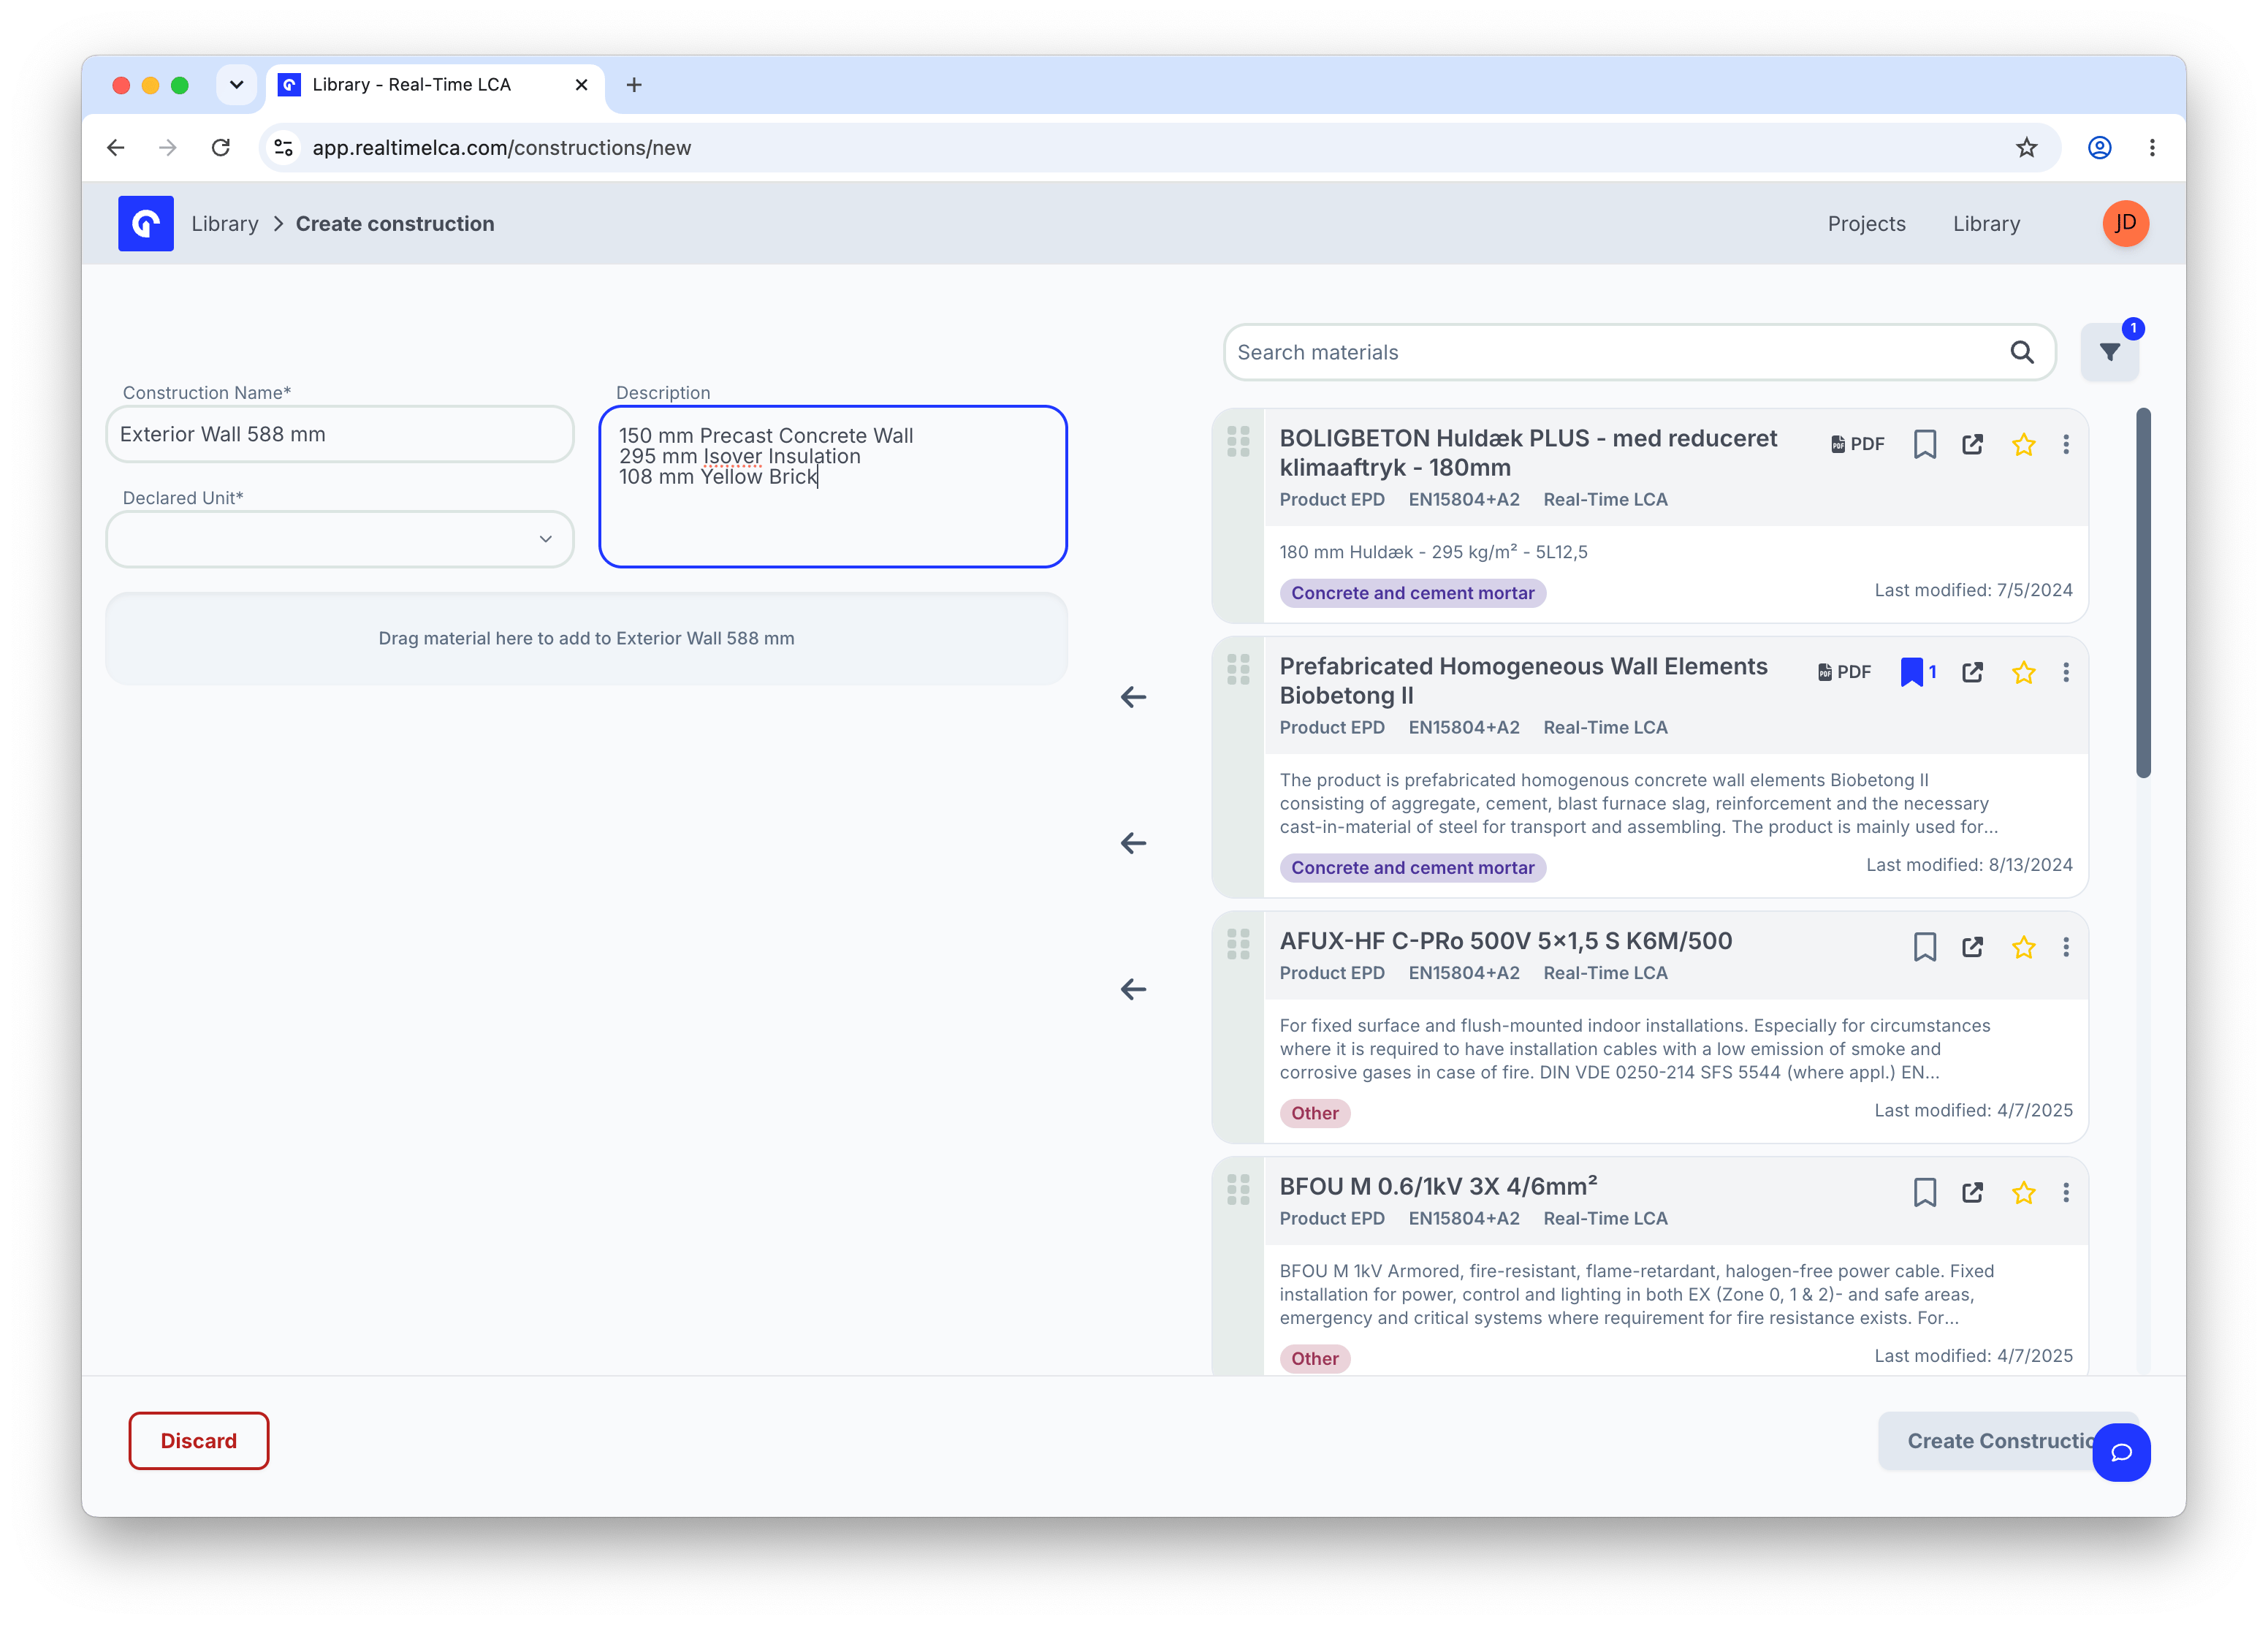
Fill in the **Construction Name** (required) and an optional **Description**. The description is plain text and is shown on the row in the Constructions list — use it to summarise the layers and thicknesses so teammates can identify the build-up at a glance.
## 2. Pick a declared unit
The **Declared Unit** is required and controls how the construction is quantified when it is mapped to a model element.
The left side is the **construction you are building**. The right side is a searchable, filterable list of every material in the Library — exactly the same list you see on the Materials tab.
## 1. Name the construction
Fill in the **Construction Name** (required) and an optional **Description**. The description is plain text and is shown on the row in the Constructions list — use it to summarise the layers and thicknesses so teammates can identify the build-up at a glance.
## 2. Pick a declared unit
The **Declared Unit** is required and controls how the construction is quantified when it is mapped to a model element.
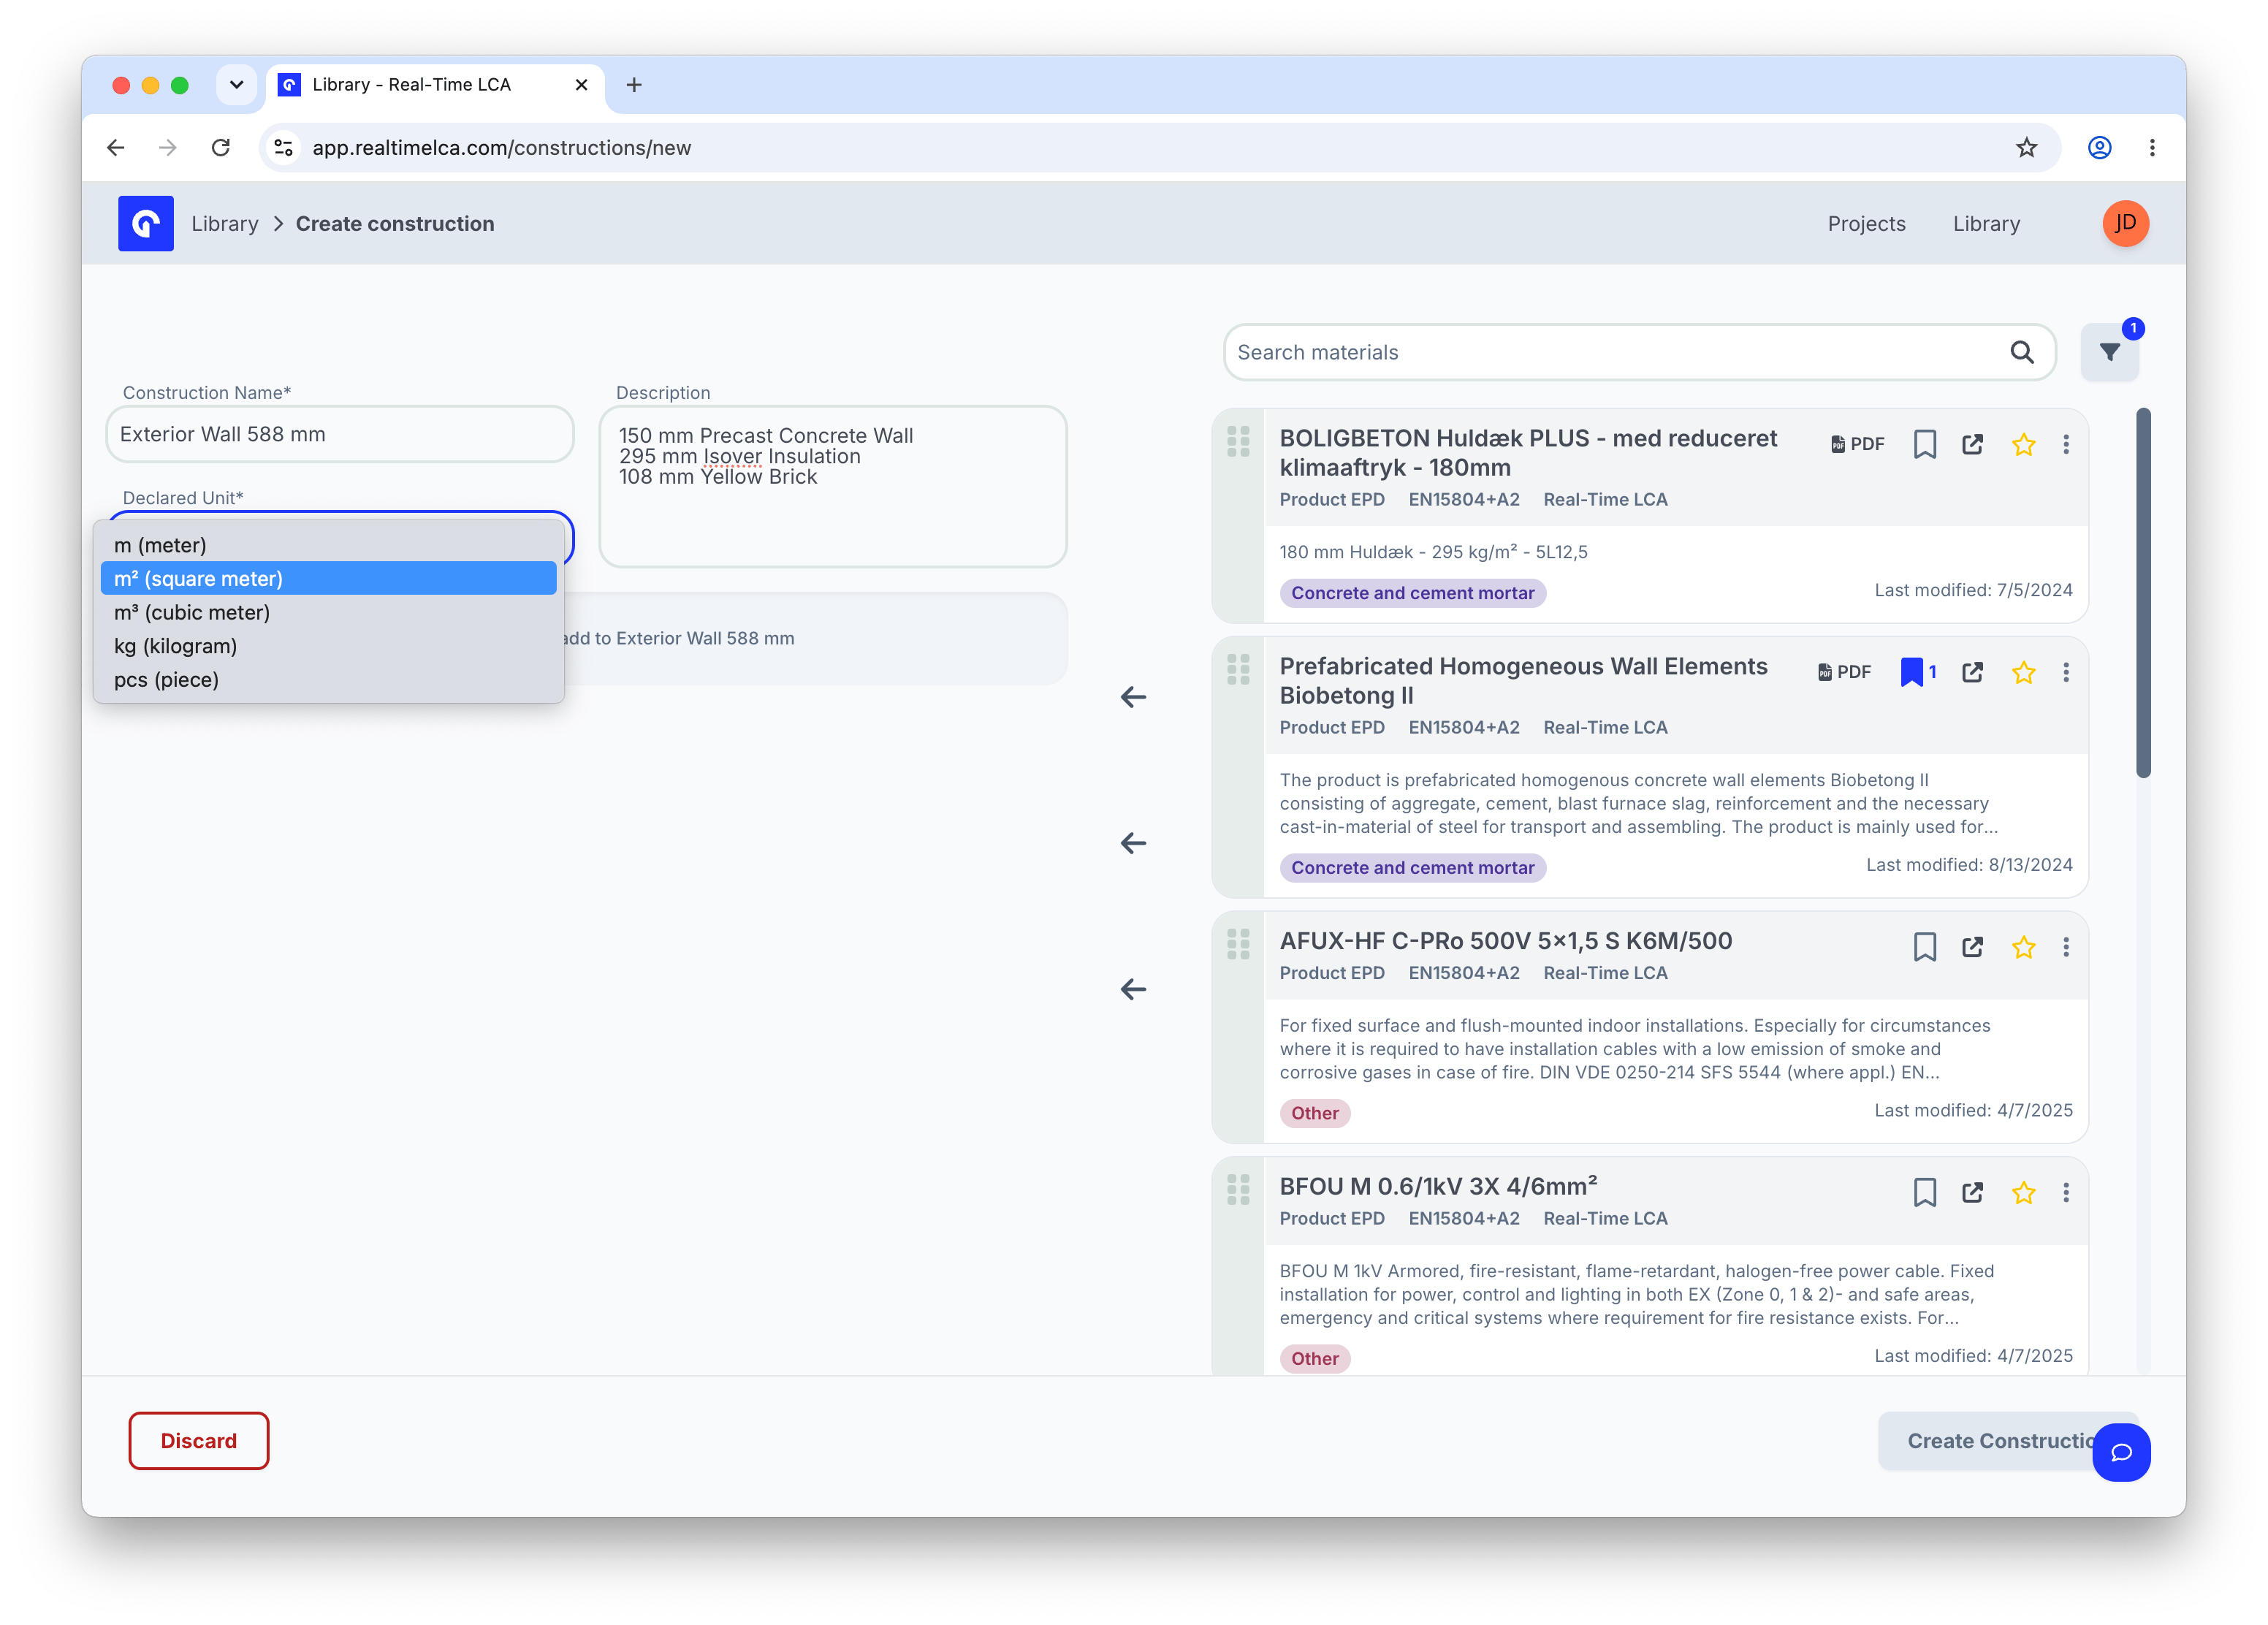 Available units:
| Unit | Use for |
| ------- | ------------------------------------------ |
| **m** | Linear elements such as beams or columns. |
| **m²** | Surfaces such as walls, floors, and roofs. |
| **m³** | Volumetric build-ups. |
| **kg** | Mass-based assemblies. |
| **pcs** | Discrete items such as doors or fixtures. |
Available units:
| Unit | Use for |
| ------- | ------------------------------------------ |
| **m** | Linear elements such as beams or columns. |
| **m²** | Surfaces such as walls, floors, and roofs. |
| **m³** | Volumetric build-ups. |
| **kg** | Mass-based assemblies. |
| **pcs** | Discrete items such as doors or fixtures. |
 ## 3. Drag materials into the construction
Find each material you need in the right-hand list — use the search box or the filter panel exactly like on the [Materials tab](/user-guide/library/materials/browse-materials#search). Grab the material's drag handle and drop it on the **Drag material here to add to construction** zone on the left.
## 3. Drag materials into the construction
Find each material you need in the right-hand list — use the search box or the filter panel exactly like on the [Materials tab](/user-guide/library/materials/browse-materials#search). Grab the material's drag handle and drop it on the **Drag material here to add to construction** zone on the left.
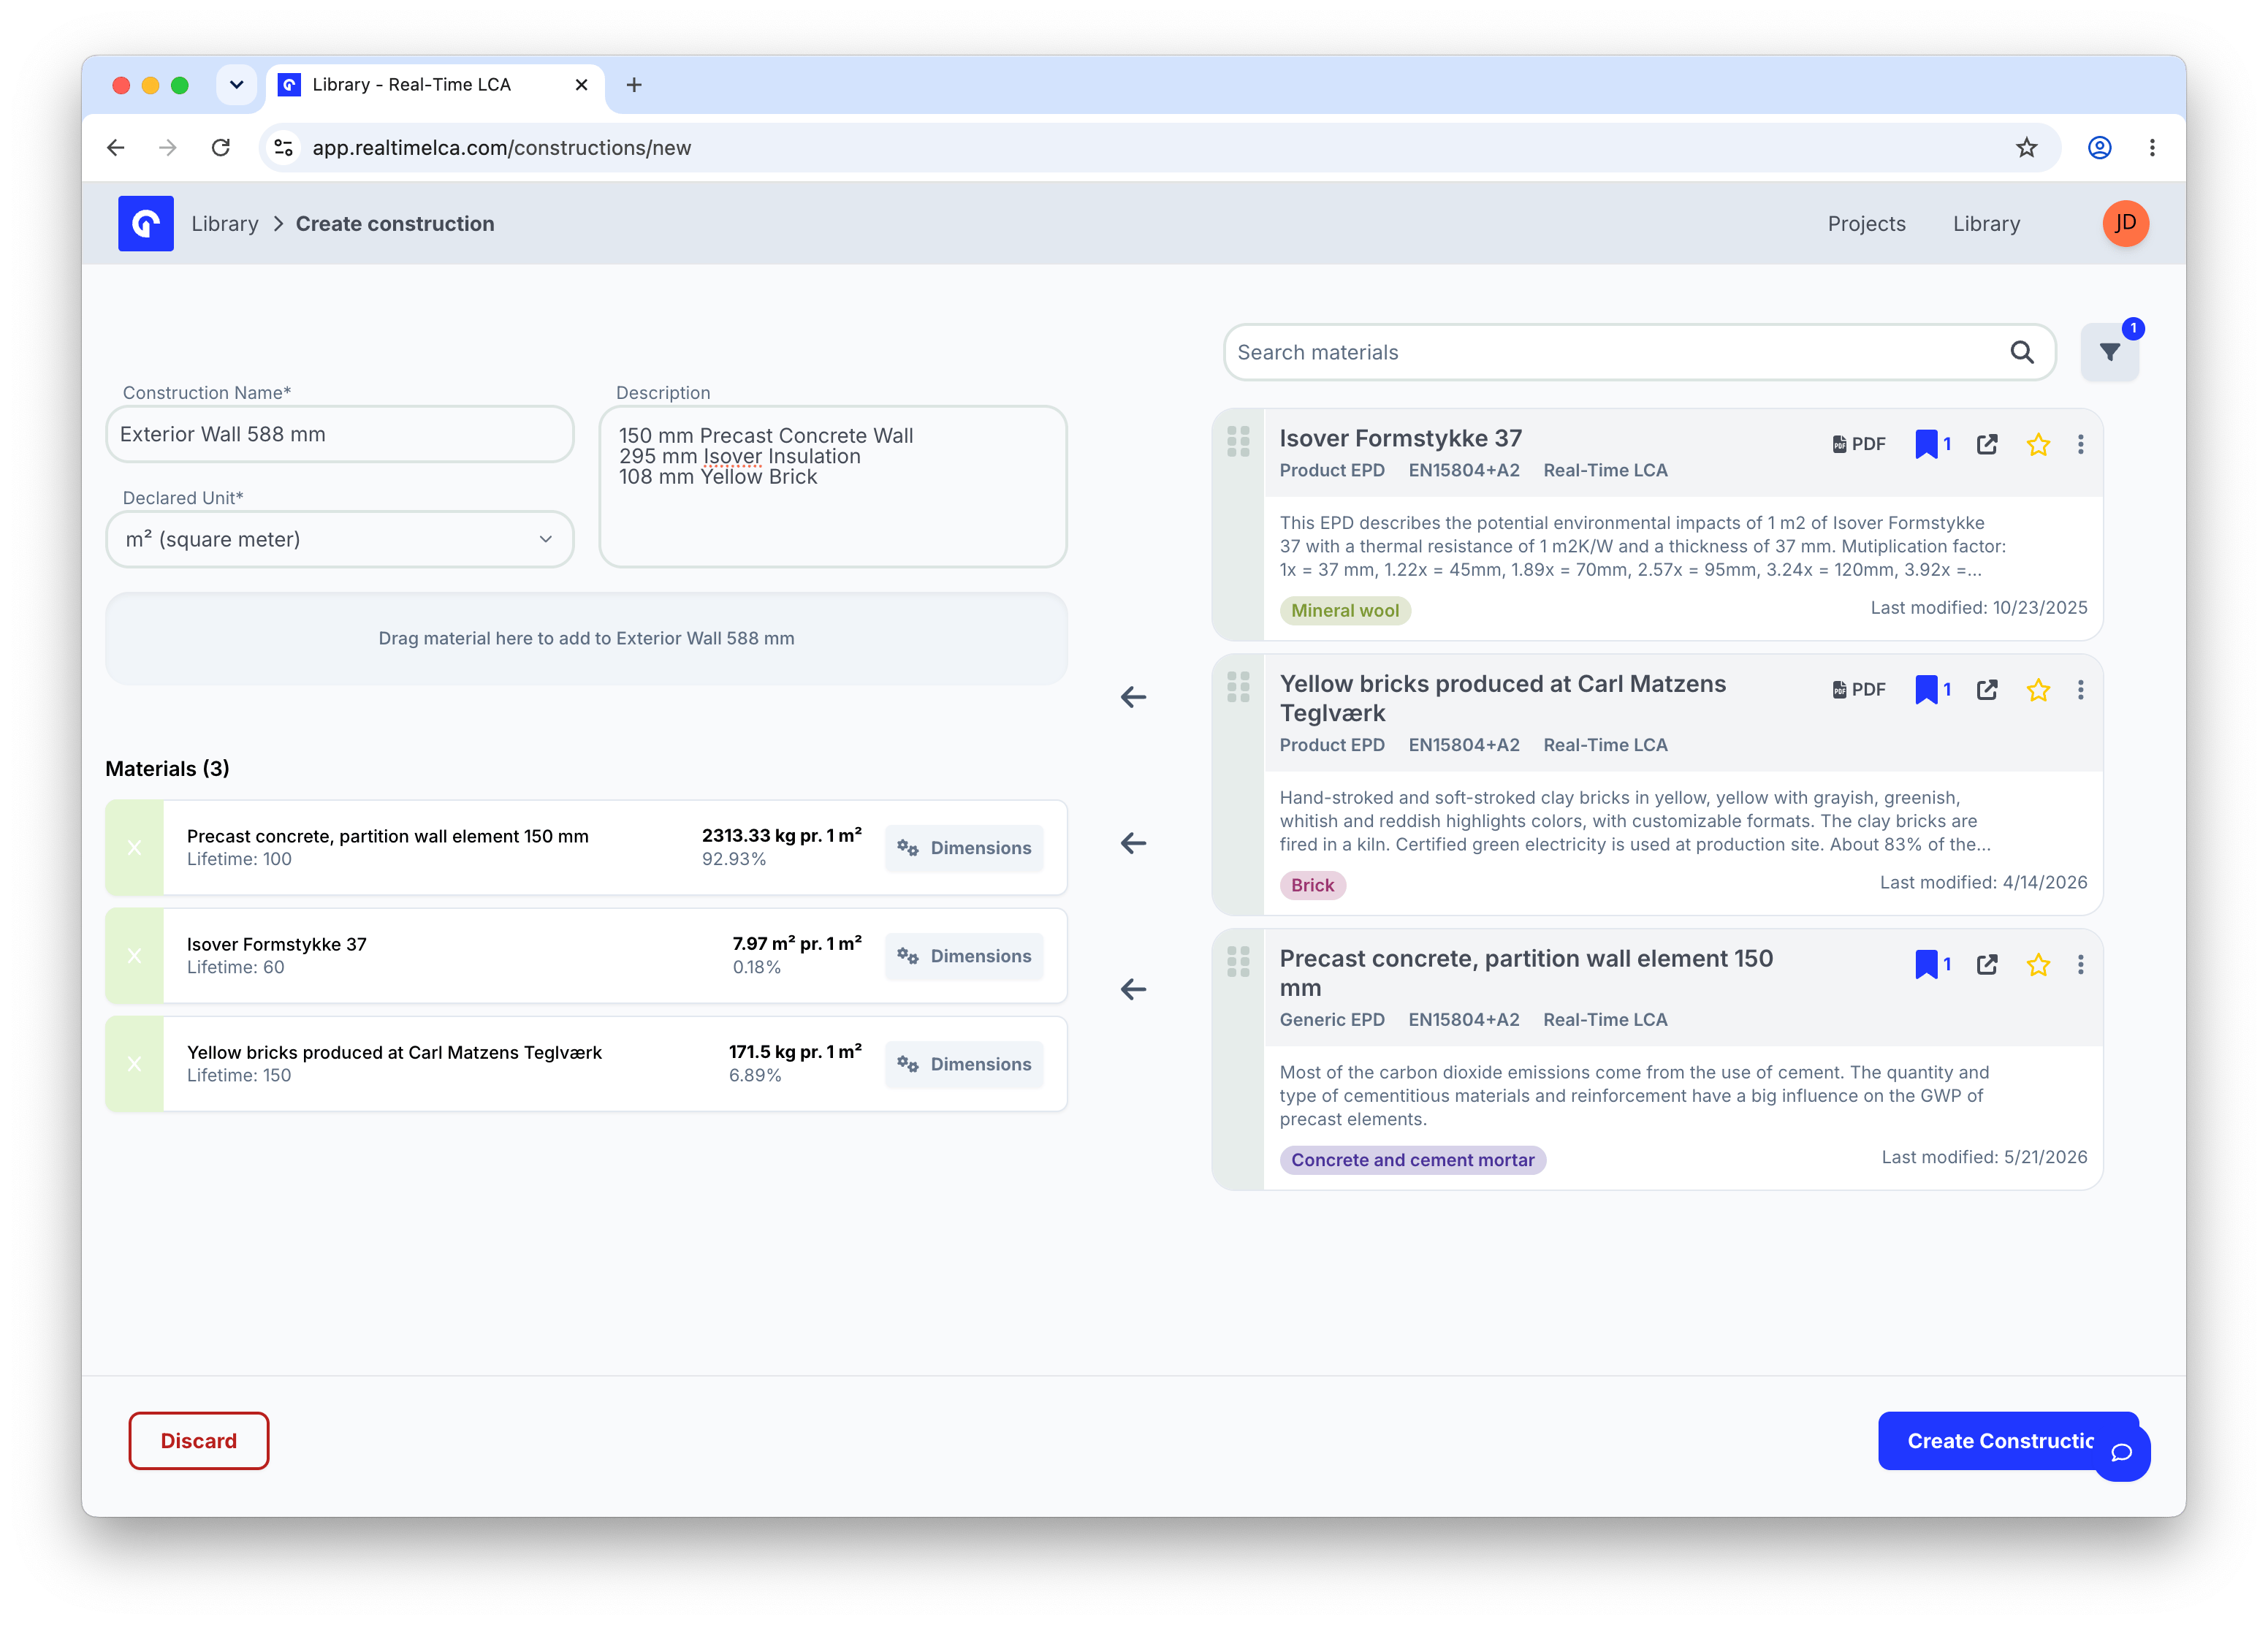
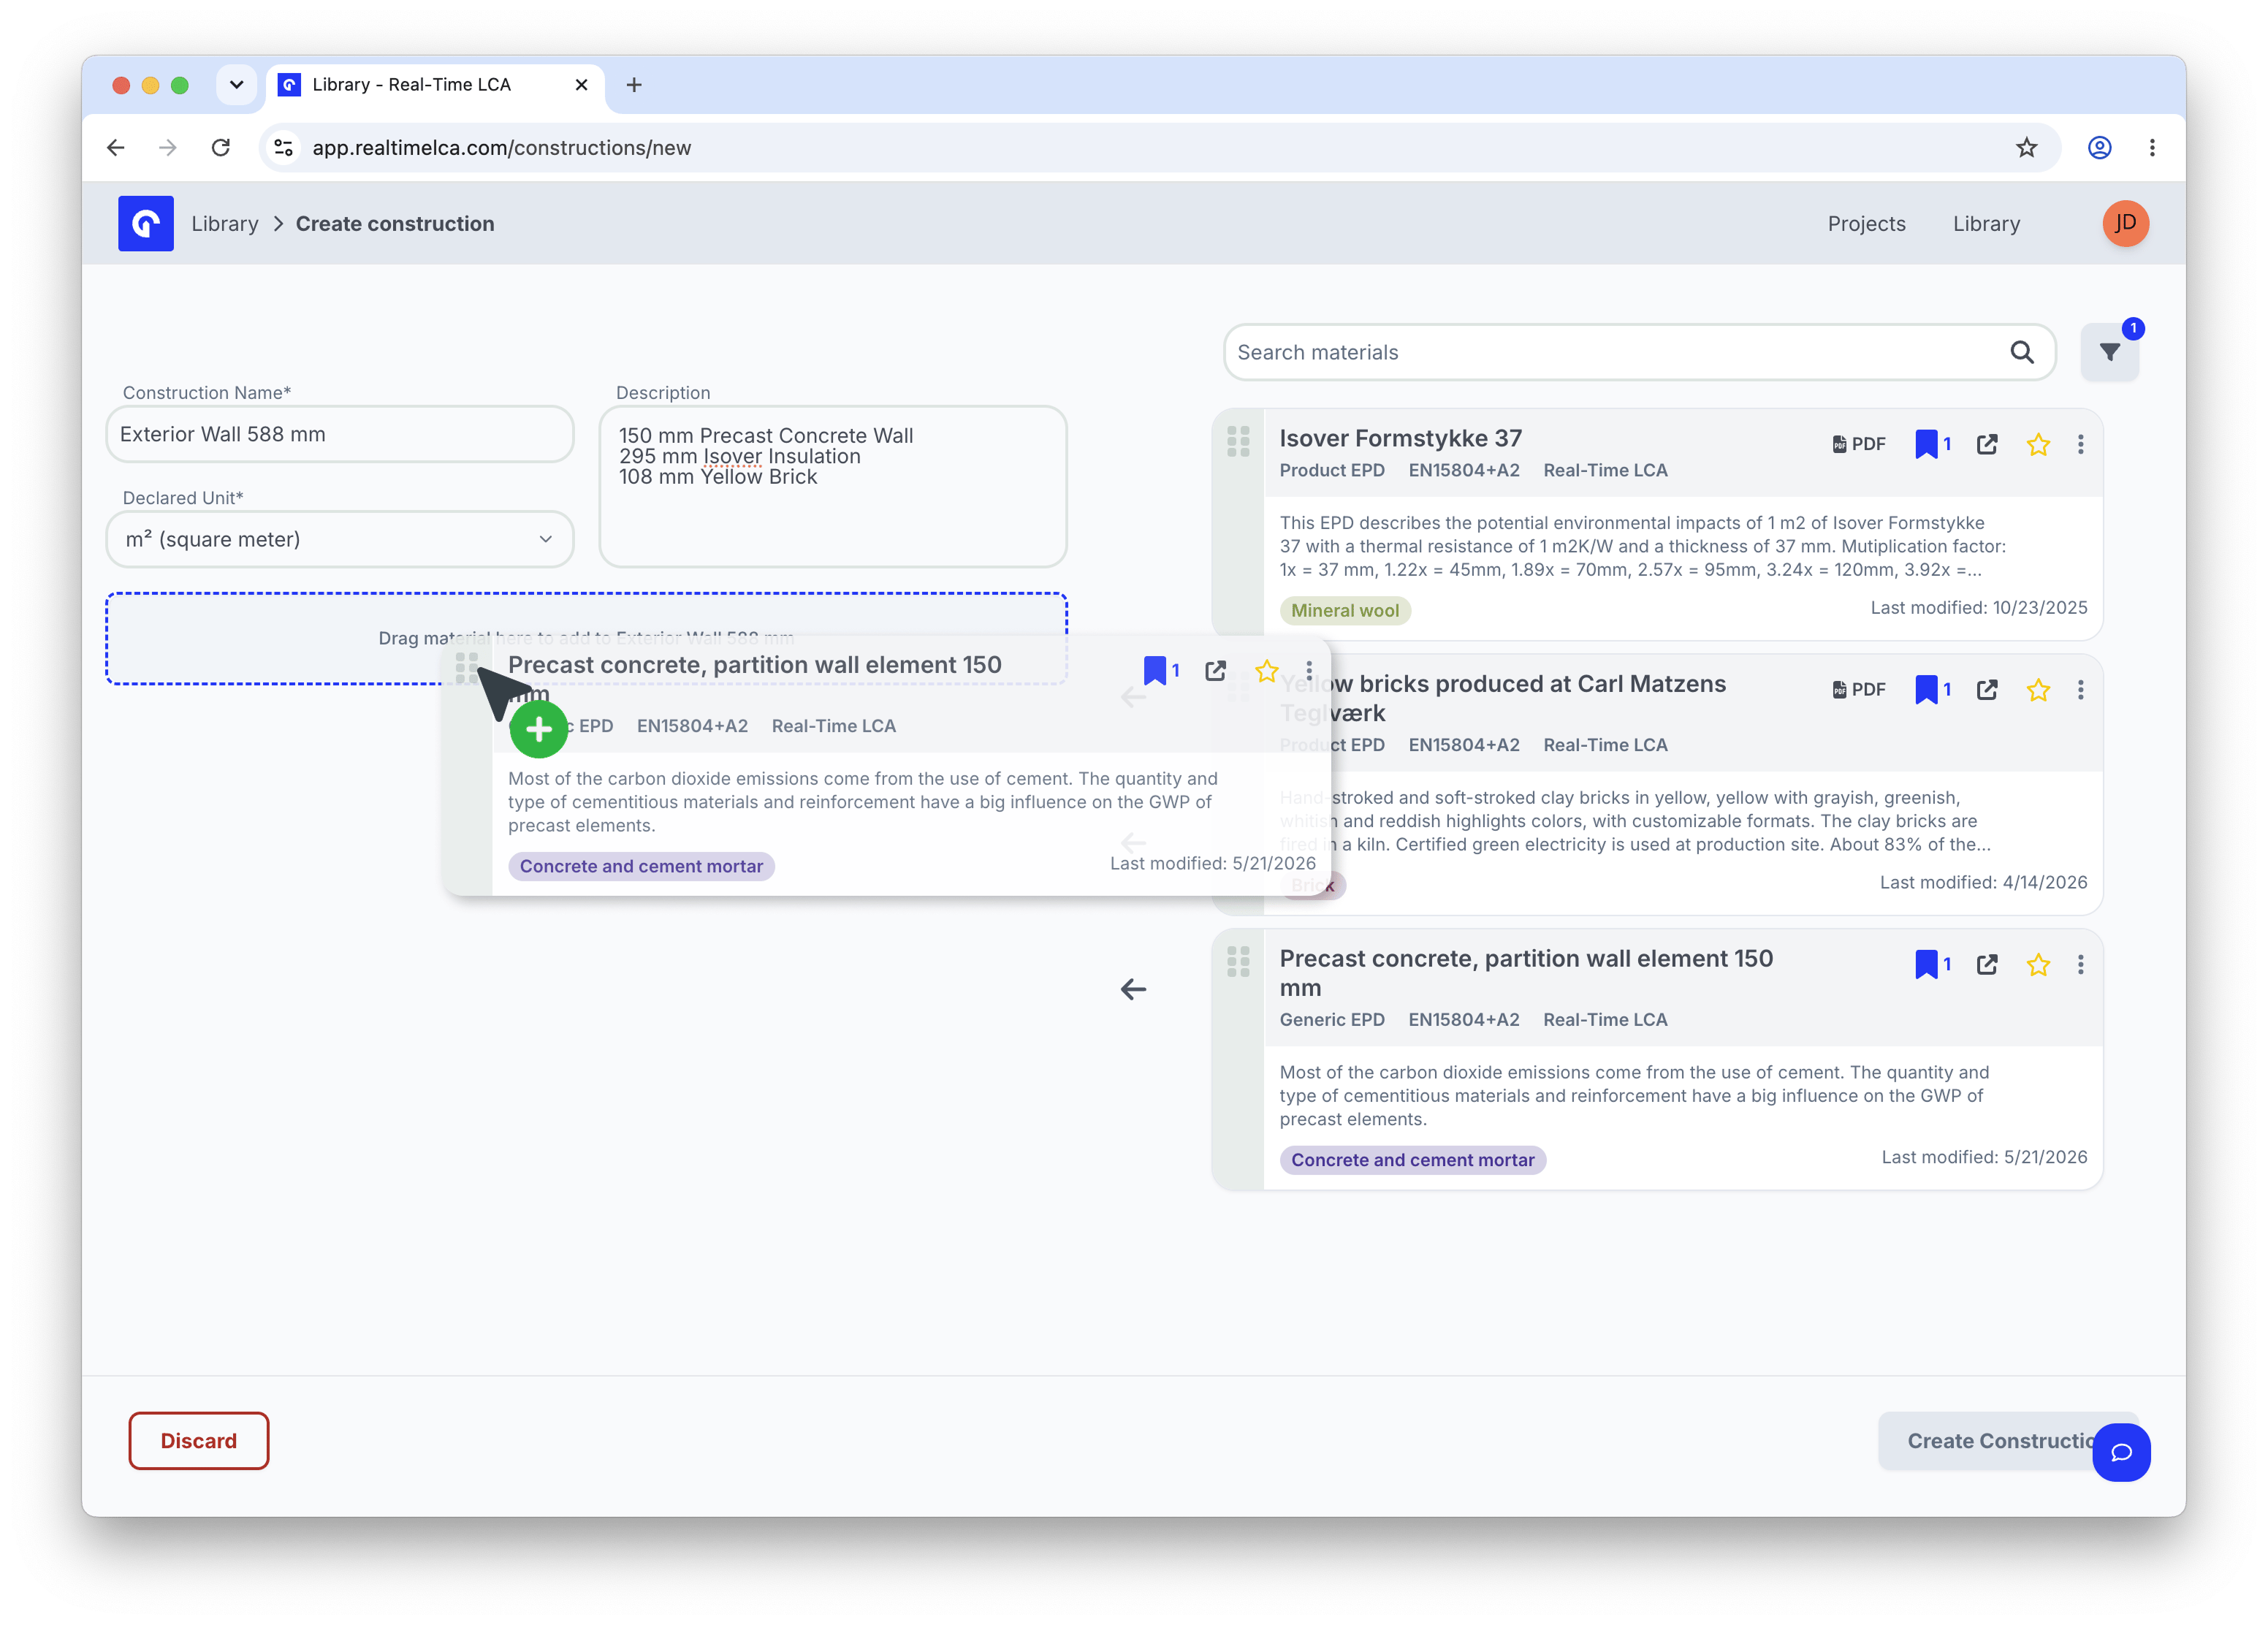 Once the material is dropped, it appears as a layer under **Materials** with a **Dimensions** button.
 ### If the material has no lifetime
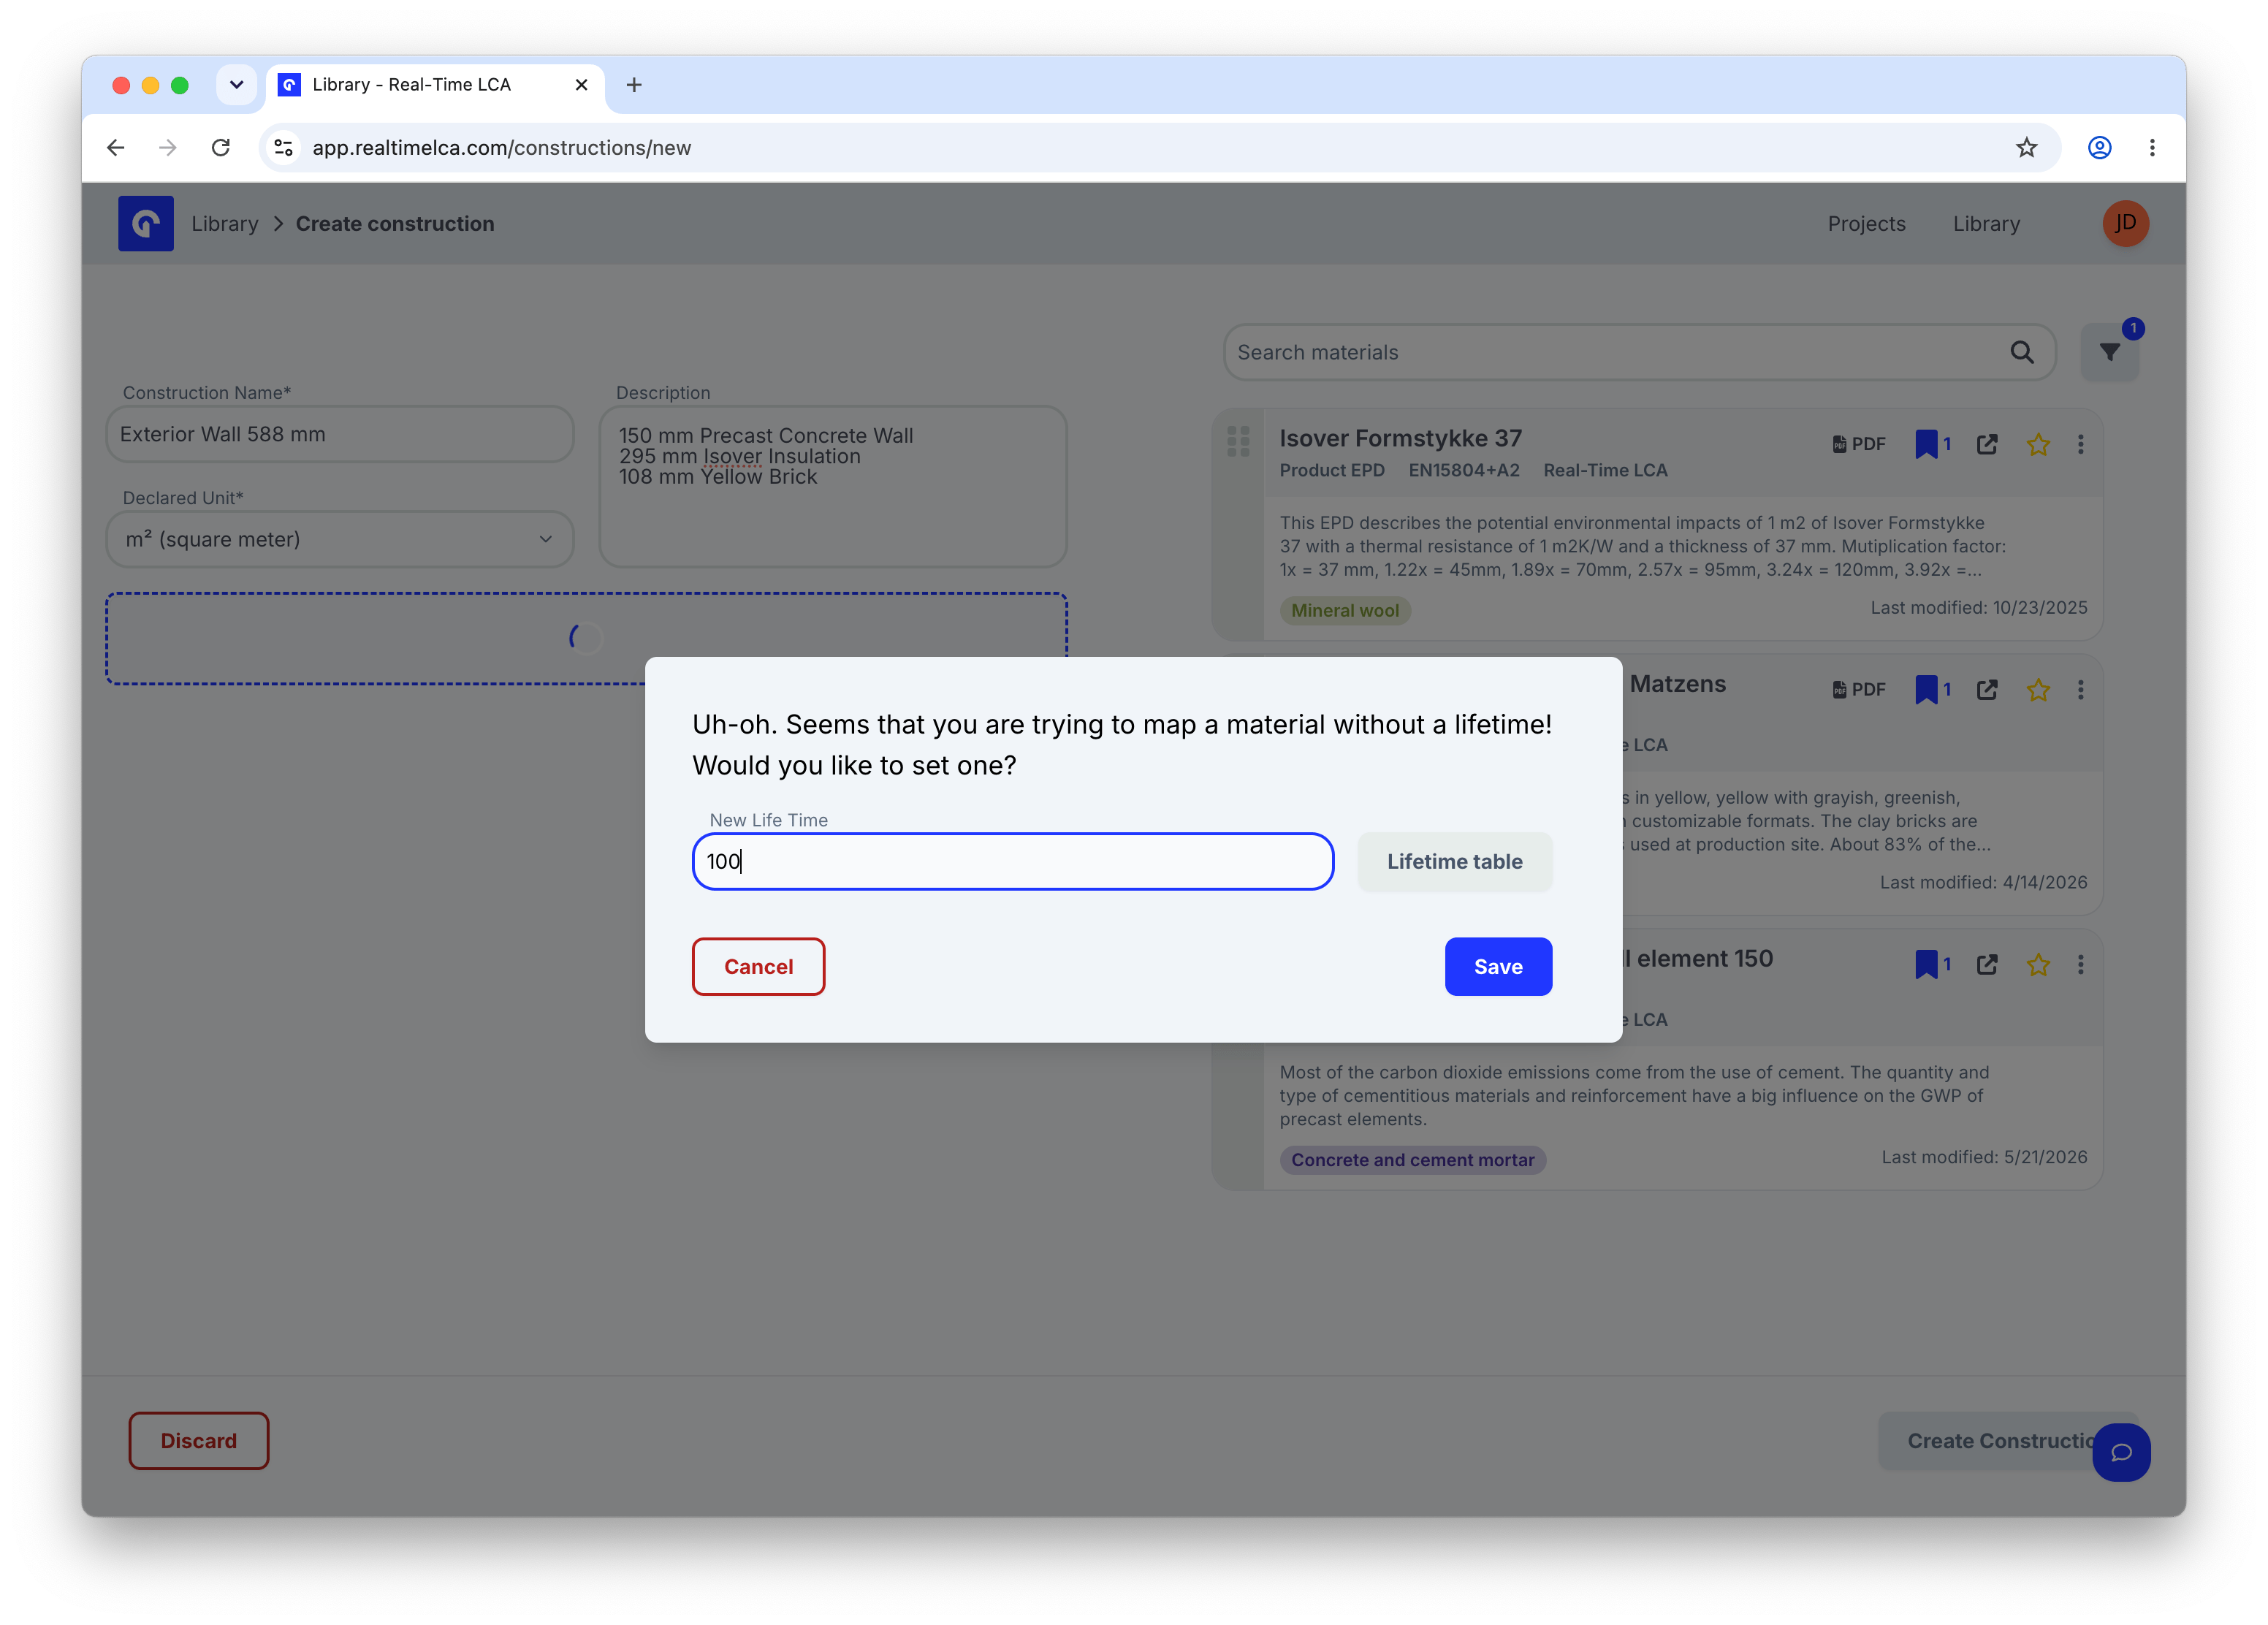
If the material you just dropped doesn't carry a declared service life, Real-Time LCA stops the drop with a prompt before adding it to the construction. Enter a **New Life Time** in years, or open the **Lifetime table** for guidance, then **Save** to accept the layer.
### If the material has no lifetime
If the material you just dropped doesn't carry a declared service life, Real-Time LCA stops the drop with a prompt before adding it to the construction. Enter a **New Life Time** in years, or open the **Lifetime table** for guidance, then **Save** to accept the layer.
 Click a material's **open** icon to inspect its full EPD panel without leaving the form — useful for confirming you have the right product and for reading any multiplication-factor tables it ships with (see [Scaled EPDs](#scaled-epds-eg-insulation) below).
## 4. Set each layer's dimensions
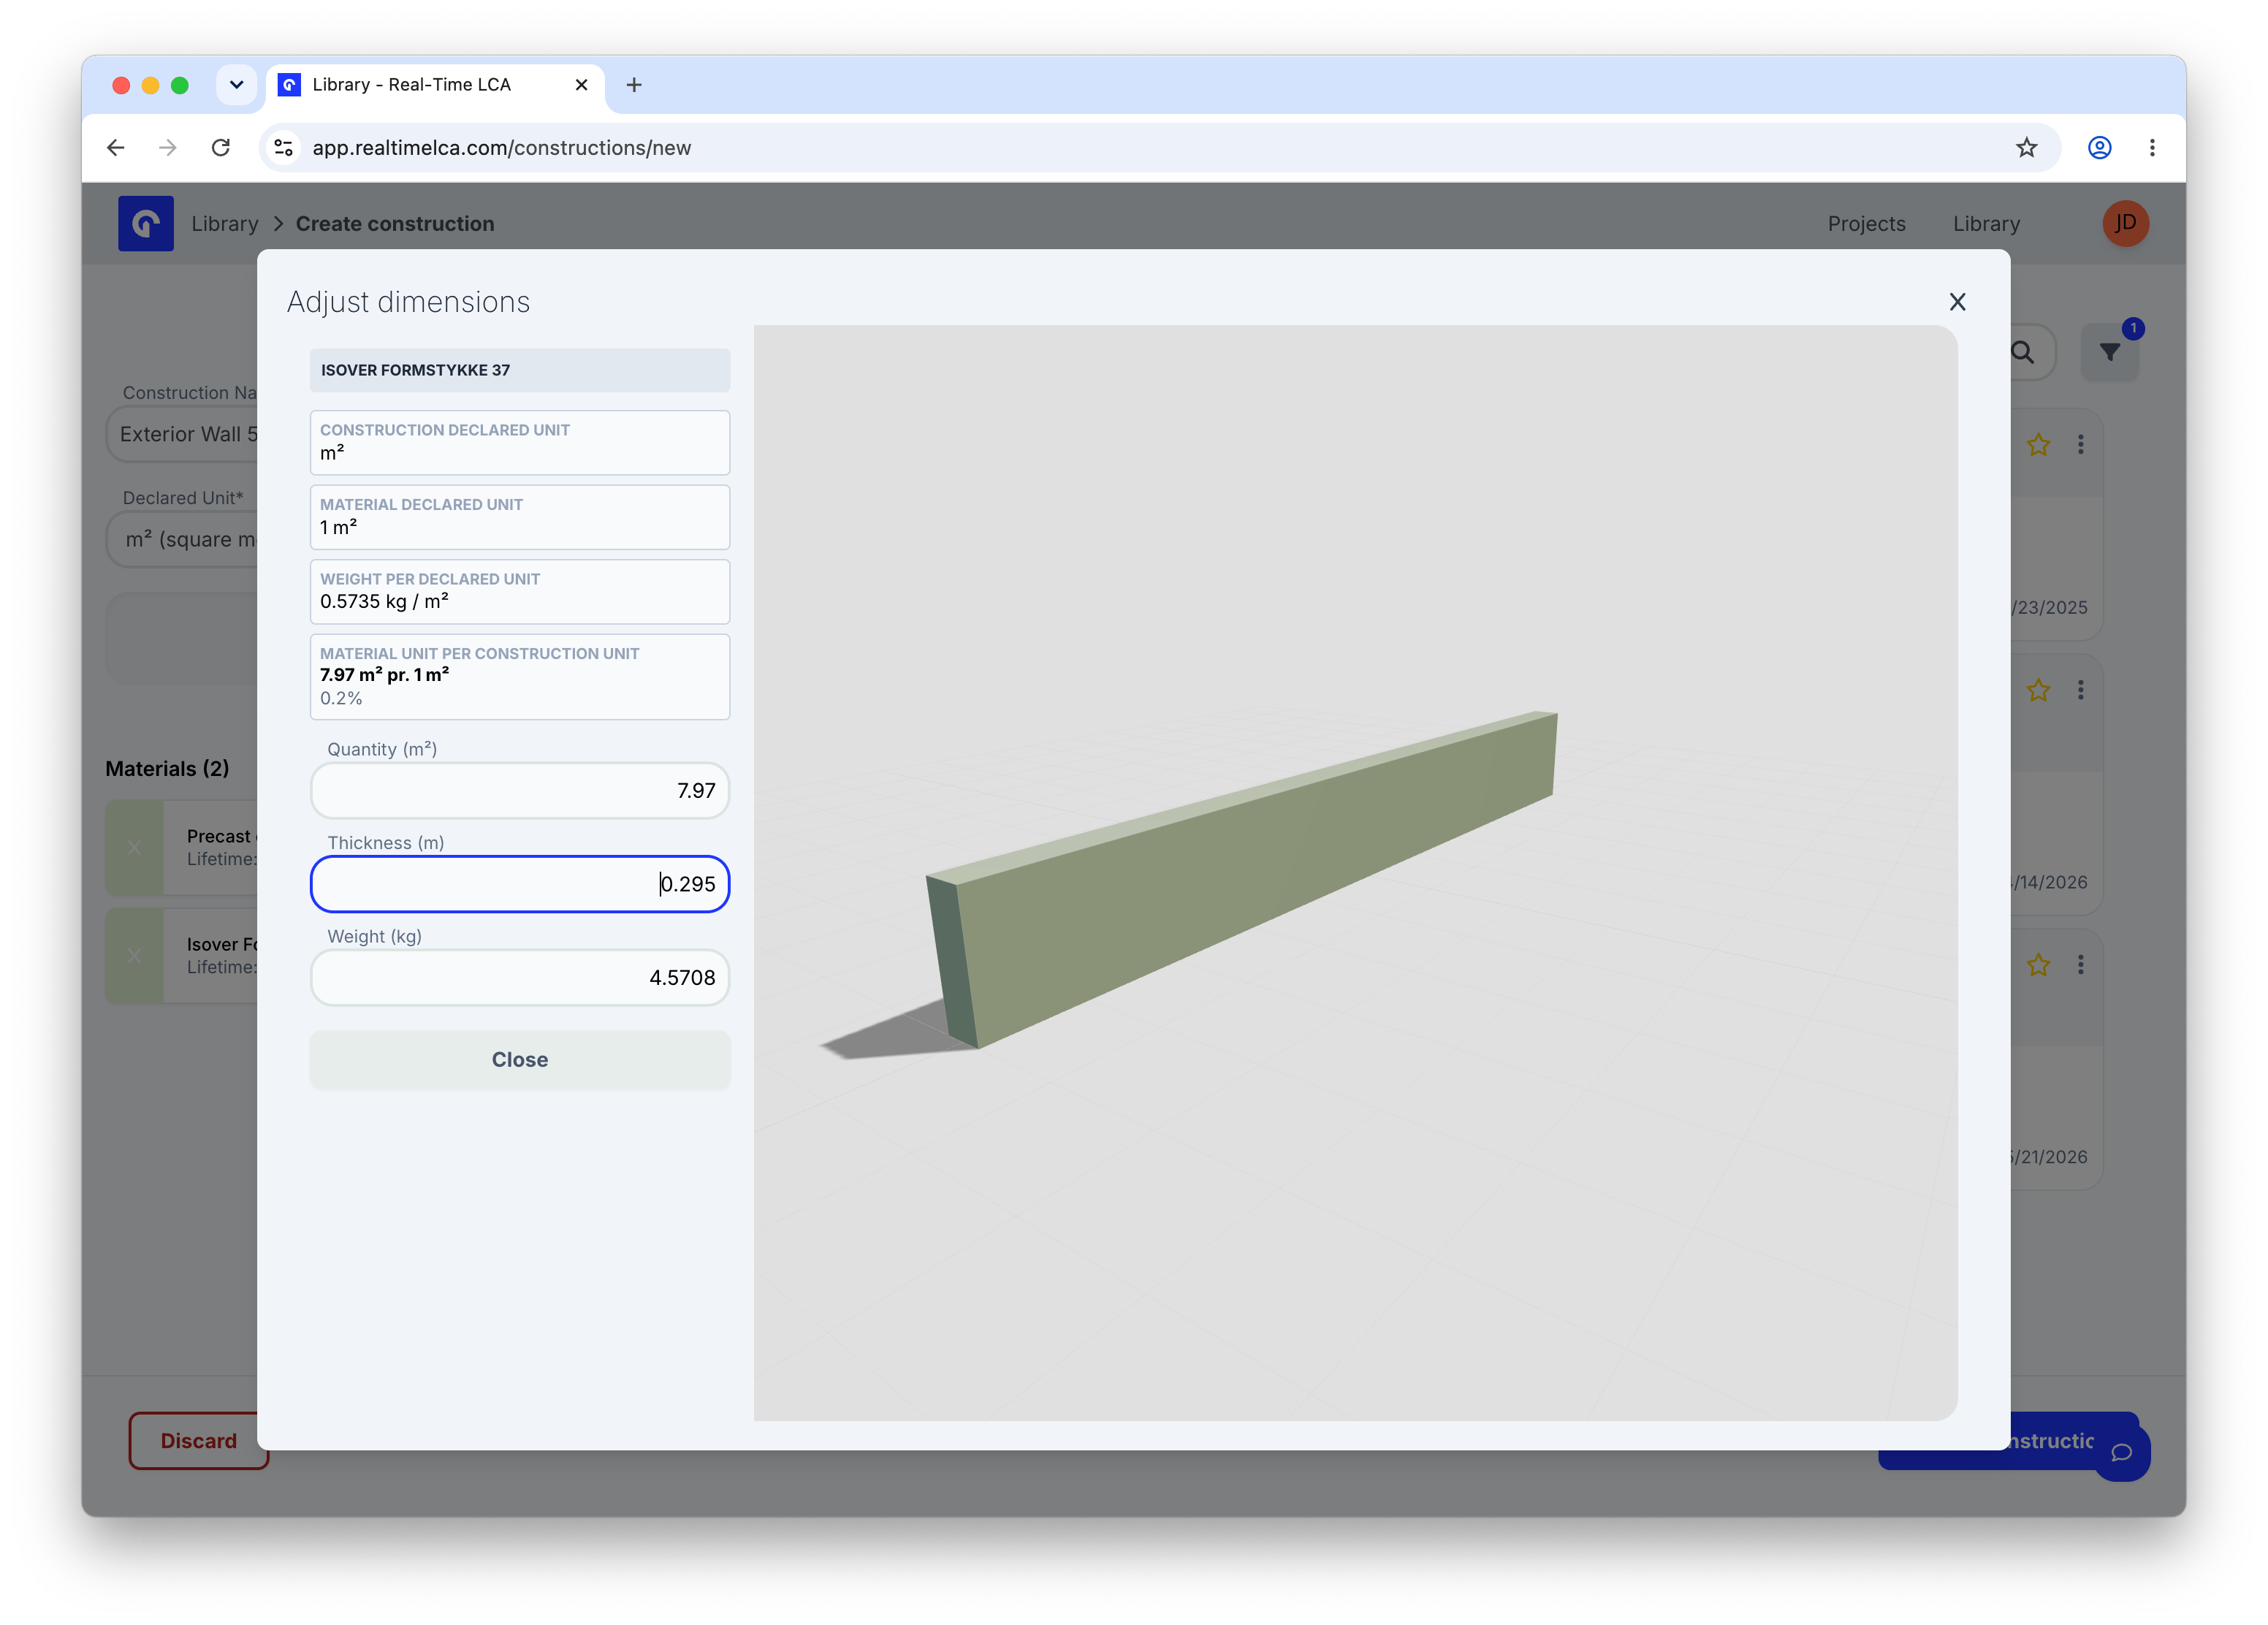
Click **Dimensions** on a layer to open the **Adjust dimensions** modal. The fields that appear depend on the material's declared unit and the construction's declared unit — Real-Time LCA only asks for the dimensions it needs to convert one to the other.
Click a material's **open** icon to inspect its full EPD panel without leaving the form — useful for confirming you have the right product and for reading any multiplication-factor tables it ships with (see [Scaled EPDs](#scaled-epds-eg-insulation) below).
## 4. Set each layer's dimensions
Click **Dimensions** on a layer to open the **Adjust dimensions** modal. The fields that appear depend on the material's declared unit and the construction's declared unit — Real-Time LCA only asks for the dimensions it needs to convert one to the other.
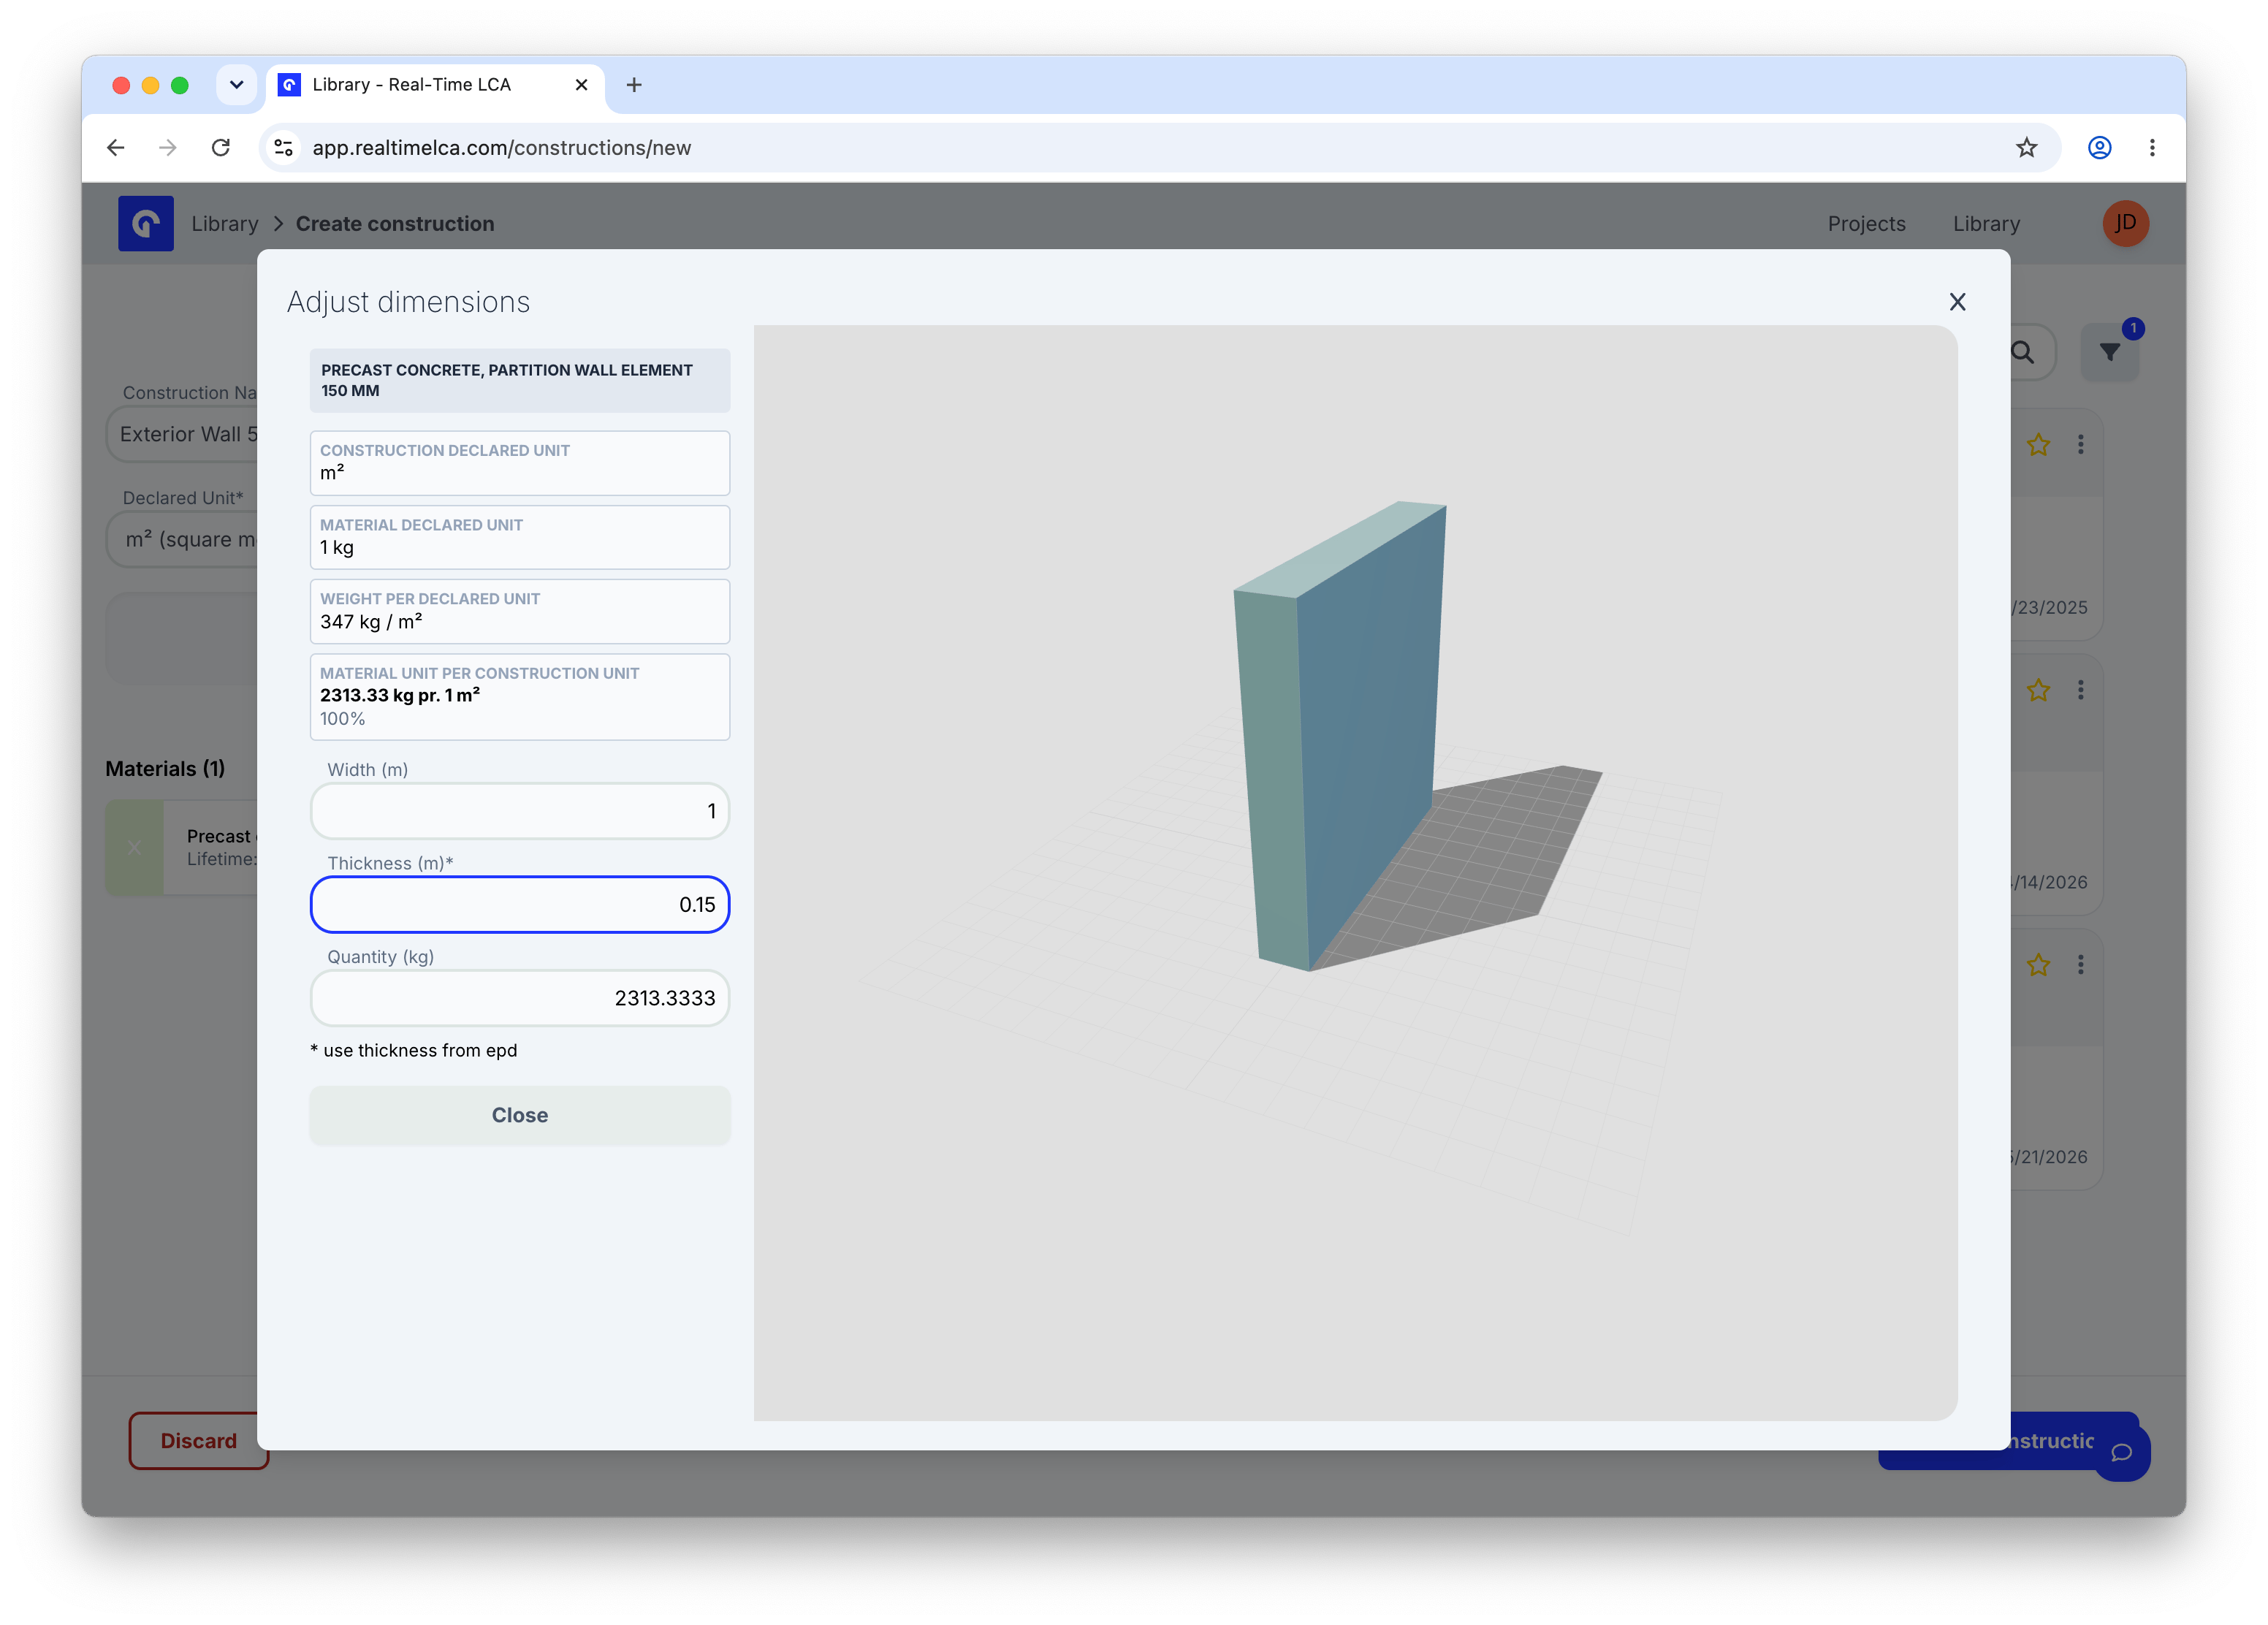
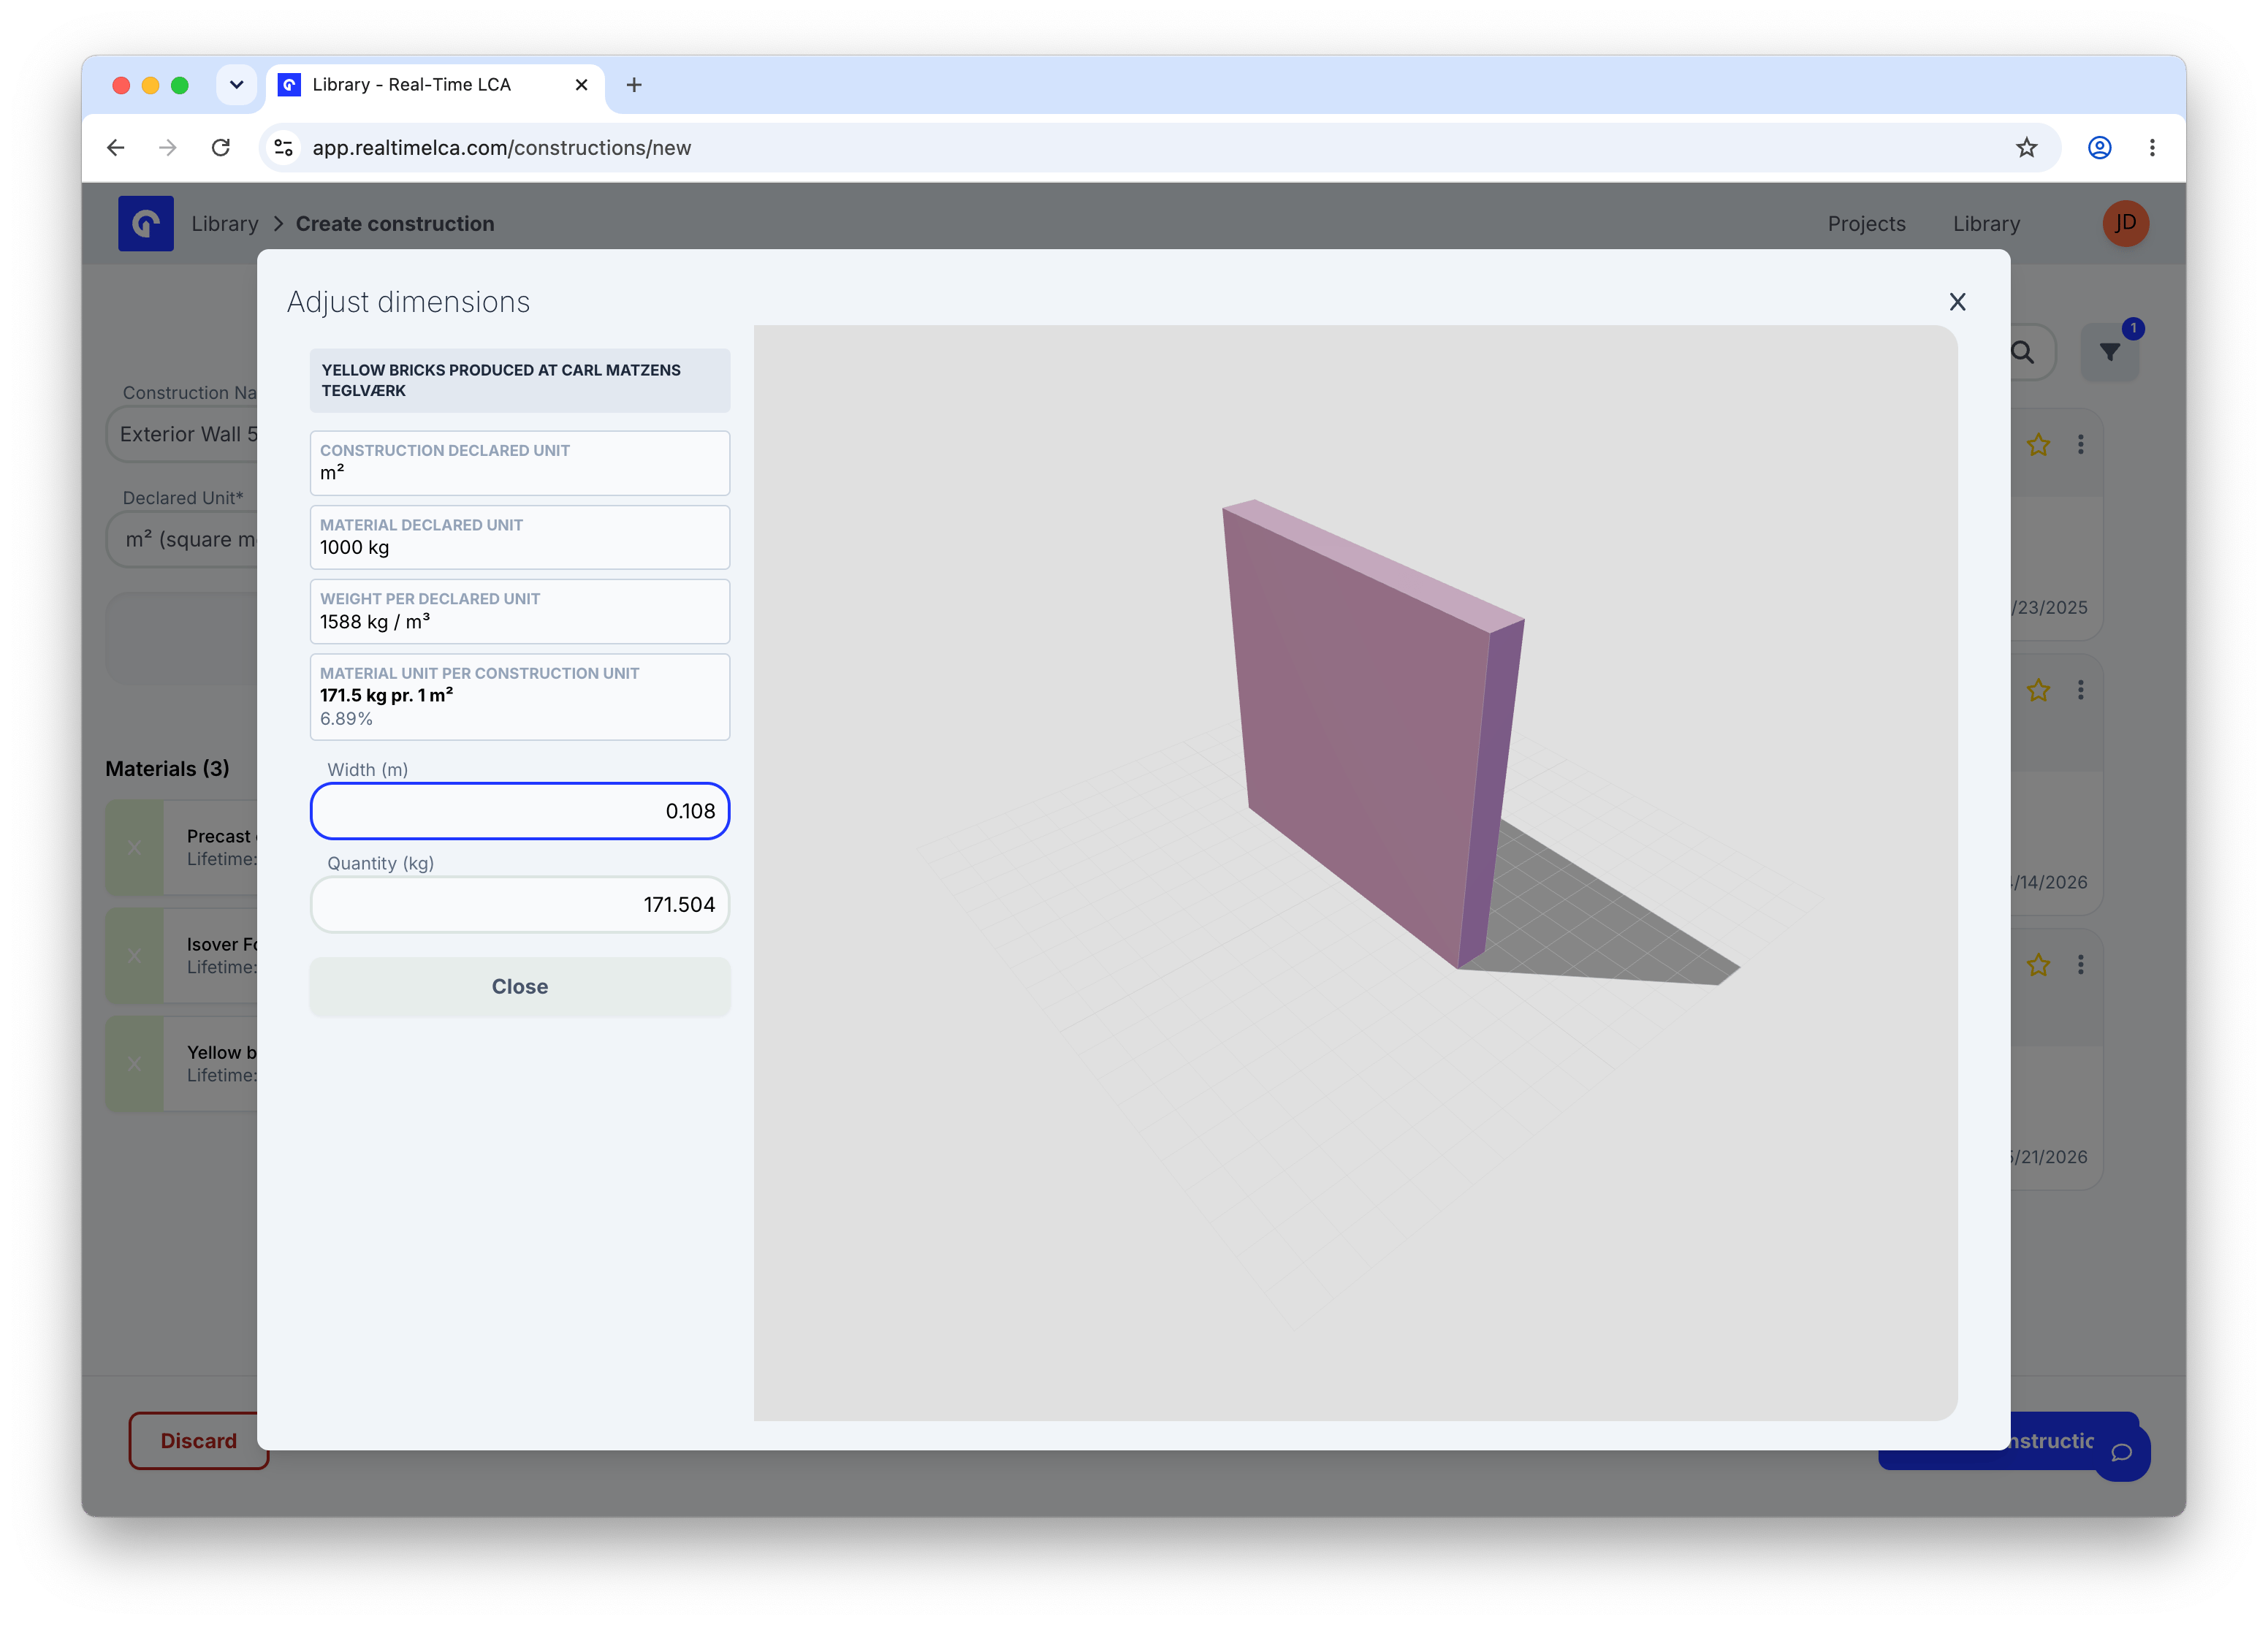 The 3D preview reflects each value as you type, so you can sanity-check the layer thickness before saving. Click **Close** to confirm the layer.
### Scaled EPDs (e.g. insulation)
Most insulation EPDs — and several other thin-layer products — are declared for a **fixed reference thickness** and expect you to multiply by a factor to reach the thickness you actually need. The EPD lists those factors in its description.
The 3D preview reflects each value as you type, so you can sanity-check the layer thickness before saving. Click **Close** to confirm the layer.
### Scaled EPDs (e.g. insulation)
Most insulation EPDs — and several other thin-layer products — are declared for a **fixed reference thickness** and expect you to multiply by a factor to reach the thickness you actually need. The EPD lists those factors in its description.
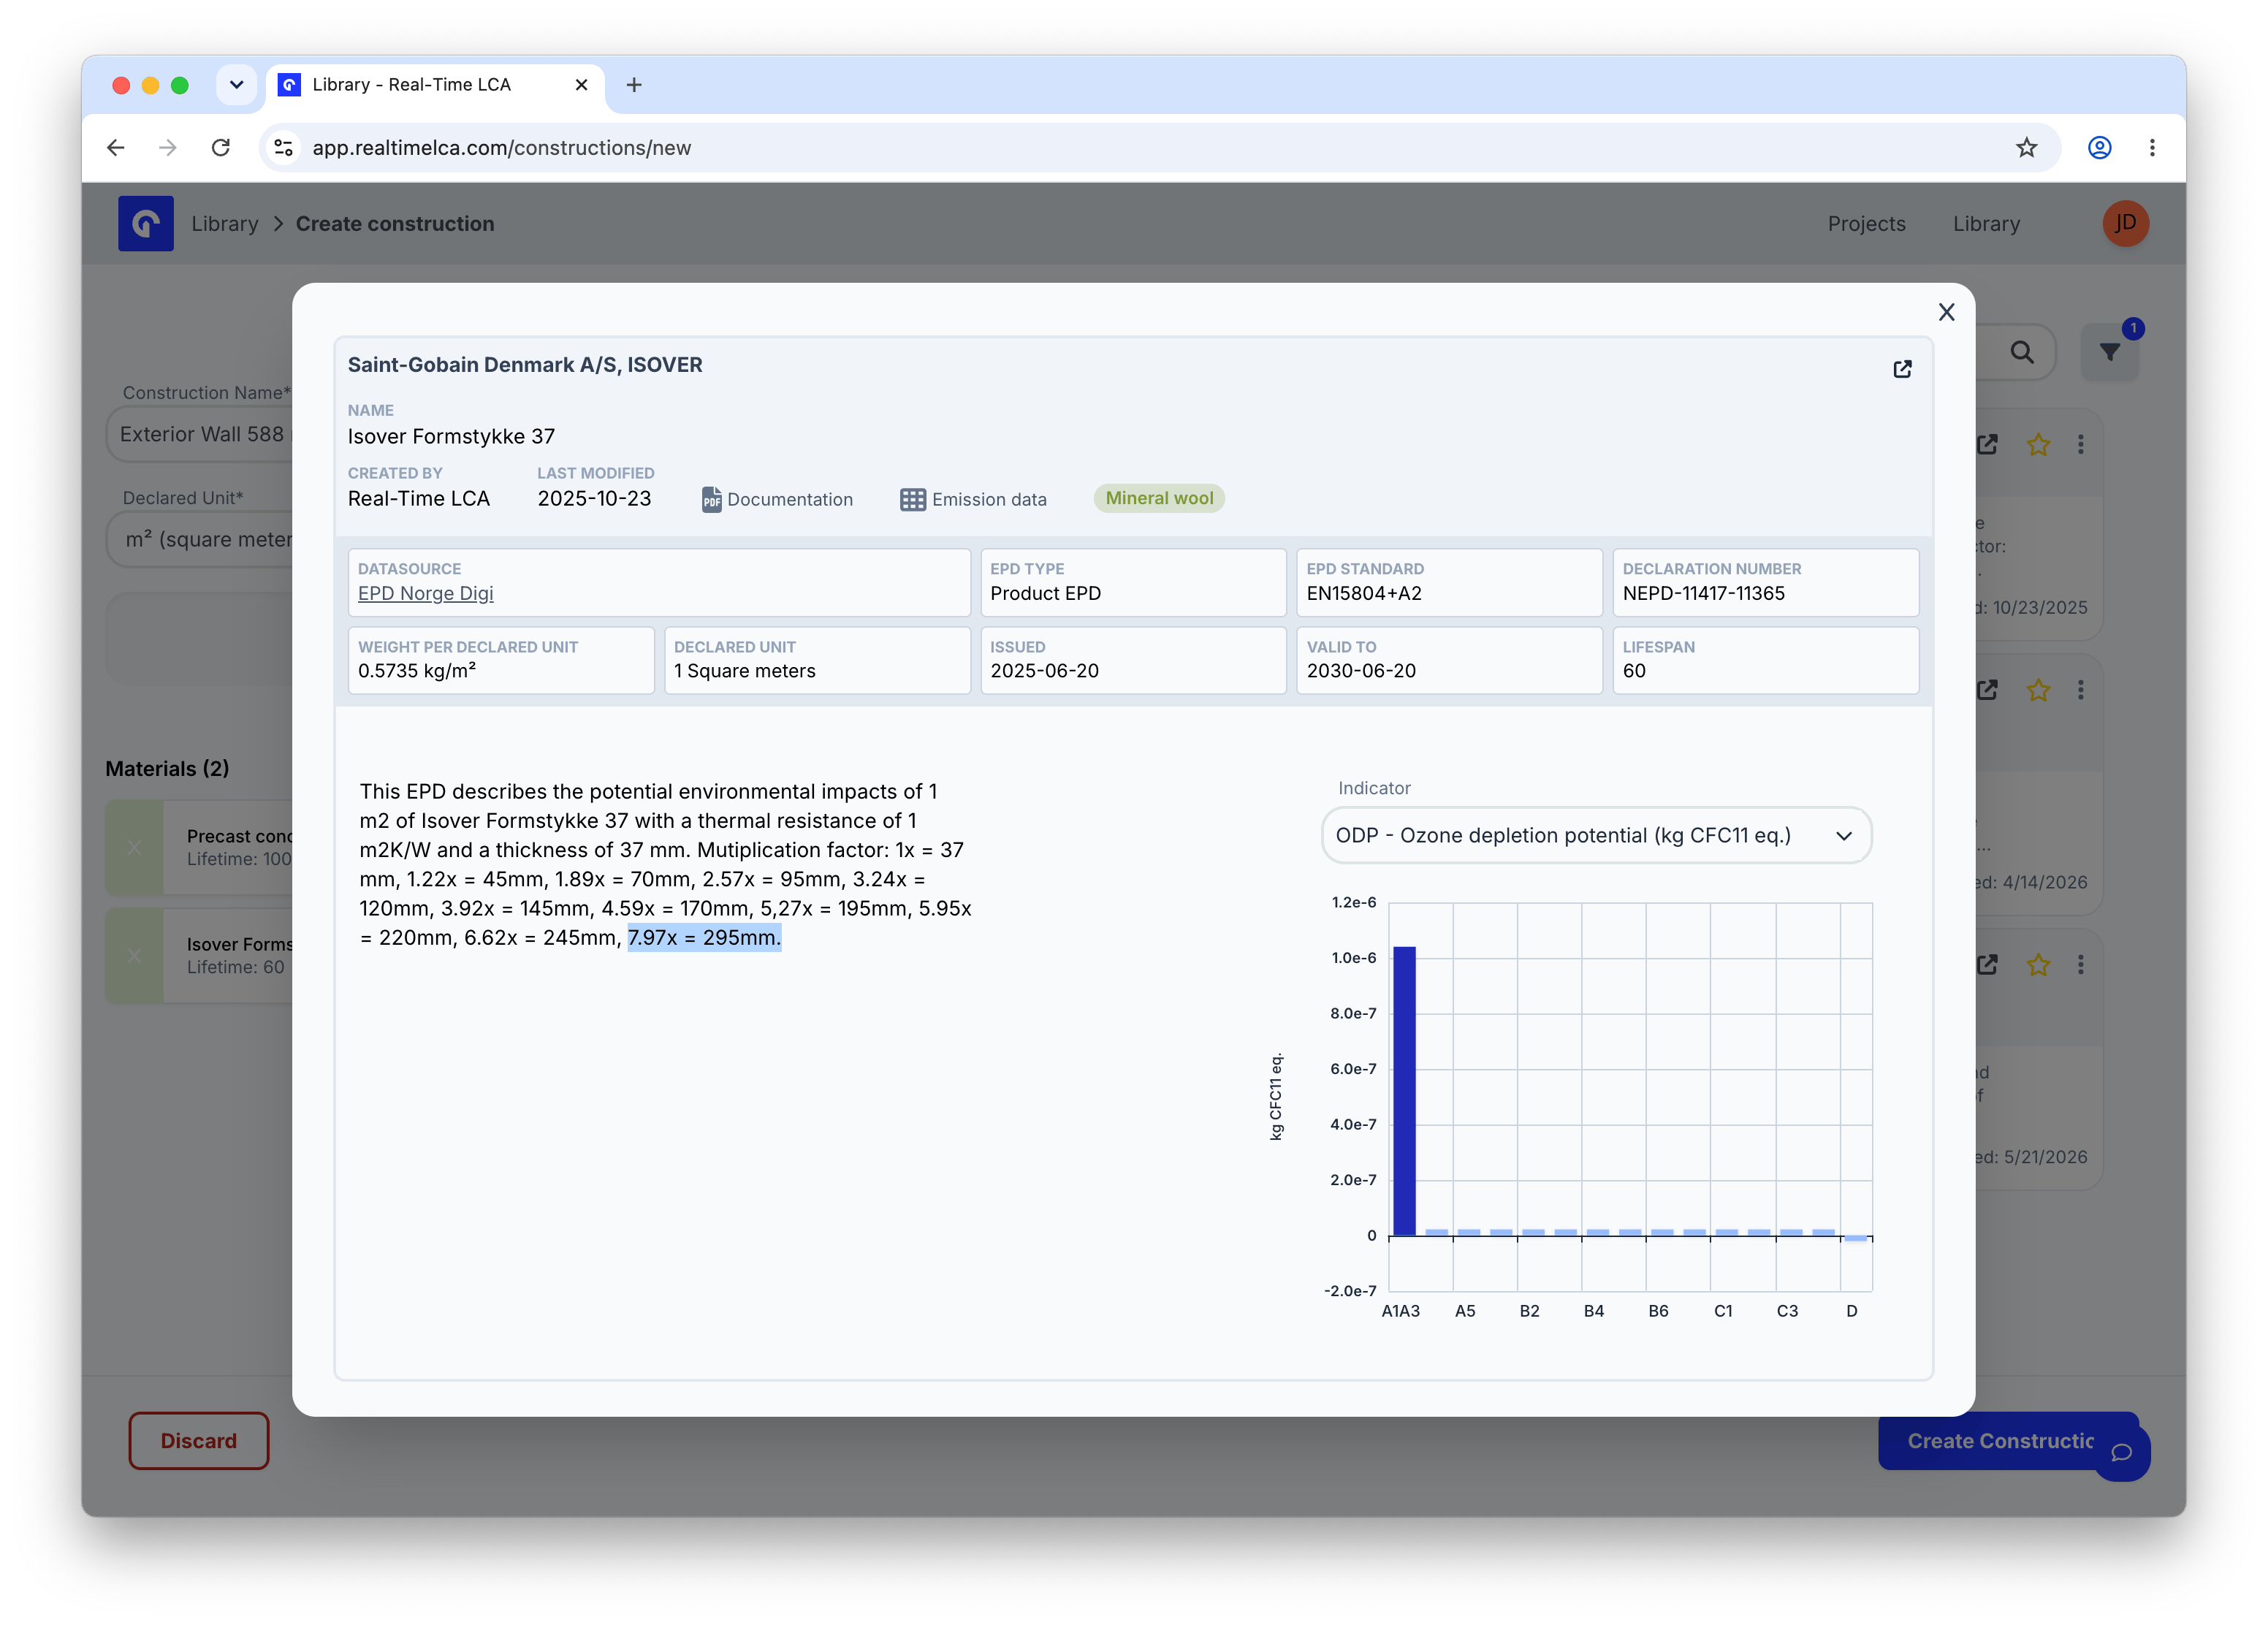 In this construction the wall needs **295 mm of Isover Formstykke 37**, so the factor is **7.97** (295 mm ÷ 37 mm). Enter that factor as the **Quantity** in the Adjust dimensions modal — the thickness and weight then update accordingly (0.295 m, 4.57 kg).
 For non-scaled materials (such as the concrete and brick layers above), leave Quantity at its default — you only need to set the dimension the EPD doesn't already declare.
Repeat for every material you drag in. As you add layers, the **Materials** list shows each one's mass per declared unit and share of the total weight.
For non-scaled materials (such as the concrete and brick layers above), leave Quantity at its default — you only need to set the dimension the EPD doesn't already declare.
Repeat for every material you drag in. As you add layers, the **Materials** list shows each one's mass per declared unit and share of the total weight.
 ## 5. Save to your organisation library
Click **Create Construction** in the bottom-right.
### Review the preview
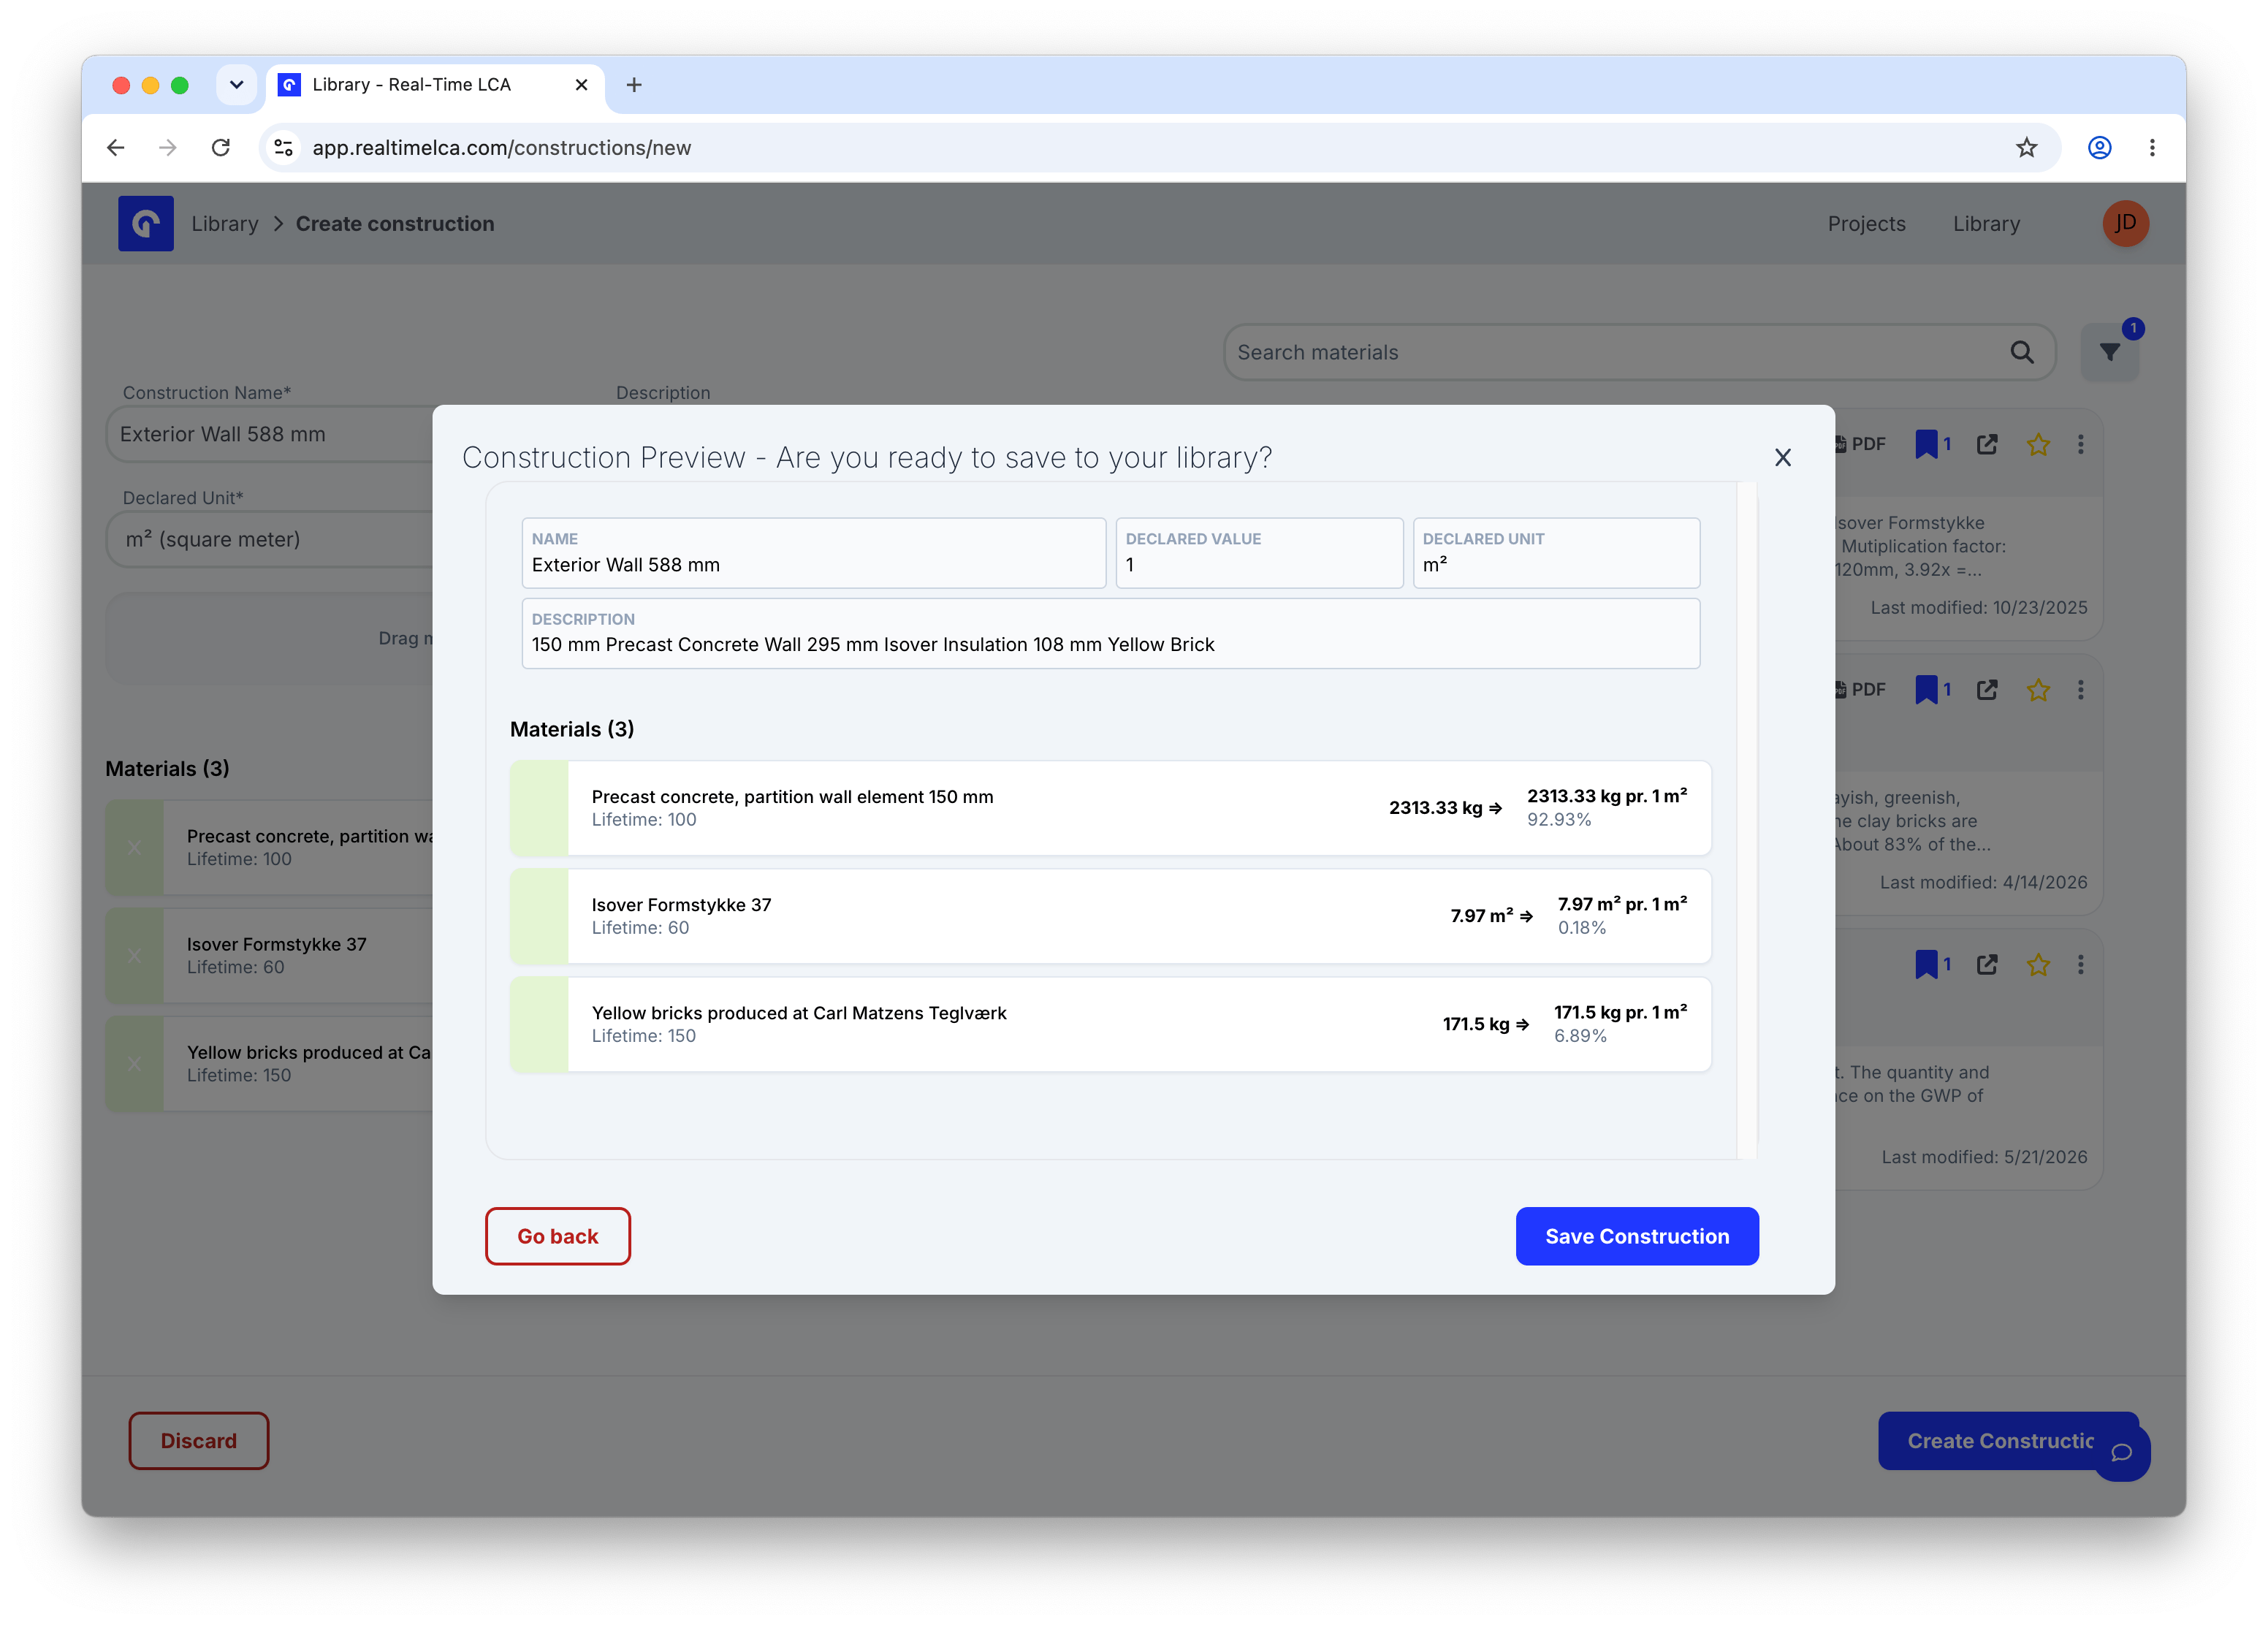
The **Construction Preview** modal summarises the name, declared unit, description, and every layer with its lifetime and resolved mass. Use **Go back** if anything looks wrong, or **Save Construction** to commit it to the Library.
## 5. Save to your organisation library
Click **Create Construction** in the bottom-right.
### Review the preview
The **Construction Preview** modal summarises the name, declared unit, description, and every layer with its lifetime and resolved mass. Use **Go back** if anything looks wrong, or **Save Construction** to commit it to the Library.
 ### Confirmation
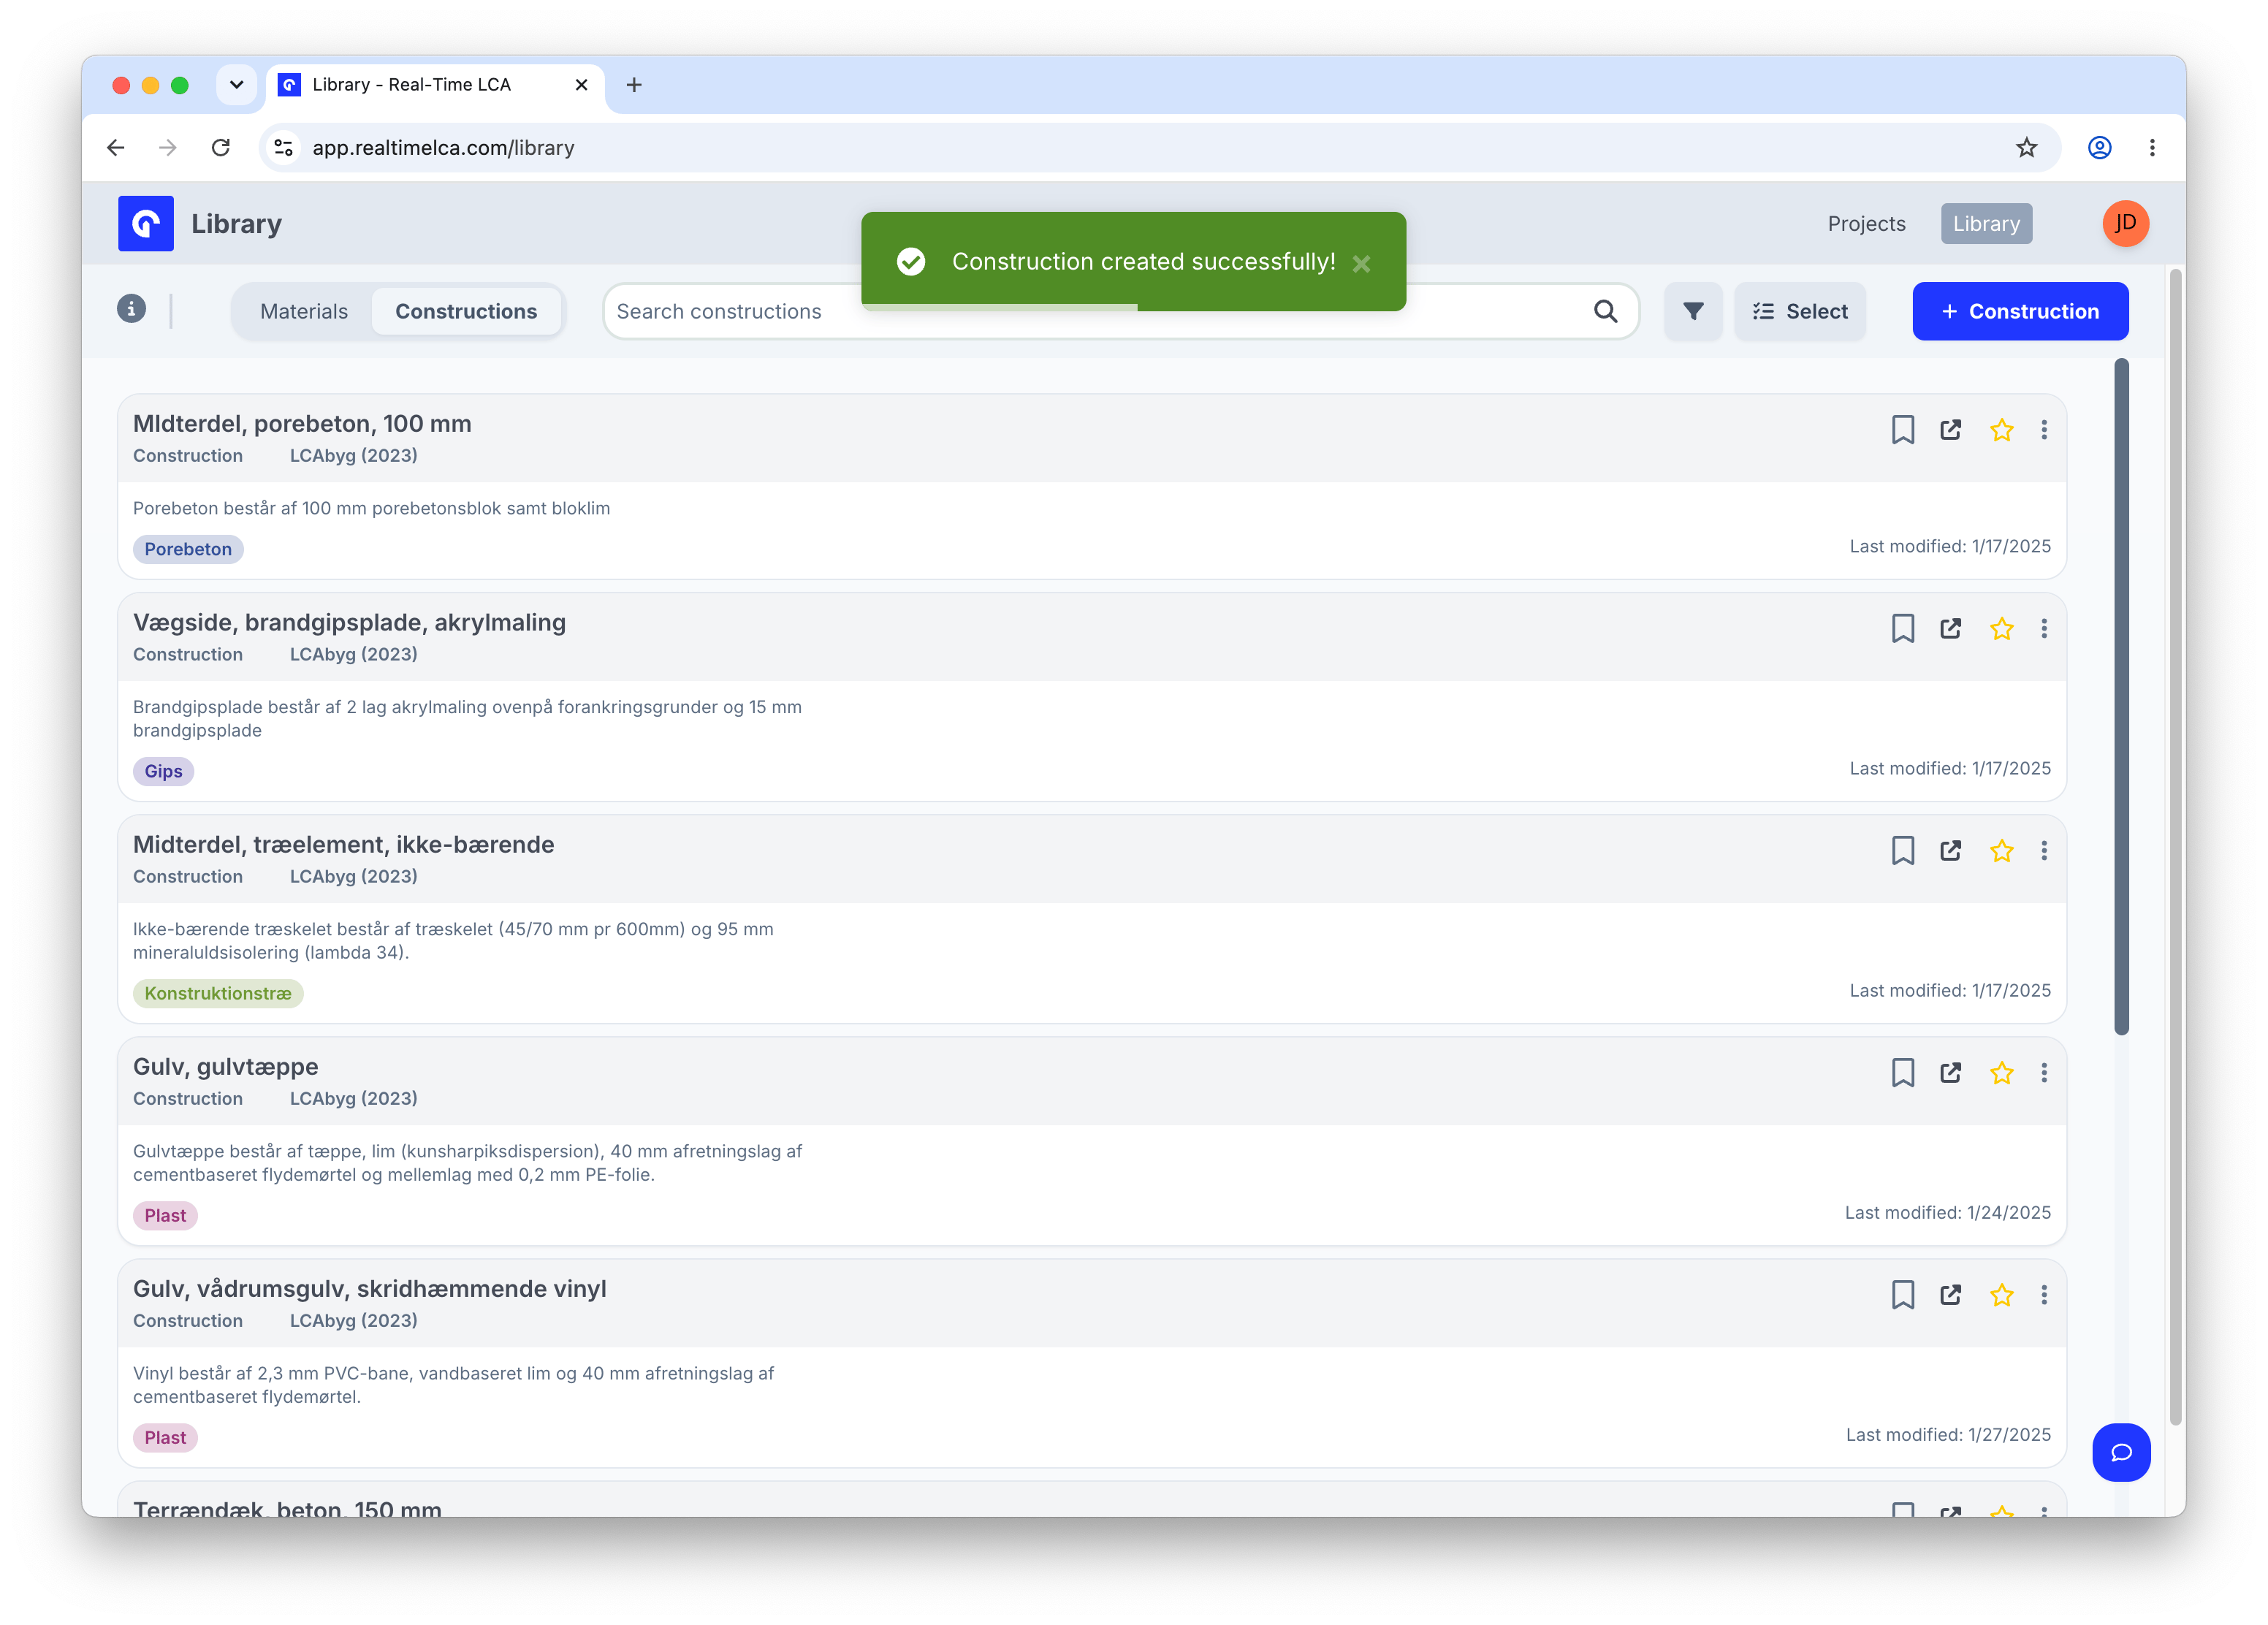
A green **Construction created successfully** toast confirms the save and returns you to the Constructions list with the new build-up in place.
### Confirmation
A green **Construction created successfully** toast confirms the save and returns you to the Constructions list with the new build-up in place.
 ## Find your saved constructions
Constructions you create are owned by your organisation. To see only your own build-ups, open the filter panel on the Constructions tab and pick your organisation under **Organisations**.
## Find your saved constructions
Constructions you create are owned by your organisation. To see only your own build-ups, open the filter panel on the Constructions tab and pick your organisation under **Organisations**.
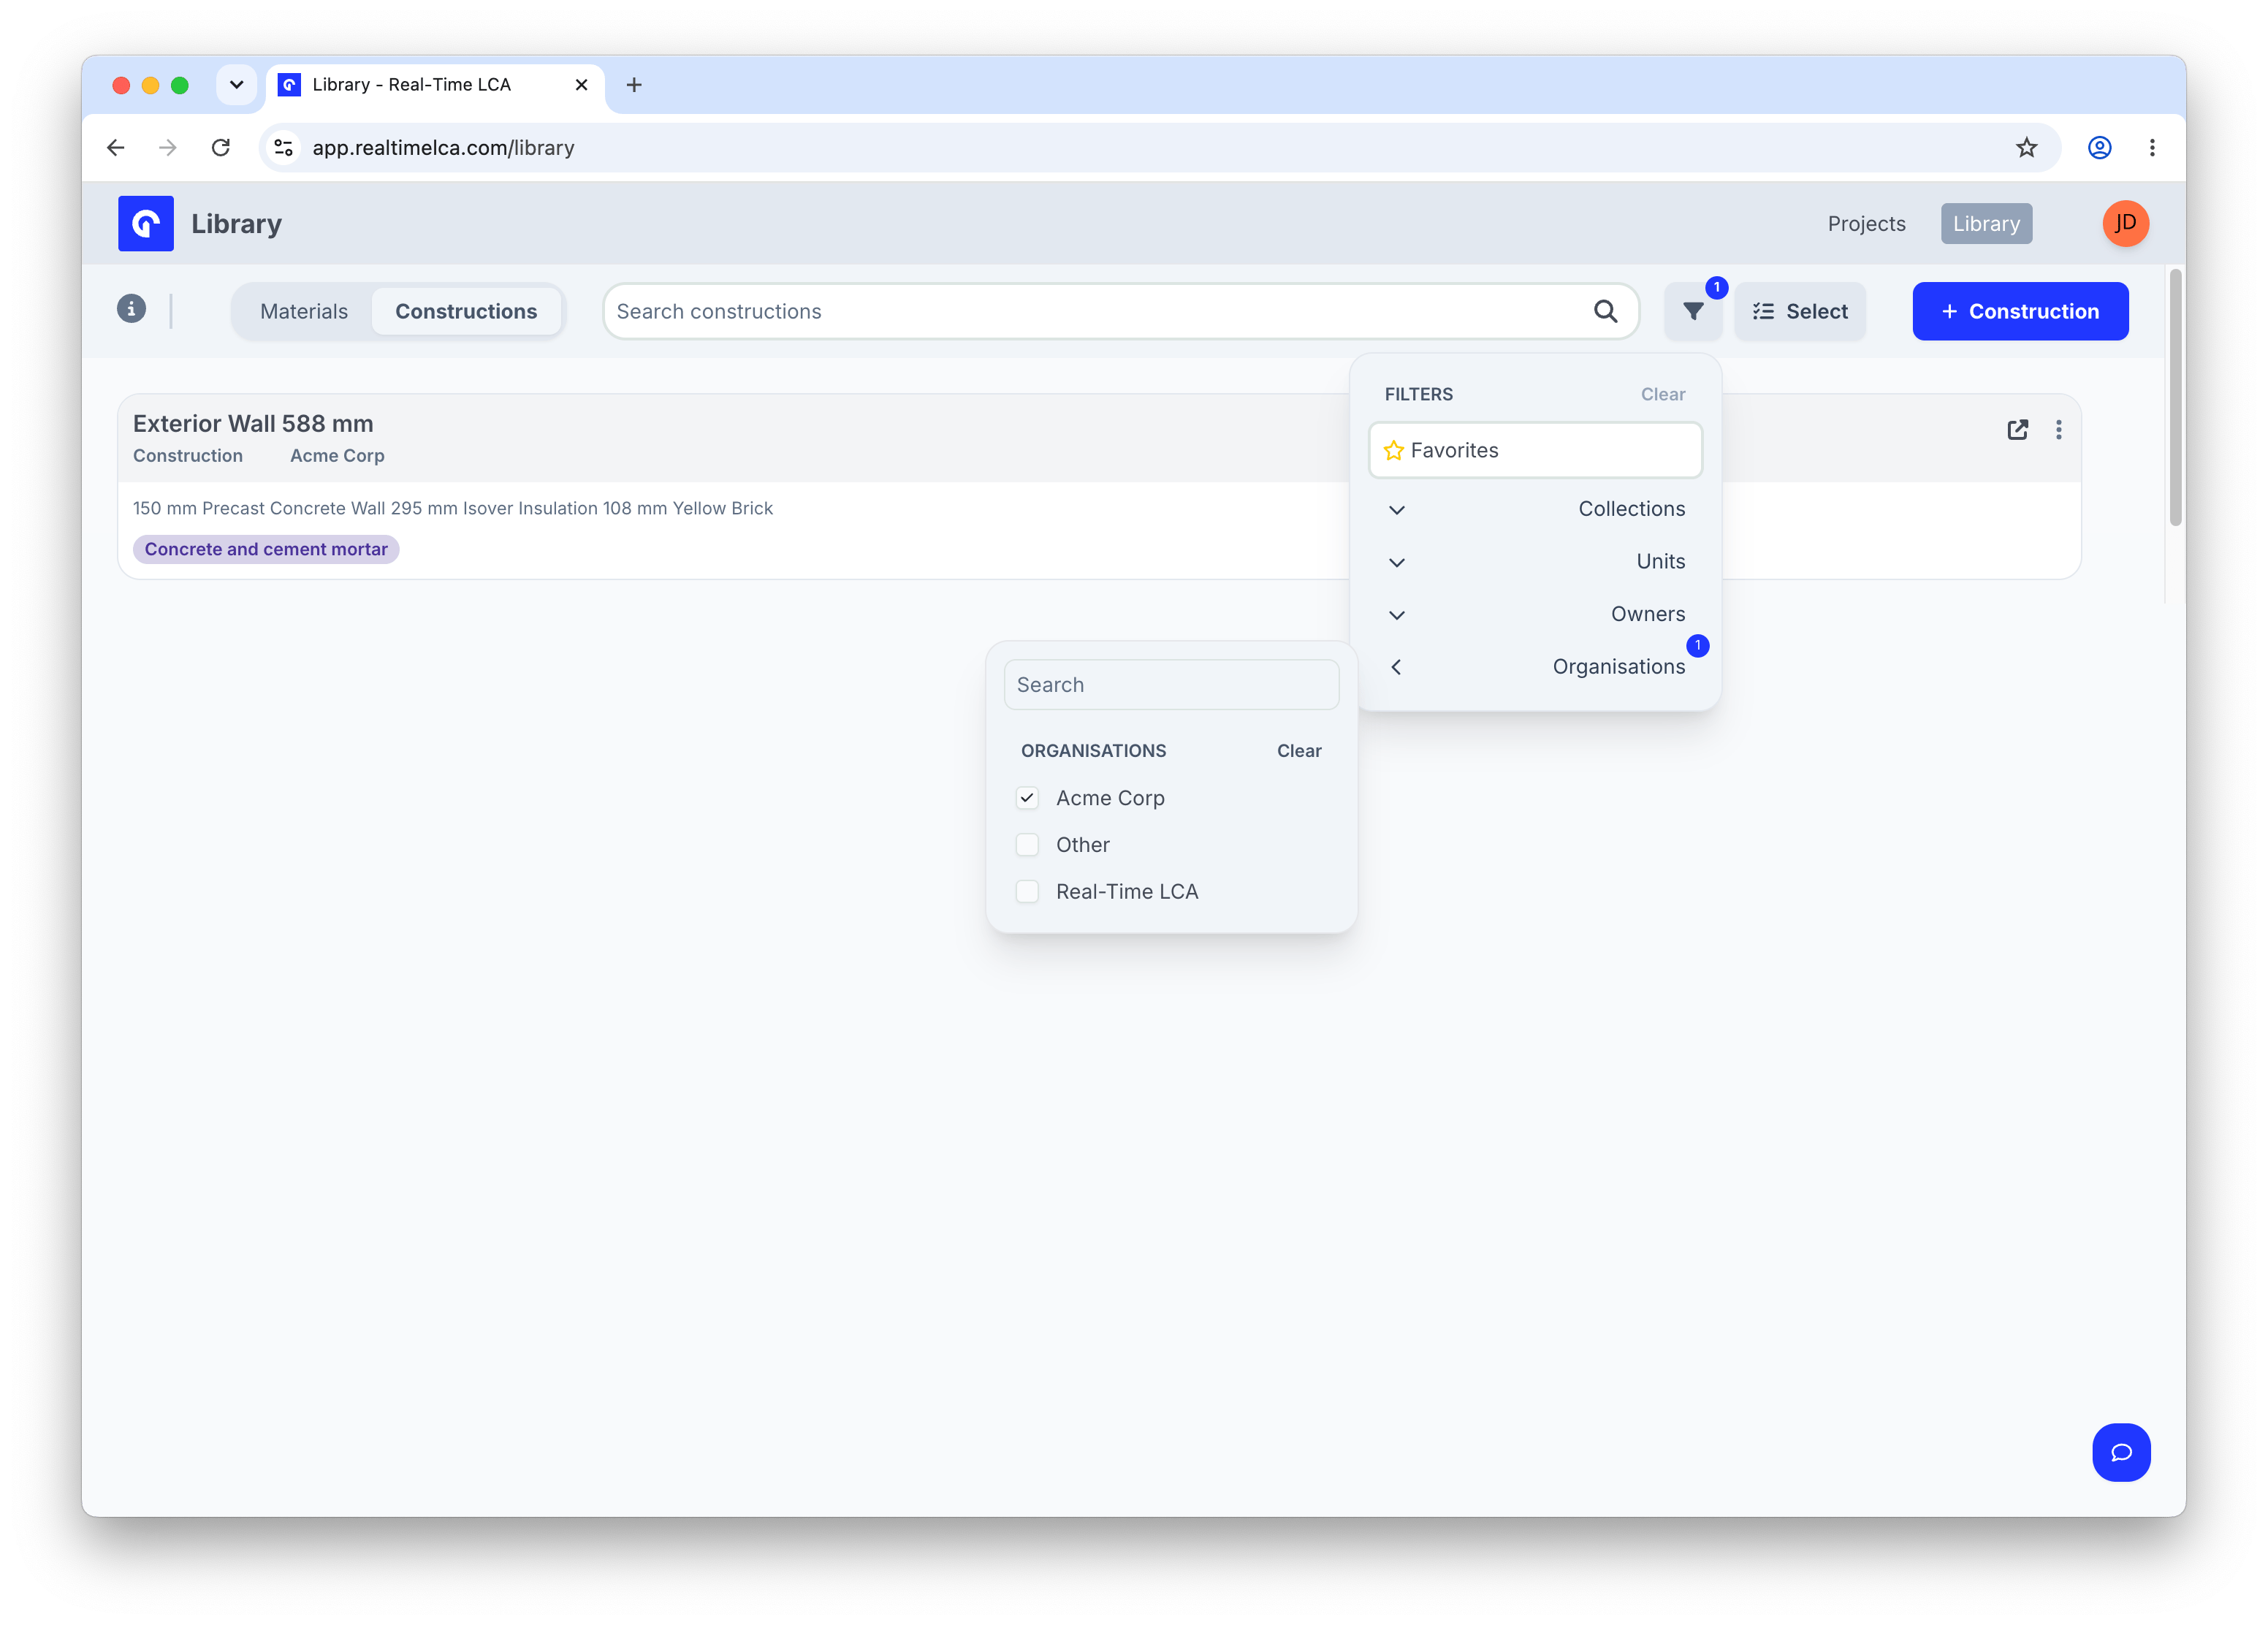 From here you can favourite, clone, compare, or open the new construction — see [Browse constructions](/user-guide/library/constructions/browse-constructions) for the row-level actions.